5
Installation
1 Using a Phillips screwdriver, loosen and take out the screw attached
to the black handle.
2 Pull up on the black handle and remove it.
3 Using your hand, turn the brass round nut counter clockwise until it
has been removed. If you are having trouble, use a pliers.
4 Press in the quick release buttons located on the left and right side
of the unit. Lift up and remove the cover of the unit.
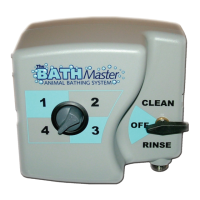
5 Determine a mounting location within 5 feet of the water supply.
When deciding where to place the Bathmaster unit (K.) make
sure it is positioned slightly above the area where
shampoo/conditioner will be.
6 Mark the wall for the 4 wall anchor (G.) locations.
7 Drill 4 holes using a 9/32” drill bit.
8 Install the 4 wall anchors (G.)
9 Position The Bathmaster unit (K.) lined up with the wall anchors (G.)
10 Using a Flat Head screwdriver, screw the 4 screws (F.)
into the 4 wall anchors (G.)
11 Pick up the blue inlet hose (I.) This hose has a female quick connect
on one end and a female connect with lter screen & black washer
on the other.
12 Pull down with two ngers on the outside of the female
quick connect.
13 While pulling down on the outside of the female quick connect,
slide over the male quick connect (located at the bottom back of the
unit) and let go. The two connections are now attached.