Page 9<&(%$*4.8"4,7%K'*#$"&8#L%/7*,#*%4,77%HMNNNMNIIMOPQP1Item 63445
?@<6ARST6;@ACSED@CEA6E@EU6 ?6AFT
V&(J/"*4*%,89%V&(J%@(*,%?*$%F/
1. Designate a work area that is clean and well-lit.
The work area must not allow access by children
or pets to prevent distraction and injury.
2. Route the power cord along a safe route to reach
the work area without creating a tripping hazard or
exposing the power cord to possible damage. The
power cord must reach the work area with enough
extra length to allow free movement while working.
3. There must not be objects, such as utility lines,
nearby that will present a hazard while working.
W*8*(,7%S/*(,$"83%C8#$('4$"&8#
V@;ECEWd%%AS%T;6!6EA%?6;CSF?%CEcF;R%<;SD%B@e@;Y?%?FUB%@?%`CU`X@U`-%
Y&%8&$%/7,8*%)&(J/"*4*#%#.&($*(%$.,8%HOfL%8,((&)*(%$.,8%a0gfL%)"9*(%$.,8%H]MH0]fL%&(%7*##%$.,8%H0Nf%$."4J1%
F#*%&87>%8,$'(,7%9(>%)&&9#$&4J%)."4.%"#%2(**%2(&5%8,"7#L%#$,/7*#L%J8&$#L%*$41%%%
<**9%"8$&%T7,8*(%"8%7"8*%)"$.%$.*%3(,"81%
Y&%8&$%/7,8*%)&&9%$.,$%"#%$)"#$*9L%),(/*9L%J8&$$*9%&(%+&)*91
E&$*- If one side of workpiece is uneven, plane with
flat side down first. If both sides are uneven, run one
side through a jointer to flatten it before planing.
E&$*- Use Depth Adjustment Scale as a reference
to indicate thickness of finished workpiece.
E&$*- Practice on scrap material until
familiar with Planer′s capabilities.
1. Make sure dust collection system is in place.
2. Make sure Power Switch is in the off-position.
3. Plug in Planer.
E&$*- Use calipers to measure workpiece.
4. Place workpiece on Planer Table, then turn
Depth Adjustment Handle counterclockwise to
lower Cutterhead until it just touches workpiece.
V@;ECEWd A&%/(*Z*8$%#*("&'#%"8='(>L%9&%8&$%$'(8%
T7,8*(%&8%)"$.%)&(J/"*4*%'89*(%U'$$*(.*,91
5. Remove workpiece, then turn Depth
Adjustment Handle counterclockwise.
One full turn will remove 1/16" of material.
ESACU6- Y&%8&$%(*5&Z*%5&(*%$.,8%a0a]f%&2%5,$*(",7%
,$%&8*%$"5*%\HMH0]%$'(8#%&2%Y*/$.%@9='#$5*8$%B,897*_1%%
ESACU6- `**/%7&83%)&(J/"*4*#%7*Z*7%+>%
#'//&($"83%$.*5%&8%+&$.%*89#%&2%T7,8*(%
)"$.%#$,89#%&(%+>%&$.*(%5*,8#1%%
6. Turn on Planer by lifting the Power Switch up.
7. After Cutterhead has reached full speed, slowly
guide workpiece into Planer until Infeed Roller takes
control. Workpiece will auto feed through Planer, do
not push on workpiece once it starts autofeeding.
V@;ECEWd A&%/(*Z*8$%#*("&'#%"8='(>%2(&5%J"4J+,4JL%
#$,89%&8%#"9*%8*,(*#$%$.*%#)"$4.%,89%$&%$.*%#"9*1%%
V@;ECEWd `**/%.,89#%&'$%2(&5%
'89*(8*,$.%U'$$*(.*,91
8. Retrieve workpiece from Outfeed side.
E&$*- If using assistant, Rollers may be used to
transport workpiece from Outfeed to Infeed.
E&$*- If one or both ends of workpiece have a deeper
cut, the problem may be snipe.
?**%A(&'+7*#.&&$"83%&8%/,3*%Ha%for a solution.
?8"/*
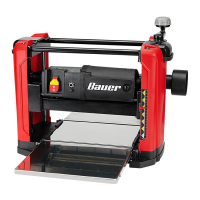
<"3'(*%W-%%V&(J/"*4*
9. Continue to remove material until
desired thickness is achieved.
ESACU6- To prevent damage from clogging,
empty dust collection system frequently.
10. To prevent accidents, turn off tool, lock by removing
yellow key from Power Switch, and unplug tool from
its electrical outlet after use. Clean and lubricate
according to D,"8$*8,84*%,89%?*(Z"4"83%&8%/,3*%
HHL then store tool indoors out of children’s reach.
 Loading...