Page 9For technical questions, please call 1-888-866-5797.Item 56404
SAFETYOPERATIONMAINTENANCE SETUP
Operating Instructions
Read the ENTIRE IMPORTANT SAFETY INFORMATION section at the beginning of this
manual including all text under subheadings therein before set up or use of this product.
Setting and Testing
TO PREVENT SERIOUS INJURY FROM ACCIDENTAL OPERATION:
Make sure that the Trigger is in the off-position and unplug the tool from its
electrical outlet before performing any procedure in this section.
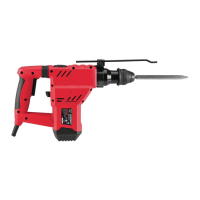
Drill Bit Installation
CAUTION! Wear heavy-duty work gloves to provide
protection when inserting and removing drill bits.
Drill bits become very hot during use.
Do not remove drill bits until the bit has cooled.
1. While holding the ring behind the collar of the
Chuck with one hand, rotate the collar of the
Chuck counterclockwise until the jaws of the
drill are opened enough to fit the drill bit. If the
collar is tight, use the key to loosen the Chuck.
2. Use a drill bit designed for the workpiece type.
Place the desired drill bit or screwdriver bit
into the drill between the Chuck Jaws.
Note: In addition to single or double-ended
screwdriver bits, adapters with hex or Hexal shafts
with matching socket heads can also be used.
3. Hand tighten the Chuck until the bit is held securely
in place, centered between the Chuck Jaws.
4. Insert the tip of the Chuck Key into a hole on the
side of the Chuck so that the teeth on the Key
engage the gear on the Chuck. Use the Key to
tighten the Chuck securely and remove the Key.
Side Handle Setup
1. Loosen the grip on the Side Handle and
slide Side Handle clamp over and behind
the Chuck until it is set against housing.
2. Rotate the Side Handle until it is in
desired orientation. If you are right-
handed, position the Side Handle so it
extends from the left of the housing.
3. Rotate Side Handle clockwise to secure the clamp.
Installing and Adjusting Depth Gauge
The Depth Gauge is installed on the Side Handle and is
used as a guide when drilling holes to a specific depth.
1. Insert bit and tighten Chuck.
2. Loosen the Side Handle and slide the Depth Gauge
through the gauge hole in the Auxiliary Handle.
3. Place tip of bit against solid surface and extend
Depth Gauge until it is against same surface.
Determine required hole depth.
4. Retract Depth Gauge to depth required. Once
positioned, tighten Side Handle to secure Depth
Gauge in place.
Note: The Drilling depth is the distance from the
tip of the drill bit to the tip of the Depth Gauge.
Drilling
Depth
Drill Bit
Depth Gauge
Depth Adjustment
Mode Selection
Use the Mode Selection switch to select between
plain drilling and hammer drilling modes.
1. Set for plain drilling by sliding the switch
to the right, towards the “drill” symbol.
2. Set for hammer drilling by sliding the switch
to the left, towards the “hammer” symbol.
 Loading...