Page 9;&(%$*4.8"4,7%<'*#$"&8#=%/7*,#*%4,77%>?@@@?@AA?BCDC1Item 64754 64756
EF;6GHIJ6KFGLIMNFLMG6MFMO6 E6GPJ
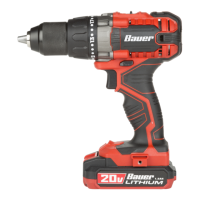
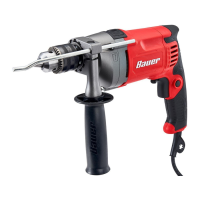
E*$$"83%G&(<'*
Set torque by rotating Torque Selector�
a� P#*%$.*%8'5+*(*9%$&(<'*%#*$$"83#%2(&5%
>%$&%>C%2&(%9("W"83%#4(*)#=%+&7$#%,89%8'$#1%%
[;&(%N&9*7%>CDcO?S>%&87V=%,7#&%#*7*4$%
U("W"83%N&9*%)"$.%$.*%N&9*%E*7*4$&(\1
• The torque setting required depends on the
object being driven� In the case of screws,
consider the size, length, and type of material�
• If a pilot hole has been drilled into the material,
a lower torque setting will be required�
• Adjust the torque setting low enough to allow
a safety margin� Use a very low torque
setting when first driving small screws into
soft materials� Then adjust the setting as
the proper force required is determined�
b� P#*%$.*%#*$$"83%5,(X*9%+V%$.*%9("77%"4&8%2&(%
9("77"831%%[;&(%N&9*7%>CDcO?S>%&87V=%#*7*4$%
U("77"83%N&9*%)"$.%$.*%N&9*%E*7*4$&(\1
Q&(X/"*4*%,89%Q&(X%F(*,%E*$%P/
1� Designate a work area that is clean and well lit�
The work area must not allow access by children
or pets to prevent distraction and injury�
2� Secure loose workpieces using a vise or clamps
(not included) to prevent movement while working�
3� There must not be objects, such as utility lines,
nearby that will present a hazard while working�
R*8*(,7%L8#$('4$"&8#%2&(%P#*
1� Lock Trigger, then insert a fully charged Battery
Pack, making sure that it clicks into place securely�
2� Set Direction Switch:
;&(),(9- Push Switch in on right side
(arrow pointing forward) for clockwise rotation�
K*W*(#*- Push Switch in on left
side (arrow pointing backward) for
counter-clockwise rotation�
G("33*(%T&4X- Push Switch to the
center to lock the Trigger�
OFPGLIMg%%E*$%U"(*4$"&8%E)"$4.%$&%4*8$*(%
G("33*(%T&4X%/&#"$"&8%9'("83%#*$%'/=%).*8%
4.,83"83%+"$#%&(%).*8%$&&7%"#%"97*1%%
J'#.%%
2&(%
;&(),(9
J'#.%%
2&(%
K*W*(#*
J'#.%$&%O*8$*(%$&%
TIOY%GKLRR6K
3� Install bit, select Mode (Model 1792C-B1 only),
Torque (when driving), Speed and Direction�
MIGLO6-%U&%8&$%4.,83*%9"(*4$"&8%&2%(&$,$"&8%
)."7*%O.'4X%"#%(&$,$"831%%Wait until Chuck has come
to a complete stop before changing direction�
4� Press Trigger� The Work Light will turn
on when Trigger is pressed and turn off a
few seconds after Trigger is released�
5� When inserting or removing a screw or bolt, use
slight pressure at first to keep the bit in the head
of the screw or bolt and cause the screw or bolt
to thread into or unthread from the material�
6� When drilling a hole, let the tool do the work,
using only enough pressure to follow the
drill as it cuts the hole in the material�
7� When drilling a hard, smooth surface, use a center
punch (not included) to mark the desired hole�
8� When finished using the Drill, release Trigger
and center Direction Switch to lock Trigger�
9� To prevent accidents, remove tool’s Battery
Pack after use� Clean, then store the
tool indoors out of children’s reach�