This document serves as a user manual for the Baumatic 51 Bottle Temperature Controlled Wine Cabinet, covering both dual zone models (BWCDZ150SS/BWCDZ150GL) and single zone models (BWCSZ150SS/BWCSZ150GL). It provides essential information for installation, operation, and maintenance to ensure optimal performance and longevity of the appliance.
Function Description
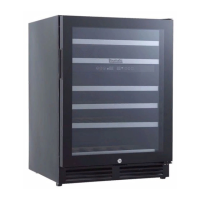
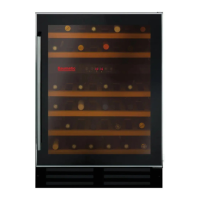
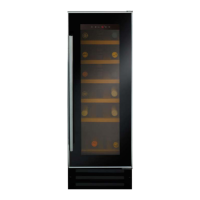
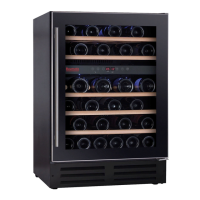
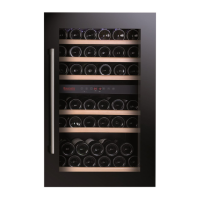
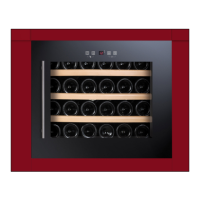
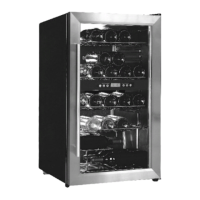
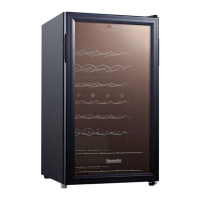
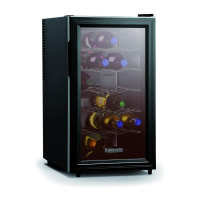
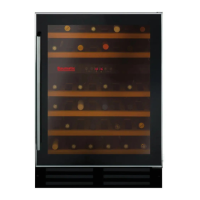
The Baumatic wine cabinet is specifically designed for the storage and chilling of wine bottles in a household setting. It is not intended for storing foodstuffs or for commercial use. The appliance is built to maintain precise temperature control, crucial for preserving the quality and taste of various wines. Dual zone models offer two independently controlled compartments, allowing different types of wine to be stored at their ideal temperatures simultaneously. Single zone models provide a single temperature-controlled compartment for uniform storage. The cabinet operates within specific climate classifications (SN, N, ST, T), ensuring efficient performance within a recommended ambient temperature range of 22-25°C.
Usage Features
Installation and Positioning:
The wine cabinet is designed for built-in and permanent installation under a kitchen tabletop. Proper positioning is crucial for its functionality and safety. It should be installed in a location where the ambient temperature aligns with the appliance's climate classification. Two people are recommended for positioning to prevent injury or damage. The appliance should not be exposed to direct sunlight, continuous heat, or extreme temperatures; if proximity to heat sources is unavoidable, an insulation plate should be used. A readily accessible electrical socket is required. The appliance must be placed on a solid, level base, using the adjustable front feet for leveling. Adequate space must be left for door opening to avoid damage or injury. Crucially, the vent at the base of the appliance is for ventilation and must not be obstructed, as this will impair proper operation.
Electrical Connection:
The wine cabinet requires a 10 amp moulded lead with an AS/NZS 3112 approved plug. Installation must be carried out by a qualified electrician registered on the E.W.R.B. website, adhering to AS/NZS 3000 Wiring Regulations and local regulations. The mains lead wiring follows a standard color code: brown for live (L), blue for neutral (N), and green and yellow for earth (E). It is imperative to ensure no stray strands or cut wires are present and that the cord clamp secures the outer sheath.
First Use and Power Control:
After installation, the appliance should stand upright for approximately 2 hours before connecting to the mains supply to allow refrigerant gases to settle. The exterior and removable accessories should be cleaned with a liquid detergent solution, and the interior with a solution of sodium bicarbonate in lukewarm water, ensuring all parts are thoroughly dried. An initial odor may be present but will dissipate as the appliance cools.
The appliance powers on automatically when plugged into a power outlet. It can be turned on or off by touching the power mark. A critical safety measure: if the unit is switched off or unplugged, a minimum of 5 minutes must pass before restarting or reconnecting to the mains supply to prevent damage to the compressor.
Temperature Setting:
- Dual Zone Models: These models feature a zone selection button to choose between the two compartments. Once a zone is selected, its LED display flashes, allowing temperature adjustment using the plus and minus buttons. Each press adjusts the temperature in 1°C / 1°F increments. The LED display shows the selected temperature for 5 seconds before reverting to the actual internal temperature.
- Single Zone Models: A single temperature selection button allows adjustment of the compartment temperature using the plus and minus buttons, also in 1°C / 1°F increments. Similar to dual zone models, the LED display shows the selected temperature for 5 seconds before displaying the actual internal temperature.
- Temperature Control Malfunction: If the temperature control malfunctions, the LED display will show "HH" or "LL" accompanied by a continuous buzz. In such cases, the appliance is designed to periodically run the compressor and fans to protect the stored wines.
- Temperature Variance: During initial use or after a prolonged shutdown, a slight variance between the selected and displayed temperature is normal due to activation time. This will normalize after a few hours of operation.
- Celsius/Fahrenheit Interchange: The appliance allows users to interchange between Celsius (°C) and Fahrenheit (°F) display by selecting the "°F/°C" button.
Interior Lighting:
The interior cool LED lighting can be switched on or off by touching the light button. The light automatically turns off after 10 minutes. To keep the light on continuously, press the button for 3 seconds until an audible sound is heard.
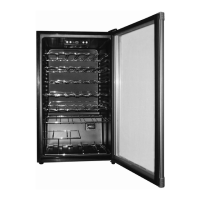
Wine Storage:
The standard shelves are designed for Bordeaux bottle storage, though the maximum number of bottles may vary based on their size and the number of pre-installed shelves. Shelves come in two designs:
- Without telescopic rails but with plastic stoppers on each side of the shelf track to prevent bottles from falling.
- With telescopic rails that have their own stoppers.
To prevent damage to the door gasket, ensure the door is fully open before pulling out shelves. Only sealed wine bottles should be stored. Recommended temperatures for chilling/storage are: Red Wines (15-18°C / 59-65°F), Dry/White Wines (9-14°C / 48-57°F), Rose Wines (10-11°C / 50-52°F), and Sparkling Wines (5-8°C / 40-47°F).
Vacation Time:
- Short Holidays (less than 3 weeks): Leave the wine cabinet in operation.
- Long Absences (several months): Remove all items, turn off the appliance, unplug the electricity cable, clean and dry the interior thoroughly. To prevent odors and mold, leave the door slightly ajar.
Moving the Wine Cabinet:
When moving the appliance, remove all items, securely tape down loose shelves, turn up the adjustable foot to prevent damage, tape the door closed, and ensure the appliance remains upright during transport, protecting its exterior with a blanket or similar item.
Maintenance Features
Cleaning:
Regular cleaning is essential. Before cleaning, ensure the appliance is disconnected from the mains supply. Do not pour or spray water directly onto the appliance. The interior should be cleaned periodically with a solution of about 2 tablespoons of baking soda in 1 liter of lukewarm water. Accessories should be cleaned separately with soap and water, not in a dishwasher. Wooden shelves must be thoroughly dried before being returned to the cooler. Abrasive products, detergents, or soaps should not be used. When cleaning controls or electrical parts, wring excess water from the sponge or cloth. Steel wool or steel brushes should not be used on stainless steel surfaces, as this can cause contamination and rusting.
Power Failure:
Most power failures are brief and should not significantly affect the appliance's temperature if the door is opened minimally. For longer power outages, take appropriate steps to protect the contents. Remember the 3-5 minute delay before restarting the wine cabinet after a power loss or unplugging to prevent compressor damage.
Troubleshooting:
The manual provides a troubleshooting guide for common issues:
- Appliance not operating: Check if it's plugged in, turned on, or if the circuit breaker/fuse has tripped.
- Not cold enough: Verify temperature settings, external environment, frequency of door opening, and proper door closure/gasket seal.
- Frequent turn-on/off: May be due to high room temperature, large amount of contents added, frequent door opening, improper door closure/gasket seal, or incorrect temperature control setting.
- Lighting not working: Check if plugged in, if circuit breaker/fuse tripped, or if lighting is turned off.
- Excessive vibration: Ensure the appliance is level and no internal parts or compressor chamber components are loose.
- Excessive noise: Rattling noises from refrigerant flow are normal. Gurgling sounds may occur as cycles end. Popping/crackling noises can result from contraction/expansion of internal walls. Ensure the appliance is level.
- Door not closing properly: Check if the appliance is level, if the door was installed correctly, if the gasket is dirty, or if shelves are out of position.
- "HH" or "LL" on LED display with buzz: Indicates the temperature control is out of order.
Service and Warranty:
Users should not attempt repairs themselves. If issues persist after troubleshooting, disconnect the appliance from the mains supply and contact Baumatic Service Care. Repairs must be performed by a qualified engineer. If a service call is made under warranty and no appliance fault is found, the user may be liable for the call-out charge. The appliance must be accessible for repairs; if installation hinders access or risks damage, the engineer may not complete the repair. This includes situations where the appliance is tiled in, sealed with sealant, or has obstructions like plinths. The warranty conditions, including a 24-month period (3 months for non-residential commercial use), are detailed, covering defects from materials, components, or workmanship, but excluding normal wear and tear, accidental damage, misuse, or unauthorized repairs.
Energy Saving Tips:
To maximize energy efficiency, locate the appliance away from heat-producing devices and direct sunlight. Ensure adequate ventilation and never cover air vents. Only open the door when necessary, avoiding prolonged openings or frequent opening/closing.
Lock and Unlock (Option):
For models with a door lock, a key is provided. Insert the key and turn it counter-clockwise to unlock, and follow the reversed operation to lock. The key should be kept in a safe place.