Bayco Products, Inc. • 640 South Sanden Blvd. • Wylie, TX 75098 • 1-800-233-2155 • 1-469-326-9400 • www.nightstick.com
INS-XPP-5422GMX-GMXA-DL-22
09-07-2022
Instruction Manual
XPP-5422GMX / XPP-5422GMXA
THE XPP-5422GMX/GMXA IS APPROVED FOR USE
CLASS I DIV 1 GRPS A-D T3
CLASS II & III DIV 1 GRPS E-G T135C
CLASS I ZONE 0 IIC T3
CLASS II ZONE 20 IIIC T135C
-20ºC ≤ Tamb ≤ +40ºC
1.5V/Cell AA Alkaline
ID 4003544
INTRINSICALLY SAFE
SECURITE INTRINSEQUE
Bayco Products, Inc. XPP-5422GMX
Wylie, TX 75098
640 S. Sanden Blvd.
CLASS I DIV 1 GRPS A-D T3
CLASS II & III DIV 1 GRPS E-G T135C
CLASS I ZONE 0 AEx ia IIC T3 Ga
CLASS I ZONE 0 Ex ia IIC T3 Ga
Ex ia op is I Ma
Ex ia op is IIC T3 Ga
Intertek ITS 13 ATEX 27837X
ITS21UKEX0264X
IECEx ITS 16.0067X
-20ºC ≤ Tamb ≤ +40ºC
1.5V/Cell AA Alkaline
2575
ID 4003544
INTRINSICALLY SAFE
SECURITE INTRINSEQUE
I M 1 Ex ia op is I Ma
II 1 G Ex ia op is IIC T3 Ga
Bayco Products, Inc. XPP-5422GMXA
Wylie, TX 75098
640 S. Sanden Blvd.
Conforms to:
ANSI/UL STD 913, ANSI/UL
60079-0, ANSI/UL 60079-11
ANSI/ISA 60079-26
Certified to:
CAN/CSA STD C22.2 No 157
CAN/CSA STD C22.2 No 60079-0
CAN/CSA STD C22.2 No 60079-11
0359
Ex ia op is I Ma
Ex ia op is IIC T3 Ga
(-20ºC ≤ Tamb ≤ +40ºC)
NCC 15.0286 X
21-AV4BO-0137X
CAPACITANCE LIMITATION - INTRINSICALLY SAFE
The capacitance measured on the two magnets and the side clip exceeds 3pF as is
required for a Group IIC rating. The user should consider this fact when deciding to use this
light in their specic application.
WARNINGS - INTRINSICALLY SAFE
y Warning: Use only the approved non-rechargeable batteries listed below.
y Warning: Do NOT attempt to use rechargeable AA batteries with this light.
y Warning: To prevent ignition of a hazardous atmosphere, do not open the lens bezel in
the hazardous environment. This task must ONLY be performed in an area known to be
non-hazardous.
y Warning: When exchanging batteries, use only Duracell PC1500, Energizer EN91 or
Energizer L91 batteries.
y Warning: To prevent ignition of a hazardous atmosphere, the AA batteries must only be
exchanged in an area known to be non-hazardous.
y Warning: To reduce the risk of explosion, do not mix new non-rechargeable batteries
with used non-rechargeable batteries, or mix non-rechargeable batteries from different
manufacturers.
y Warning: Substitution of components may impair intrinsic safety.
SPECIAL INSTRUCTIONS FOR INTRINSIC SAFETY
For personal safety, always conrm the rating of any known hazardous or potentially
hazardous location where the light is to be used.
BATTERY INSTALLATION
WARNING: In order to maintain the Intrinsically Safe Permissible rating, the only AA
batteries certied for use with this light are the Duracell PC1500, Energizer EN91 or
Energizer L91 batteries.
y Do not attempt to use any other brand or model of AA batteries with this light.
y Do not attempt to use any type of rechargeable AA batteries with this light.
Warning: To prevent ignition of a hazardous atmosphere, do not remove the lens bezel or
the reector / battery carrier in the hazardous environment. This task must ONLY be done
in an area known to be non-hazardous.
y Loosen the locking screw located on the side of the lens cap. NOTE: Do NOT attempt
to completely remove the locking screw. Doing so is not necessary and may damage the
threads. The screw simply needs to be loosened enough to allow the lens bezel to unscrew.
y Unscrew the lens bezel from the housing in a counter-clockwise direction.
y Turn the light upside down and carefully shake the light in order to remove the reector /
battery carrier. Allow the reector / battery carrier to slide into your hand. WARNING: Do NOT
touch the reector surface with your nger. Doing so may damage the reector surface.
y Using 3 – AA Duracell PC1500, Energizer EN91 or Energizer L91 batteries (make sure
that all 3 batteries are of the same model), install the batteries in the carrier paying close
attention to the markings on the battery carrier for proper battery terminal polarity alignment.
y Align the reector / battery carrier so that the switches on the carrier are aligned with
the switches on the housing. Carefully insert the reector / battery carrier back into the
ashlight housing until it is fully seated in the housing. WARNING: Be careful to not touch
the reector surface with your nger. Doing so may damage the reector surface.
y Replace the lens bezel by screwing it onto the housing in a clockwise direction.
y Tighten locking screw. CAUTION: Do NOT over-tighten. Doing so may damage the
threads and impact the light’s Intrinsic Safety.
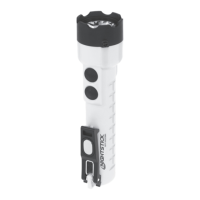
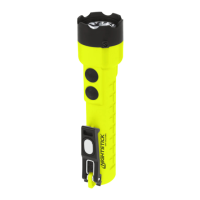
OPERATION
THE XPP-5422 HAS FOUR SEPARATE LIGHTING MODES:
Momentary Flashlight Mode
Lightly press the top body switch for momentary operation. Release the switch to turn
the light off.
Constant-on Flashlight Mode
Press the top body switch until it clicks and then release for constant-on mode. Press
and release the top body switch again to turn the light off.
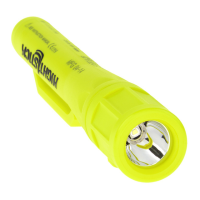
Floodlight Mode
Press the bottom body switch until it clicks and then release for oodlight mode. Press
and release the bottom body switch again to turn the light off.
Dual-Light Mode
Dual-Light allows the user to turn on both the Flashlight and the Floodlight, at the
same time. Press the top body switch until it clicks and then release for constant-on mode
Flashlight Mode. Next press and release the bottom switch to activate the Floodlight. Both
the Flashlight and the Floodlight are now running. Press and release both the top and bottom
body switches to turn the lights off.
WARRANTY
LIMITED LIFETIME WARRANTY
Bayco Products, Inc. warrants this product to be free from defects in workmanship and
materials for the original purchaser’s lifetime. The Limited Lifetime Warranty includes the
LEDs, housing and lenses. Rechargeable batteries, chargers, switches, electronics and
included accessories are warranted for a period of two years with proof of purchase. Normal
wear and failures which are caused by accidents, misuse, abuse, faulty installation and
lightning damage are excluded.
We will repair or replace this product should we determine it to be defective. This is the
only warranty, expressed or implied, including any warranty of merchantability or tness for
a particular purpose.
For a complete copy of the warranty, go to www.baycoproducts.com/bayco-product-
support/warranties. Retain your receipt for proof of purchase.
Mode d’emploi
XPP-5422GMX / XPP-5422GMXA
LA LAMPE DE POCHE A ÉTÉ APPROUVÉE POUR UTILISATION
CAPACITANCE LIMITÉE - SÉCURITÉ INTRINSÈQUE
La capacitance mesurée sur les deux aimants et la pince latérale dépasse 3pF pour le
groupe IIC. L’utilisateur doit déterminer l’équipement qui convient pour l’application.