6 |
BEFORE FIRST USE
1. Remove all packaging and accessories.
2. Clean the ice scoop, cabinet, and inner parts that contact water with mild detergent, warm water, and a
soft cloth. Dry unit and parts with a clean, soft cloth.
3. Place unit on a stable and level surface. Make sure that there is at least 8 inches of clearance on the back and
front, and at least 2 inches on each side. Keep the front accessible and the air outlet clear of obstructions.
4. Place unit in position for at least 4 hours to settle the refrigerant fluid. Do not plug it in.
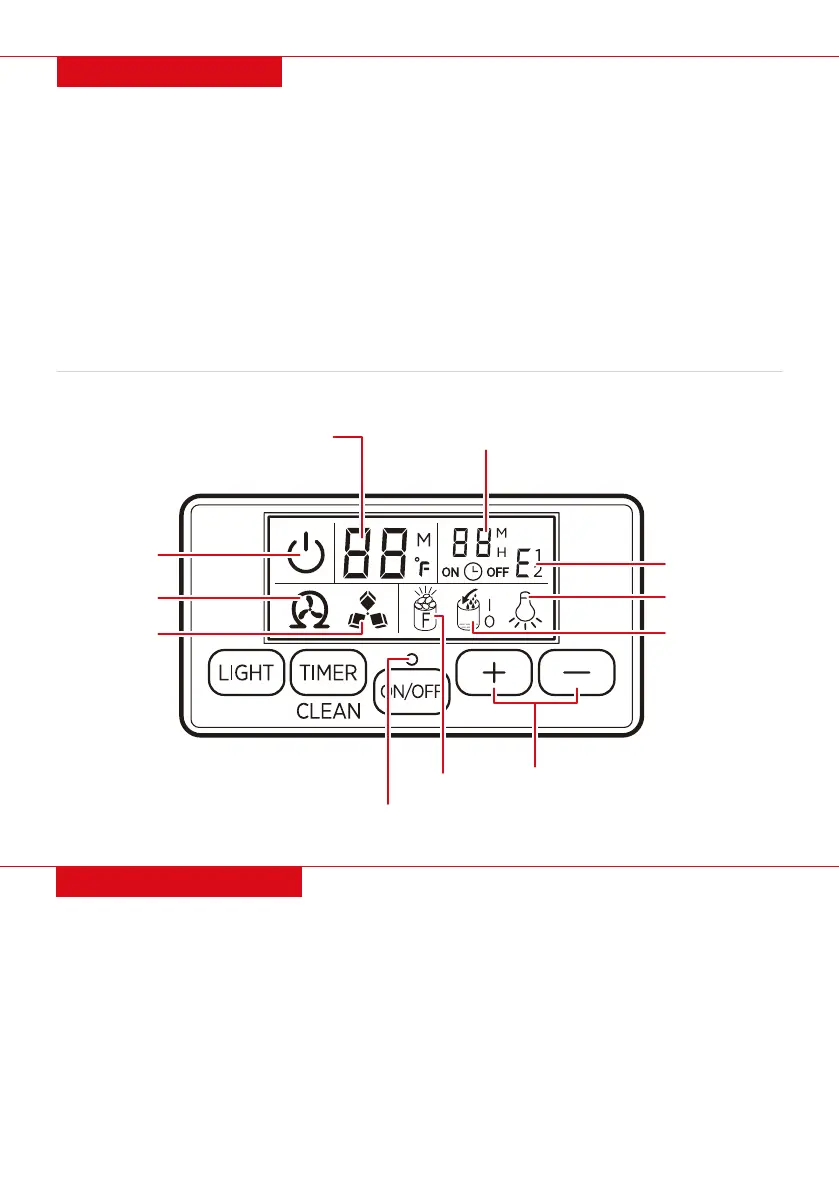
CONTROL PANEL
LIGHT: Turn internal light on/o. Press and hold to toggle between Fahrenheit and Celsius.
TIMER/CLEAN: Press to set the timer. Press and hold to enter cleaning mode.
ON/OFF: Press to turn unit on/o or cancel timer. Press and hold to forcefully switch from ice making
to ice harvesting. Flashes in standby mode, turns solid when unit is on.
Water Supply Mode: Use a thin pole to press button to toggle between manually or automatically
supplying water.
Increase/Decrease: Press to increase/decrease ice-making duration, ice thickness, or timer.
• Water flowing/add water: Flashing icon indicates water is flowing and solid icon indicates water shortage.
- I: Manual water supply mode.
- O: Automatic water supply mode.
• Ice full: Remove ice to resume ice making.
• Ice making/harvest: Rotating icon means ice making, flashing icon means ice harvest.
ICE MAKING TIMER (MINUTES) OR
AMBIENT TEMPERATURE (°F)
ICE MAKING/TIMER SETTING
ON/OFF
SELF-CLEANING
WATER SUPPLY MODE
ERROR CODE
LIGHTS ON/OFF
ICE FULL
WATER FLOWING/
ADD WATER
INCREASE/
DECREASE
ICE MAKING/
HARVEST