Installation
Install the device on a horizontal surface or in a 19” equipment rack. The DMX-240 controller is provided with an
DC-adaptor. Plug the adapter into the DC input socket (34) of the device. Plug the adapter into the mains outlet
(230V, 50Hz)
Front
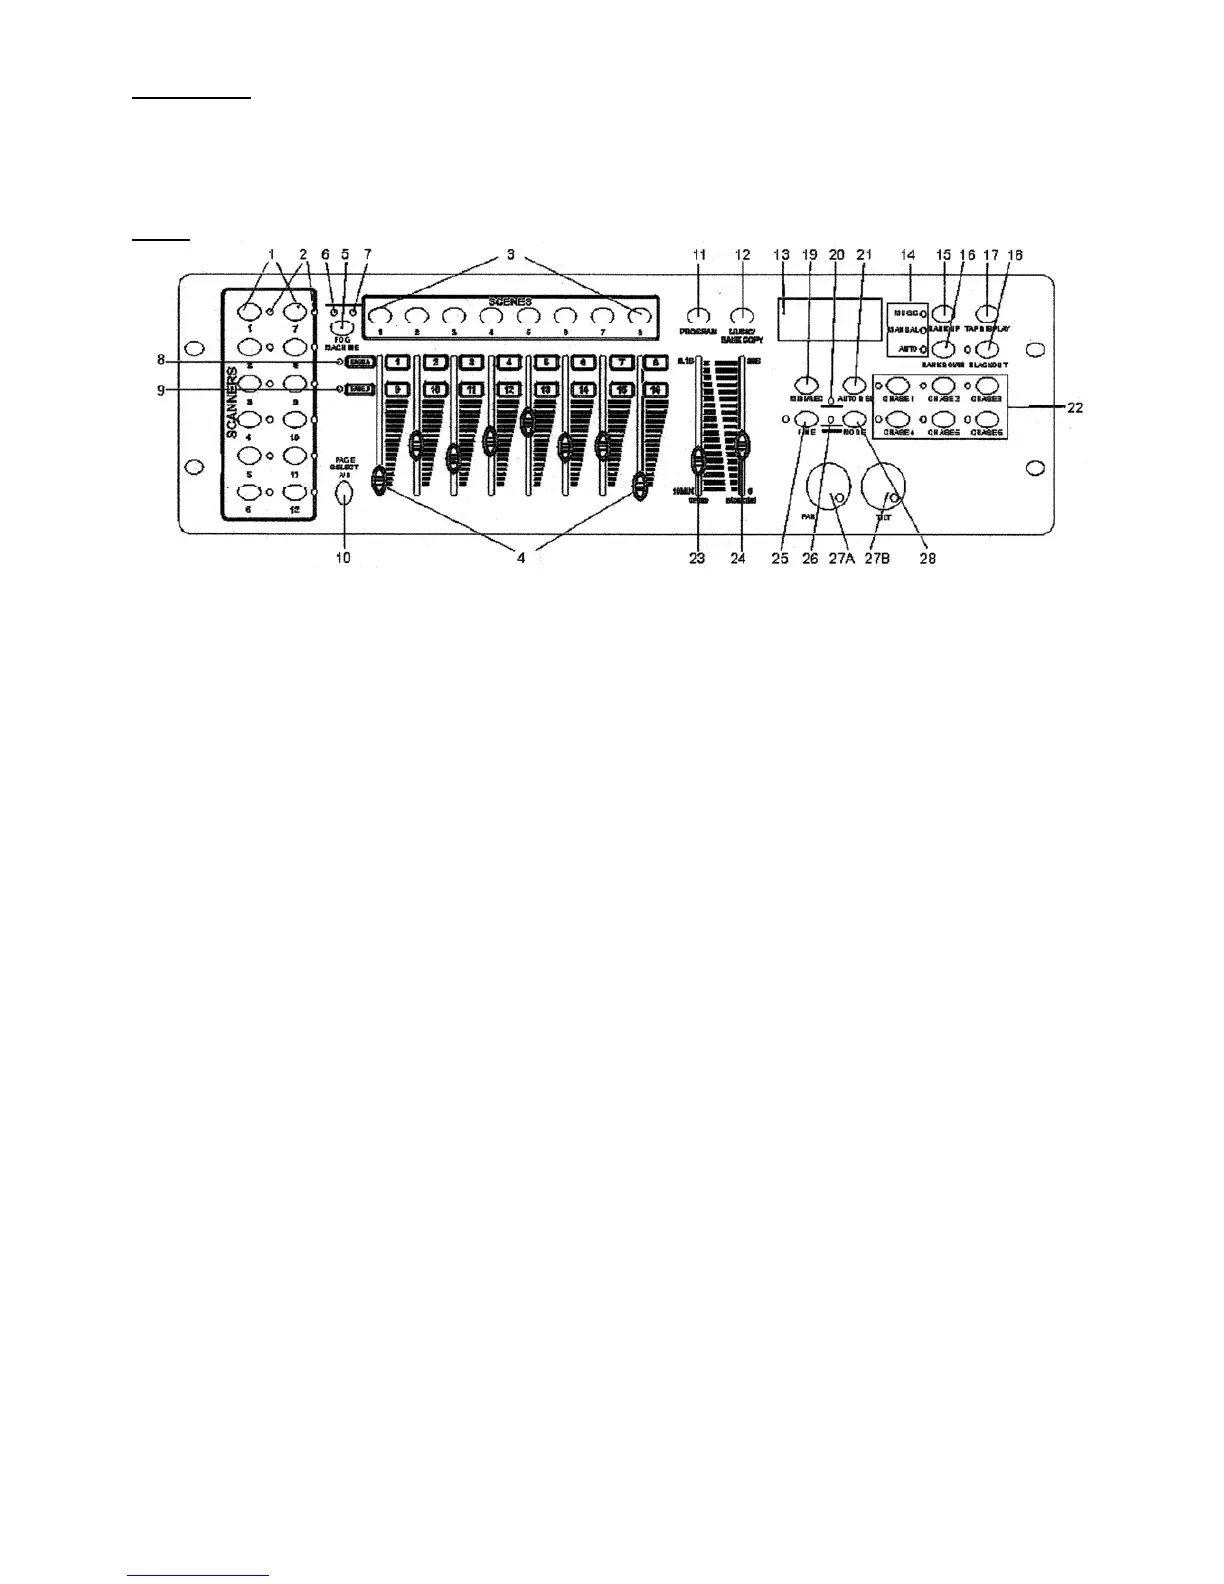
1. SCANNER buttons: Selects or deselects the desired scanner.
2. SCANNER indicator LEDs: When scanner is selected the associated LED is ON.
3. SCENE selection buttons: Activates the scenes in the selected scene bank
4. CHANNEL faders: Sets the DMX values. Channel 1 ~ 8 can be adjusted after pressing the respective
scanner button. Channel 9 ~ 16 can be adjusted after pressing the page selection button (10).
5. Not used
6. Not used
7. Not used
8. PAGE A indicator LED
9. PAGE B indicator LED
10. PAGE selection button: In manual mode, press this button to control channels 1 ~ 8 (page A) or channels 9 ~
16 (page B) or both pages by means of the fader.
11. PROGRAM button: Press for 3 sec. to enter programm mode. Programm indicator will flash.
12. MUSIC / BANK COPY button: Press to put the device in sound-control mode.
13. DISPLAY: Shows various information depending on operation being performed.
14. AUTO MODE indicator LEDs: Shows the status of Auto-Run.
15. BANK UP button: Select 1 of 30 scene banks (each bank can contain 8 scenes max.)
16. BANK DOWN button: Select 1 of 30 scene banks (each bank can contain 8 scenes max.)
17. TAP DISPLAY button:
TAP: Controls the speed of Auto-Run scenes and chasers. Press TAP several times at the speed you want the
scenes of chasers to be run. This is an alternative for the speed fader.
DISPLAY: Switch display to show DMX value (level 0 – 255 or 1% - 100%)
18. BLACKOUT button: Close the light output of all connected projectors via the shutter.
19. MIDI / REC button:
MIDI: Activates MIDI operation when pressed for 3 sec.
REC: Used in program mode for recording scenes of chases
20. ASSIGN LED
21. AUTO / DEL button
AUTO: Activates Auto-Run scenes and chases. When on, the Auto-Run LED is ON.
DEL: Used in program mode to delete scenes, chases and chase steps.
22. CHASER buttons (chaser 1 ~ chaser 6): Selects desired chase for activation or programming.
23. SPEED fader: Controls the speed when in Auto-Run mode (also used when assigning channel functions)
24. FADE TIME fader: Controls the fade time when in Auto-Run mode (also used when assigning channel functions)
25. FINE button: Enables finer control for PAN/TILT
26. PILE UP / CHASE LED
27A. PAN wheel: Controls left/right for assigned scanners
27B. TILT wheel: Controls up/down for assigned scanners
28. MODE button: Used with FINE button to set channel reverse and channel assign functions.

 Loading...