23
BOM 520/820 Operating Instructions
Before commencing programming
- Allow the door to engage with the running slide
block.
- Insert mains plug. Point display (a) will illuminate.
- Make sure that the antenna is correctly posi-
tioned (see Figure 13).
- Observe hand transmitter instructions.
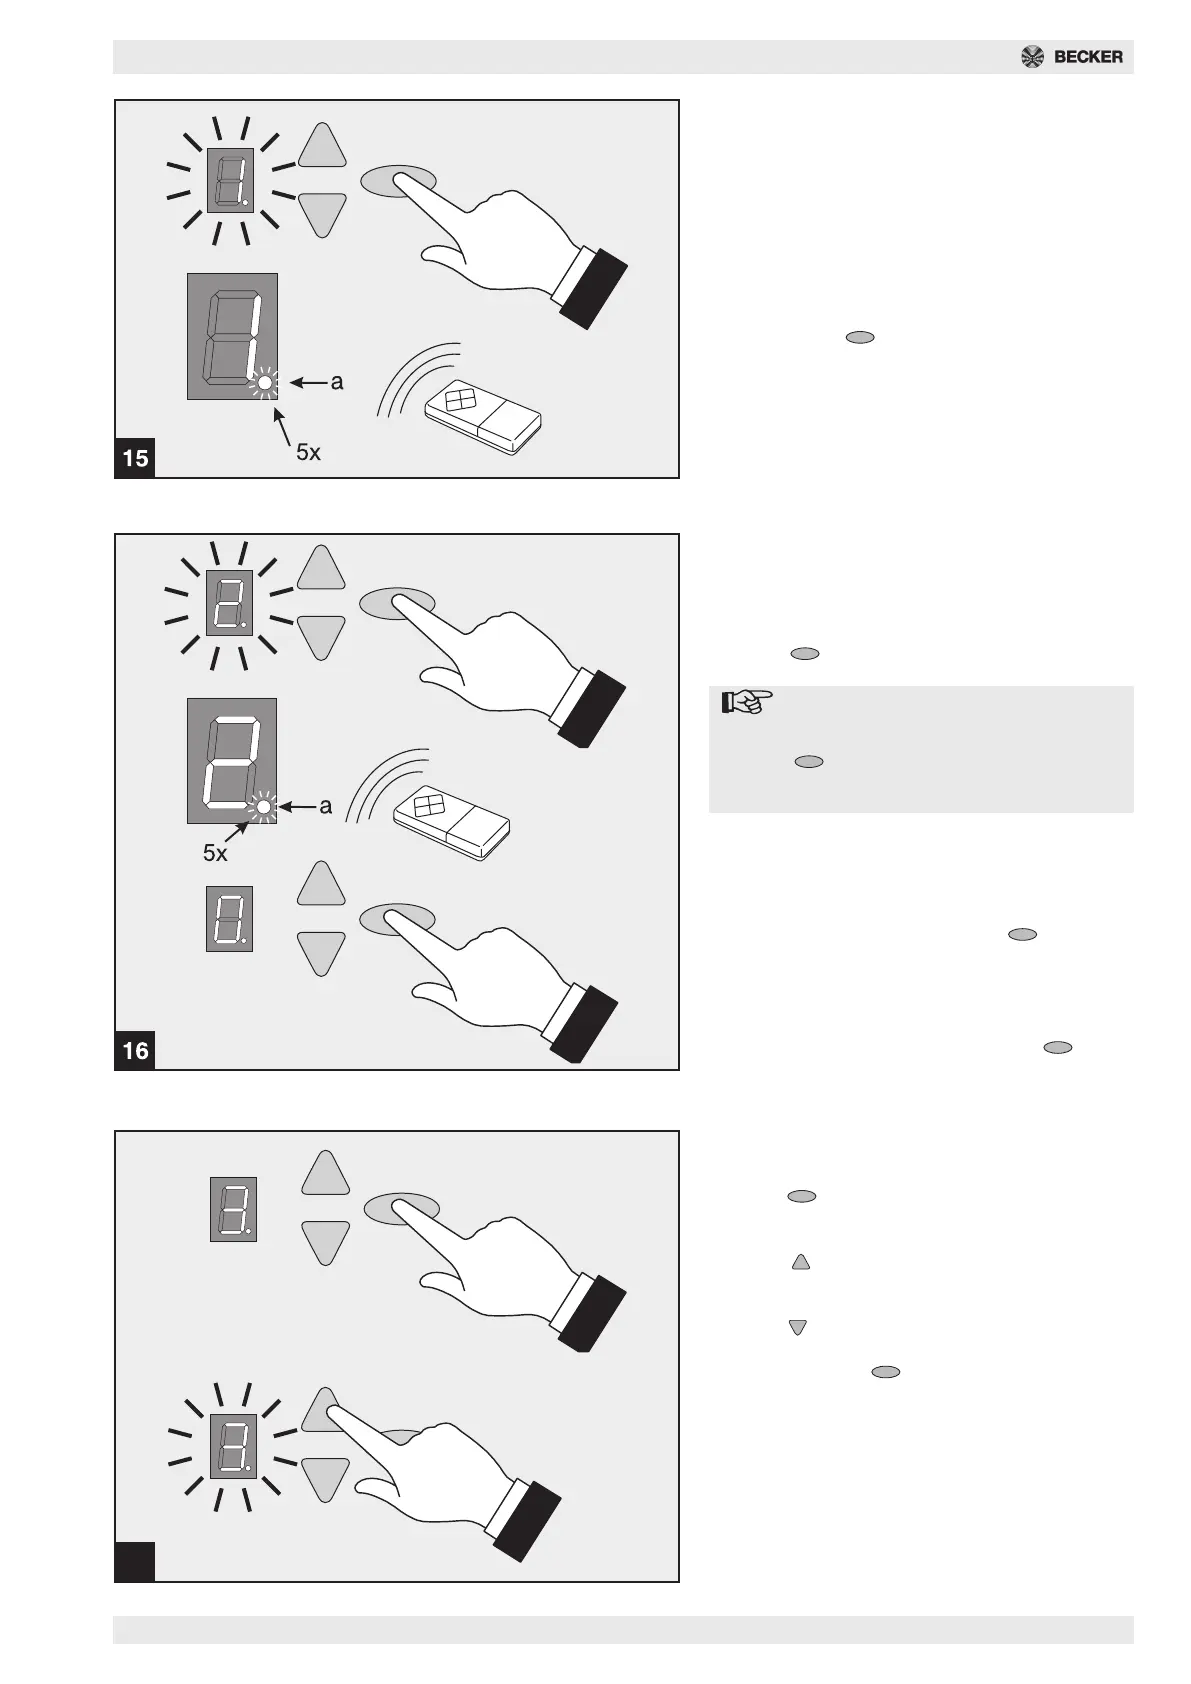
Fig. 15 - Menu step 1: Programming the
start function for the hand transmitter
Briefly press the button.
The number 1 appears on the display.
As soon as the display starts to flash, press down the
button on the hand transmitter that you subsequently
wish to use to start the drive, for approx. 1 second.
As soon as the code has been read in, the red point
display (a) flashes 5 x to acknowledge.
Further hand transmitters (up to max. 10) can be pro-
grammed.
17
3 sec.
Fig. 16 - Menu step 2: Programming the
light function for the hand transmitter
(optional, 4-channel hand transmitter
required - Art. no. 4905 530 004 0)
Press the button.
The number 2 appears on the display.
Note:
If you do not wish to program the 4
minute illumination function, press the
button again. 0 will appear on the
display - programming ended (for 1-
channel hand transmitter).
Press the second button on the 4-channel hand
transmitter that will be used to switch on the 4 minute
illumination function.
As soon as the code has been read in, the red point
display (a) flashes 5 x to acknowledge.
After programming, briefly press the button.
The number 0 appears. Menu ended.
Deleting all hand transmitters
programmed on the drive:
Insert mains plug of drive, keeping the button
pressed down.
Fig. 17 - Menu step 3: Setting the top
end position
Keep the button pressed down for 3 seconds.
Number 3 appears on the display.
Wait briefly until number 3 flashes.
Press the button. The drive will move the door in
the UP direction while the button is pressed down.
The position can be corrected in the DOWN direction
using the button.
When the desired UP end position has been
reached, press the button. Drive stores the UP
end position and number 4 appears on the display.