34 35Quick Start Guide
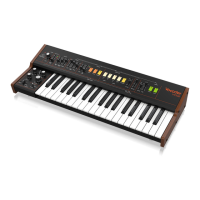
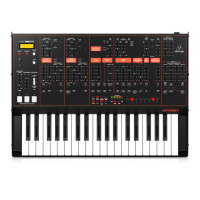
PRO-VS MINI
(1) POWER – on/o button. Hold for
3 seconds to turn the Pro VS on
and o.
(2) USB-C – used for power and to
connect to a computer for USB
MIDI control.
(3) LCD DISPLAY – OLED
information display.
(4) VOLUME – adjust the output level
from the headphones output.
Make sure the volume is turned
down before putting
on headphones.
(5) PHONES – connect your
headphones to this 3.5 mm TRS
output. Make sure the volume is
turned down before putting
on headphones.
(6) SYNC – this input allows the use
of an external clock and start/stop
signal on 3.5 mm TRS jack.
(7) MIDI IN – input MIDI from an
external MIDI device such as a
sequencer or DAW.
(8) WAVEFORM MIX – mix the signals
from the 4 sound sources.
(9) + PROG/OCTAVE – increase the
program number or raise the
octave up of the selected sound.
(10) - PROG/OCTAVE – decrease the
program number or raise the
octave up of the selected sound.
(11) ENVELOPE SELECT – allows the
controls to be used by the MIX,
FILTER or AMPLITUDE sections.
(12) R1/ATTACK – controls the attack
time of the selected envelope.
(13) R2/DECAY – controls the decay
time of the selected envelope.
(14) R3/SUSTAIN – controls the
sustain level of the
selected envelope.
(1 5) R4/RELEASE – controls the
release time of the
selected envelope.
(16) LFO SELECT – edit LFO 1 or 2.
(1 7) RATE – sets the speed of the LFO.
(18) AMT – controls the depth or
amount of modulation.
(19) CUTOFF – adjust the 24 dB low-
pass lter’s cuto frequency.
(20) RESO – adjusts the resonance
of the lter. This emphasizes
the frequencies around the
cuto point.
(21) WAVEFORM SELECT – select
which one of the 4 voice
PRO-VS MINI Controls
(E N) Step 2: Controls waveforms, A,B,C or D is active for
voice control or editing.
(22) WAVE – choose which waveform
is used for the currently
selected voice.
(23) FREQ – change the pitch or
frequency of the waveform.
(24) RATE – adjust the speed of
the chorus.
(25) AMOUNT – adjust the
chorus depth.
(26) TEMPO – sets the speed of the
ARP or sequencer in BPM.
(27) MEMORY/WRITE – calls up a
new sequence memory or, with
Function, writes a sequence to
internal memory
(28) FUNC – used to engage shift mode
or for second functions.
(29) PLAY/ACTIVE – plays the
arpeggiator or selected sequencer
pattern. Function press to make
active, which allows selected steps
to be removed from the sequence.
(30) RECORD/CLEAR – press to enter
record or function press to clear
notes or a full pattern.
(31) MENU – repeated key press gives
the following menus:
a. Seq/Arp – switches between
normal keyboard and sequencer
operation and arpeggiator.
b. Filt Env Trig – select either
Single or Multi trigger. Single
triggers the envelope with the
rst note played and will not
re-trigger until all notes are
released; Multi will re-trigger
with each new note played.
c. MIDI Tx – selects MIDI output
channel 1 – 16 or o.
d. MIDI Rx – selects MIDI input
channel 1 – 16 or o.
e. MIDI Velocity –
switch velocity On or OFF.
f. MIDI CC – selects whether MIDI
continuous controller messages
are received or o.
g. Prog Bulk SysEx Send –
outputs program memory
contents as SysEx using the
USB socket.
h. Prog Sing SysEx Send –
outputs current program as
SysEx using the USB socket.
i. Patt Bulk SysEx Send –
outputs sequencer memory
contents as SysEx using the
USB socket.
 Loading...


