88 89Quick Start Guide
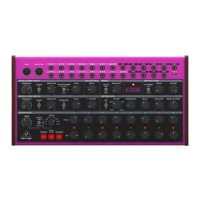
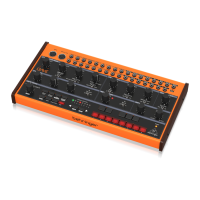
PRO-VS MINI
OVERVIEW
This ‘getting started’ guide will help you set up your PRO-VS MINI and briey
introduce its capabilities.
CONNECTION
To connect the PRO-VS MINI to your system, please consult the connection
guide earlier in this document.
SOFTWARE SETUP
The PRO-VS MINI is a USB Class Compliant MIDI device, and so no driver installation
is required. The PRO-VS MINI does not require any additional drivers to work with
Windows and MacOS.
HARDWARE SETUP
Make all the connections in your system. Keep the PRO-VS MINI power turned o
when making any connections.
Ensure your sound system is turned down.
Turn on the PRO-VS MINI before turning on any power ampliers and turn it
o last. This will help prevent any turn on or turn o “pops or thumps” in your
speakers.
WARM UP TIME
We recommend leaving 15 minutes or more time for the PRO-VS MINI to warm
up before recording or live performance. (Longer if it has been brought in from
the cold.) This will allow the precision analog circuits time to reach their normal
operating temperature and tuned performance.
FIRMWARE UPDATE
Please check the behringer.com website regularly forany updates to theBehringer
SYNTHTRIBE app.
Theapp looks for the latestrmware lewhich can thenbe downloaded and used
to update the PRO-VS MINI.
VISION GENERAL
Esta guía de “introducción” le ayudará a congurar su PRO-VS MINI y presentará
brevemente sus capacidades.
CONEXION
Para conectar el PRO-VS MINI a su sistema, consulte la guía de conexión
anteriormente en este documento.
CONFIGURACIÓN DEL SOFTWARE
El PRO-VS MINI es un dispositivo MIDI compatible con la clase USB, por lo que no
se requiere la instalación del controlador. El PRO-VS MINI no requiere ningún
controlador adicional para trabajar con Windows y MacOS.
CONFIGURACIÓN DE HARDWARE
Realice todas las conexiones en su sistema. Mantenga la potencia PRO-VS MINI
apagada al realizar cualquier conexión.
Asegúrese de que el sistema de sonido esté desactivado.
Encienda el PRO-VS MINI antes de encender los amplicadores de potencia y
apague en último lugar. Esto ayudará a evitar que se enciendan o apaguen los
“estallidos o golpes” en los altavoces.
TIEMPO DE CALENTAMIENTO
Recomendamos dejar 15 minutos o más de tiempo para que el PRO-VS MINI se
caliente antes de la grabación o la actuación en vivo. (Más tiempo si ha sido traído
del frío.) Esto permitirá que los circuitos analógicos de precisión alcancen su
temperatura de funcionamiento normal y un rendimiento ajustado.
ACTUALIZACIÓN DEL FIRMWARE
Por favor, consulte el sitio web de behringer.com regularmente para cualquier
actualización de la aplicación Behringer SYNTHTRIBE. La aplicación busca el último
archivo de rmware que luego se puede descargar y utilizar para actualizar el
PRO-VS MINI.
(E N) Step 3: Getting Started (ES) Step 3: Comenzó

 Loading...


