1. X-USB Interface Operation Guide
1.1 Host system requirements for X-USB
interface expansion card
Check the BEHRINGER website at behringer.com for updates
of X-USB rmware or system requirements. Please nd the
recommended hardware/software minimum congurations in the
specications section.
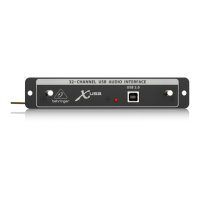
1.2 The BEHRINGER X-USB
High-Performance 32-Channel
24-Bit USB Audio Interface
The X-USB option card gives 32 channel, bi-directional audio
I/O via USB 2.0 serial bus for Mac computers or Windows-
based applications. The simultaneous 32-in, 32-out audio
channels enable for extremely powerful studio and live
applications. You can run virtual live sound checks or 32-track
high-quality studio recordings, whileat the same time remote
operating your DAW via HUI/Mackie Control emulation. The high
speed 24-bit signal transmission and ultra-low latency ASIO
drivers and CoreAudio compatibility even allow inserting audio
plugins on your PC to perform advanced outboard processing.
1.3 Conguring the X-USB option card for
use in the console
The console will automatically detect the X-USB option card
during the regular boot cycle, and it will display the card’s
presence in several instances.
The green square in front of “C: X-USB” indicates that the card is
installed and working properly.
2. Installing a BEHRINGER
InterfaceCard
Before you install an I/O card to the expansion slot of the console,
you must check the BEHRINGER website to verify whether the
console supports that card. behringer.com
CAUTION: Before installing optional I/O cards into the console,
you must make sure that the console’s power switch is turned o.
Malfunctions or electrical shock may occur otherwise.
To install an interface I/O card:
1. Make sure that the mixer’s power is turned o.
2. Loosen the screws that fasten the slot, then remove the slot
cover and keep it in a safe place.
3. Before removing the X-USB card from its protective bag,
it is recommended to touch the grounded metal chassis of
the console to prevent electrostatic discharges aecting the
sensitive electronic components. It is generally a good idea
to hold the card either by the face plate or by the two small
handles, but never touching the components on the circuit
board directly.
4. Align both edges of the card with the guide rails inside the
slot and carefully insert the card into the slot. Push the card
all the way into the slot to ensure that the contacts of the
card are correctly inserted into the connector inside.
5. Fasten the card using the included screws. Be aware that
damage or malfunctions may occur if the card is
not fastened.
13Quick Start Guide