Do you have a question about the Beko DW603 and is the answer not in the manual?
Essential safety precautions for electrical connections and usage.
Guidelines to prevent children from interacting with the dishwasher.
Details on voltage, frequency, and plug requirements for safe operation.
Instructions on how to replace the power plug if it's incompatible.
Instructions on how and when to add special dishwasher salt.
Guidance on selecting and using different types of dishwasher detergents.
Step-by-step guide to starting and running the dishwasher.
A guide to diagnose and solve common dishwasher problems.
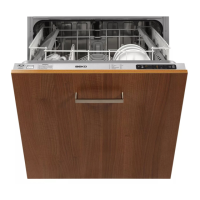
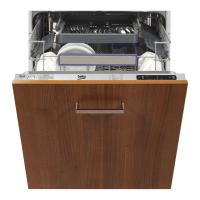
This document is a user's manual for a Beko DW603 Dishwasher, providing comprehensive information on its function, usage, and maintenance.
The Beko DW603 is a household dishwasher designed to clean dirty dishes. It features a special water softening system to remove hardness from tap water, which is crucial for effective washing and preventing watermarks. The appliance utilizes various detergents, including powder, gel, and tablet forms, and requires rinse aid for optimal drying performance. It is equipped with upper and lower spray arms to ensure thorough cleaning of items placed in the baskets. The heating element is concealed behind the liner, and the machine incorporates a hot air drying system to efficiently dry dishes after washing. Filters are in place to prevent food particles from clogging the system and ensure clean water circulation.
Before First Use: Before using the dishwasher for the first time, it is recommended to operate it on the Eco programme with prewash without any dishes. This helps ensure hygiene. Additionally, 1 liter of water should be added to the salt container before the first wash. The dishwasher must be correctly installed by a qualified electrician/plumber, and all electrical and water connections must comply with the instructions.
Water Hardness and Regeneration Settings: The dishwasher requires lime-free water. Hard water can leave watermarks, so the water softening system needs to be set correctly to increase washing effectiveness. Users can determine their local water hardness level using a provided test strip or by contacting their local Water Board. The water hardness level can be adjusted through the machine's control panel, with settings ranging from Level 1 to Level 6, corresponding to different degrees of water hardness (English, German, and French standards are provided). If the water hardness is below 8°dF (French standard), salt may not be necessary, and the "No Salt Warning Indicator" will illuminate continuously.
Adding Dishwasher Salt: Only special pelletized dishwasher salt should be used to soften hard water. Other types of salt can damage the appliance. Salt should be added immediately before starting a complete washing programme to prevent corrosion. The lower rack must be removed, and the cap of the water softener unscrewed anti-clockwise to fill the container. A funnel is provided for easier filling, and approximately 2 kg of softening salt can be added. The salt indicator light will remain on for a period after filling, and if it persists, mixing the salty water with a spoon is suggested.
Detergent Use: The dishwasher is compatible with any brand of powder, gel, and tablet detergents designed for household dishwashers. Detergents should be stored in a cool, dry place, out of reach of children, and added before each use. Overdosing can cause scratches or leave detergent traces. Three types of detergents are available: phosphate and chlorine-containing, phosphate-containing with no chlorine, and neither phosphate nor chlorine-containing. New compact powders are often phosphate-free, so adding salt is recommended even with relatively soft water to prevent white marks.
Two-in-one and Three-in-one Detergents: While combined detergents (two-in-one or three-in-one) can be used, optimal results are achieved with separate detergent, rinse aid, and water-softening salt. When using combined detergents, users must check product specifications and follow package instructions. Tablets should always be placed in the detergent dispenser, not in the internal section or cutlery basket. Combined detergents may not provide the same drying performance as separate products. To improve drying, the rinse aid setting can be adjusted to "1" and rinse aid applied. If combined detergents are used without adding salt, lime scale may form, especially on glasses; setting the water softener to "1" and adding salt is recommended.
Filling Detergent Dispenser: The main detergent container (A) should be filled up to 25cm³ for full loads and heavily soiled dishes, or up to 15cm³ for lighter loads. A smaller container (B) can be filled up to 5cm³ for dishes left unwashed for a long time. Powder and gel detergents are poured directly into the dispenser. For tablet detergents, refer to manufacturer recommendations for placement.
Rinse Aid: Only rinse aid intended for household dishwashers should be used. Rinse aid prevents watermarks and scale, and improves washing and drying efficiency. The rinse aid dispenser regulator (C) can be adjusted from Level 1 (minimum dose) to Level 6 (maximum dose), with a factory preset of Level 4. The dose should be increased if water drops or lime spots appear, and reduced if sticky whitish streaks are observed. To fill, open the dispenser lid, fill to the 'max' mark, and ensure the lid (E) clicks shut. Any spilled rinse aid should be cleaned.
Loading the Dishwasher: Correct loading enhances washing, drying, and energy performance. Large food scraps should be removed to prevent filter clogging. The dishwasher has three baskets: lower for large/heavily soiled items, upper for small/delicate items, and a cutlery basket for forks, knives, and spoons. Tall, narrow items go in the middle racks. Long-stemmed glasses should lean against the basket or racks, not other dishes. Saucepan, cups, and glasses should be arranged upside down. Racks in the upper basket can be folded for larger items.
Folding Plate Support Rods: The lower basket has four folding plate support rods (1,2,3,4) that can be individually folded down by pressing handgrips (A) to create more space for larger items like saucepans and bowls.
Movable Cutlery Basket: The cutlery basket can slide over the tines to the left (A) and right (B) sides, allowing flexible placement of dishes.
Upper Basket Height Adjustment: The upper basket has a lifting mechanism, allowing height adjustment even when fully loaded. To lift to the "high" (A) position, pull upwards on one side, then the other. To lower (B), hold the basket lever on one side and carefully lower it without releasing the lever, ensuring both levers catch at the same height.
Operating the Dishwasher:
Hot Air Drying: The hot air drying system ensures efficient drying of dishes.
Unloading Dishwasher: Dishes should cool for 15-30 minutes after the programme ends. Leaving the door ajar for this period can improve drying results. Unload the lower rack first, then the upper, to prevent water drops from falling onto clean dishes.
Cleaning the Machine: Regular cleaning ensures a longer product life and reduces problems. Spray arms and filters should be cleaned at least once a week. Always unplug the appliance and turn off the water supply before cleaning. The door seal should be cleaned with neutral detergent and a damp cloth, and the control panel with a slightly damp cloth. Abrasive detergents should not be used. If the appliance will not be used for a long time, switch it off, turn off the water, and leave the door ajar.
Cleaning Filters and Spray Arms: For efficient operation, filters and spray arms must be checked regularly. The machine has three filters: main, coarse, and micro. To clean, turn the coarse and micro filter assembly anti-clockwise and lift it. Press the two tongues inwards to pull out the coarse filter, then pull off the main filter. Clean all three filters under running tap water with a brush. Reinsert the main filter, place the coarse filter into the micro filter (ensuring marks align), and turn the coarse filter clockwise until it clicks. The dishwasher must not be used without filters, as incorrect repositioning will lead to poor washing results.
Upper Spray Arm Cleaning: Turn the nut anti-clockwise to remove both the nut and the upper spray arm. Flush away food particles under running water. Reinsert the spray arm and screw the nut clockwise until it clicks.
Lower Spray Arm Cleaning: Remove the lower spray arm from its slot by releasing the catches and pulling it upwards. Flush away food particles under running water. Reinsert the spray arm into its original position.
Troubleshooting: A troubleshooting guide is provided for common issues. Before calling service, users should check if the machine is plugged in, the fuse is intact, the water mains supply is on, the machine is switched on, the door is closed firmly, filters are not clogged, and detergent/rinse aid/salt levels are sufficient. Solutions are provided for symptoms like spotting/filming/poor cleaning (e.g., increase detergent, clean spray arms, proper loading), small particles left on items (e.g., check water pressure, clean filters, use fresh detergent), dishes not dry (e.g., proper loading, add rinse aid), scratches on glassware (e.g., minimize detergent, use appropriate programme, rinse aid), detergent cakes in dispenser (e.g., ensure dispenser is dry, close cover tightly, use fresh detergent), chipping/breakage of dishes (e.g., careful loading), and odour in dishwasher (e.g., clean filter system).
| Door color | Not applicable |
|---|---|
| Built-in display | No |
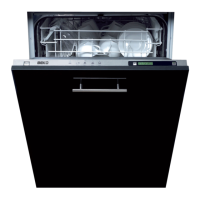
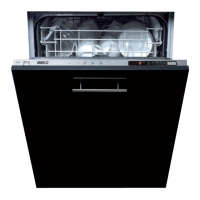
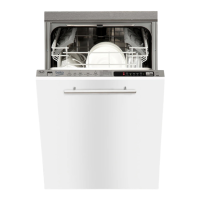
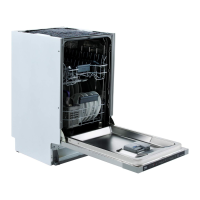
| Appliance placement | Fully built-in |
| Control panel color | Brown, Silver |
| Built-in water softener | Yes |
| Cutlery compartment type | Basket |
| Baskets adjustable placement | Upper |
| Maximum dish size (lower basket) | 250 mm |
| Maximum dish size (upper basket) | 310 mm |
| Cycle time | 165 min |
| Noise level | 49 dB |
| Delay start (max) | 9 h |
| Dishwashing programs | Eco, Intensive, Pre-wash, Quick |
| Number of place settings | 12 place settings |
| Number of washing programs | 5 |
| Number of temperature settings | 4 |
| Drying class | A |
| Annual water consumption | 3920 L |
| Annual energy consumption | 291 kWh |
| Connected load | 2200 W |
| AC input voltage | 220 - 240 V |
| AC input frequency | 50 Hz |
| Water consumption per cycle | 14 L |
| Energy consumption per cycle | 1.03 kWh |
| Depth | 550 mm |
|---|---|
| Width | 600 mm |
| Height | 820 mm |