5
IMPORTANT
INSTALLATION INSTRUCTIONS
1. The space in the room where the appliance is installed must not be smaller
than 10 cubic metres.
2. If possible avoid placing the appliance near cookers, radiators or in direct
sunlight as this will cause the compressor to run for long periods. If installed
next to a source of heat or refrigerator, maintain the following minimum side
clearances:
From Cookers 2" (50 mm)
From Radiators 12" (300 mm)
From Refrigerators or Freezers 1" (25 mm)
Allow a minimum of 60 mm (2.4 inches) between the top of the fridge and the
ceiling or the underside of a wall cupboard.
3. Make sure that sufficient room is provided around the appliance to ensure free
air circulation.
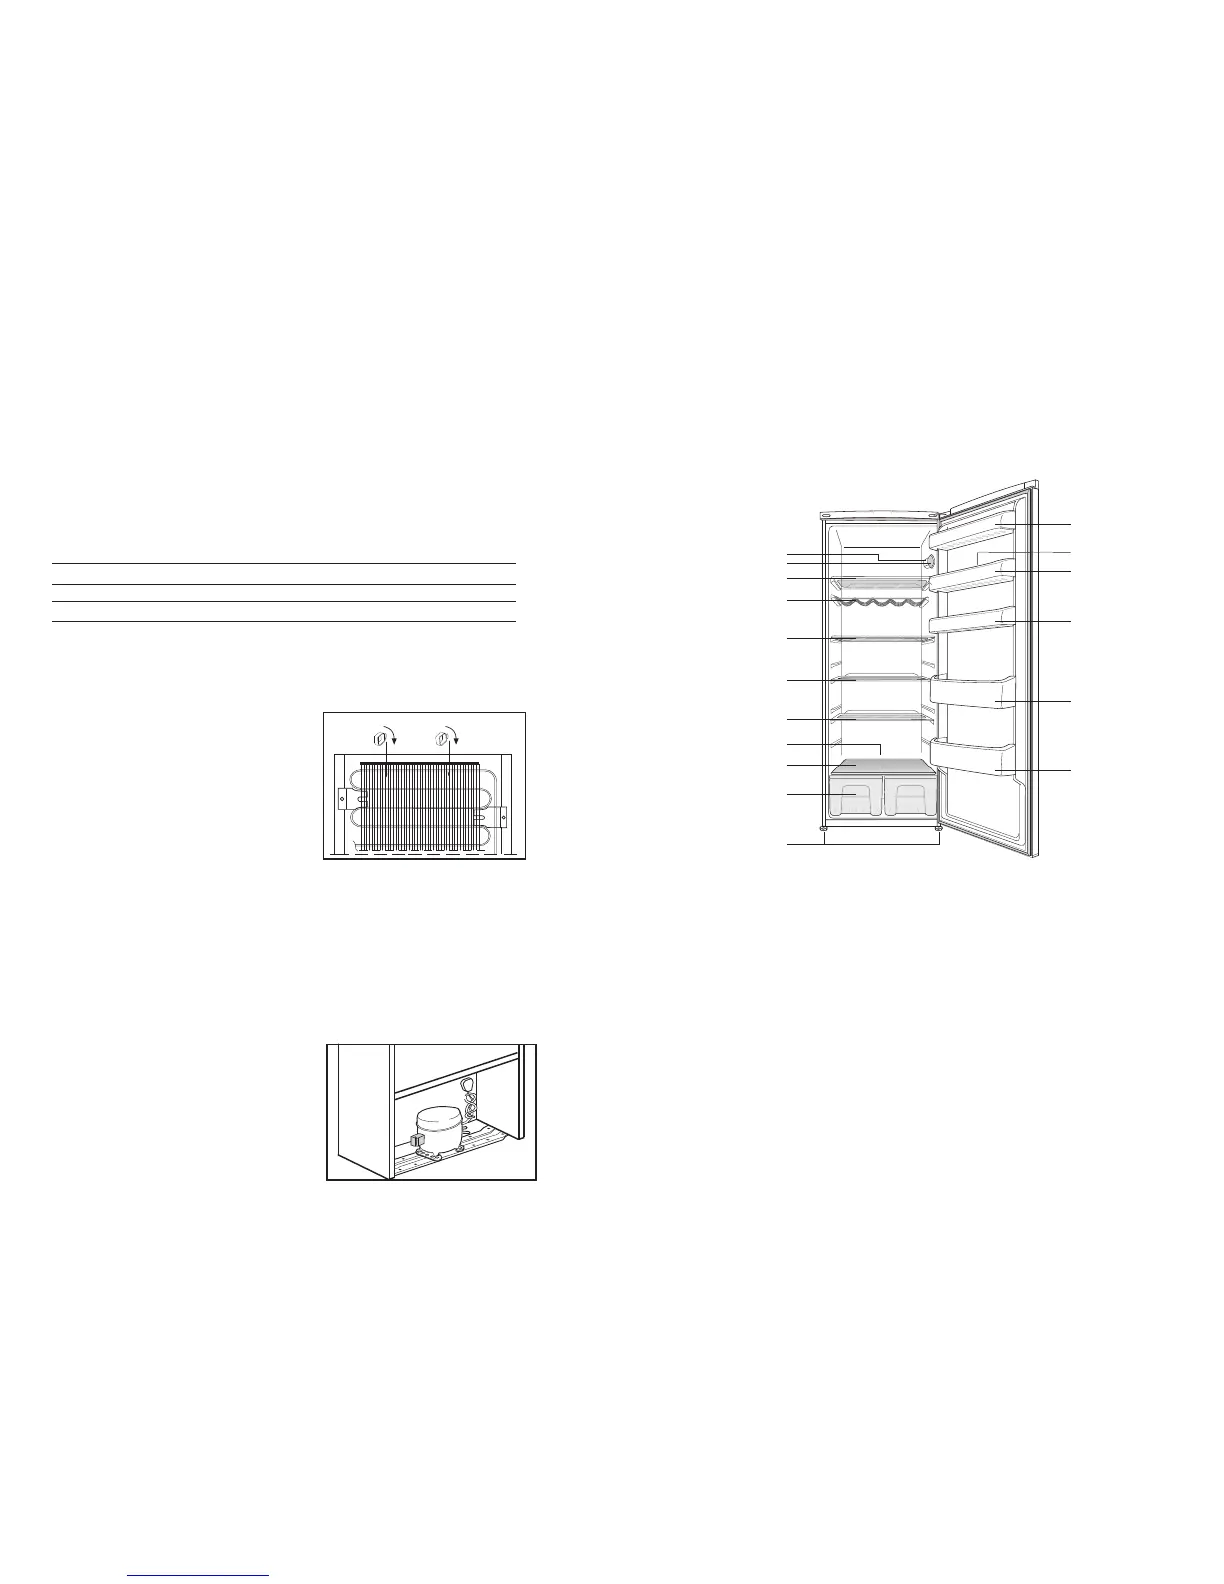
4. Fit the two plastic wall spacers supplied
with the appliance rotating 1/4 turn to
the condenser at the back of the
refrigerator (see diagram).
5. The appliance should be located on a
smooth surface. The two front feet can be
adjusted as required. To ensure that
your appliance is standing upright adjust
the two front feet by turning clockwise or anti-clockwise, until the product is in
firm contact with the floor. Correct adjustment of feet avoids excessive
vibration and noise.
6. Refer to "Cleaning and Care" section to prepare your appliance for use.
7. This appliance has been designed to operate in ambient temperatures
beetween +10 and +32 degrees C (50 and 90 degrees F).Therefore if the
appliance is installed in an unheated / cold room (E.g.: Conservatory /
annex / shed / garage etc.) then the appliance may not operate and as a result
the storage time of food may be reduced.
8. A special receptacle is supplied to store the mains plug during transit.
The receptacle is fixed at the back of the
cabinet, on the right hand side of the
compressor. (See diagram) Gently remove
the plug from the receptacle. Never pull
the mains cord, you may damage the
appliance. In the case of transportation,
ensure you locate the plug in the receptacle
provided to avoid transit damage.
6
GETTING TO KNOW YOUR LARDER FRIDGE
Interior light
Thermostat knob
Adjustable glass shelves
Wine rack
Defrost water collection - drain tube
Crisper cover
Salad crisper
Adjustable front feet
Door shelves
Egg tray
Bottle rack
1.
2.
3.
4.
5.
6.
7.
8.
9.
10.
11.
Arrangement Examples (See diagram).
1
3
3
3
3
7
8
9
9
9
11
11
2
10
6
5
4