14 AFTER SALES SUPPORT
support@tdcusainc.com 1800 599 8898
MODEL: 22096-21 PRODUCT CODE: 44964 05/2021
AFTER SALES SUPPORT 15
1800 599 8898 support@tdcusainc.com
MODEL: 22096-21 PRODUCT CODE: 44964 05/2021
USA USA
USAUSA
EE
E
E
E
E
E
E
E
E
E
E
E
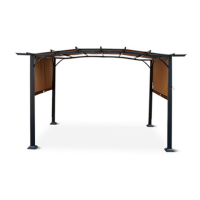
Fig. 13
STEP 7:
Place all five assembled Canopy Supports (E) across the top of the frame
so that they are resting against Crossbeams (C & D). For a consistent
look, place Canopy Supports (E) on the pergola frame so that the head
of bolts used to hold these parts together are all facing in the same
direction; see Figure 12. Insert two Bolts M6x65mm (EE) through both
ends of assembled Canopy Supports (E) and into Crossbeams (C & D);
see Figure 13.
Assembly Instructions
*Complete assembly by securely ghtening all screws aer
placing Canopy Supports (E) over pergola frame.
EE
(10) M6X65 mm Screw
G
1
N
N
G
1
G
2
G
2
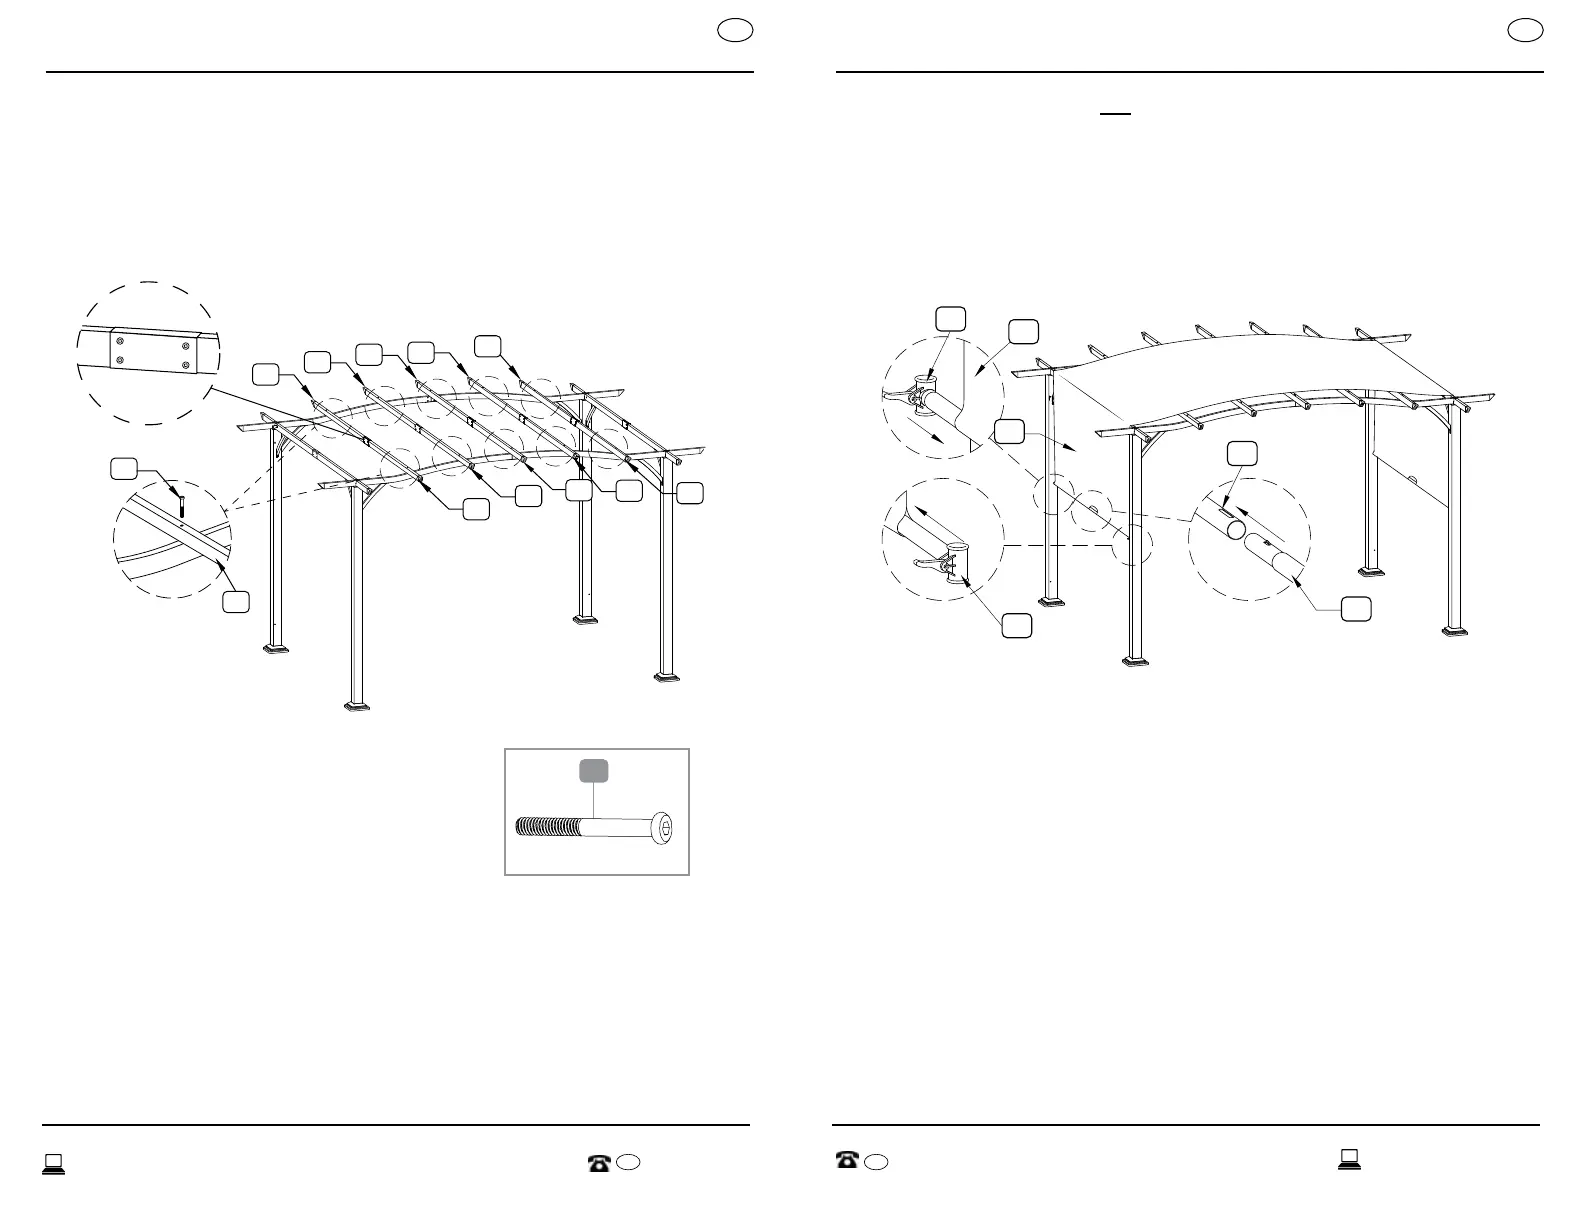
Fig. 16
Fig. 15
Fig. 14
STEP 8:
Place Canopy (N) over Canopy Supports (E). Please note that the canopy
tags should be facing inward once this step is complete.
Insert Canopy Weight Bar (G
1
) through sleeve found at either end of
Canopy (N); see Figure 14. Insert Canopy Weight Bar (G
2
) through
opposite side of sleeve found at ends of Canopy (N); see Figure 15.
Insert end of Canopy Weight Bar (G
2
) into the end of Canopy Weight
Bar (G
1
), so that they lock in place; see Figure 16. Please note that the
latches to these two parts should be facing outward.
Assembly Instructions
*Parts G1 and G2 are not s when connected, they are meant
be exible.