PAGE 3 OF 7
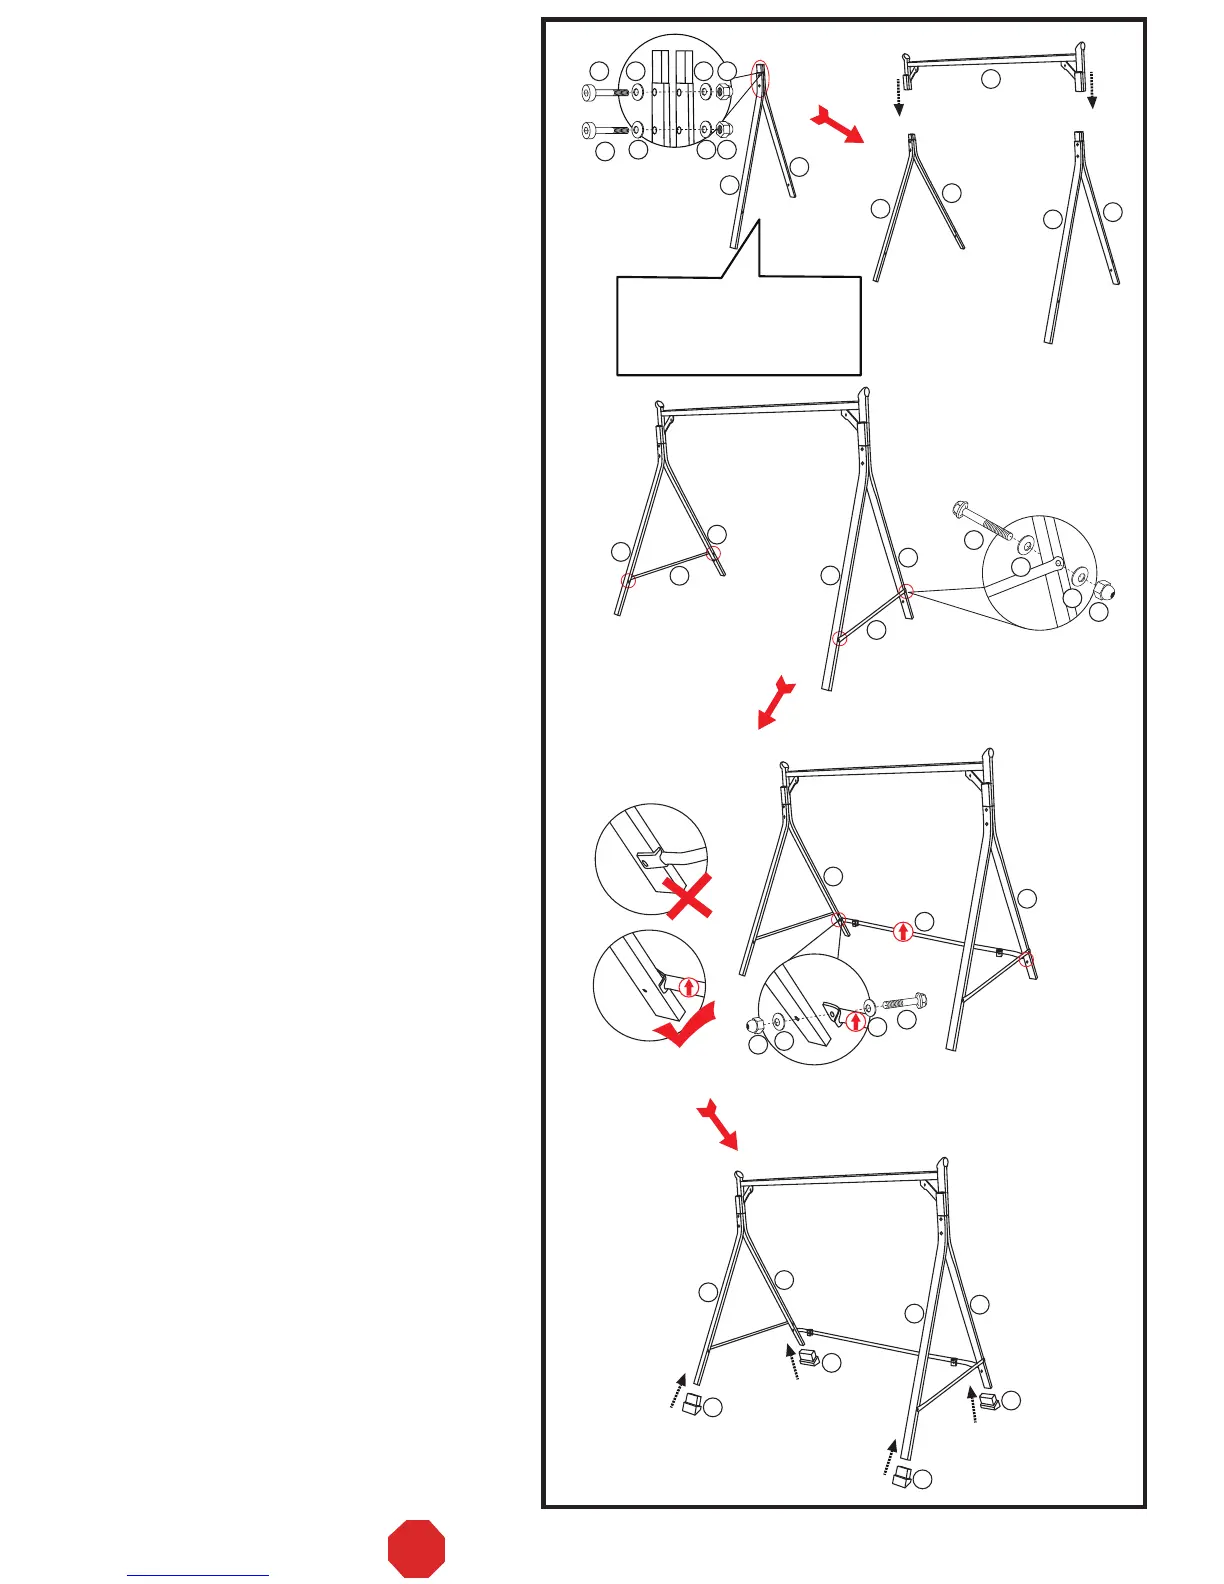
Step 3:
Fasten the lateral cross braces (#4) to upright
supports (#2 and #3) by using bolts (#16),
washers (#22), and plastic nuts (#26). Repeat
the same procedure for both sides.
See Fig. A – Step 3.
Step 5:
Insert the leg caps (#14) into all of the base feet.
See Fig. A – Step 5.
Step 1
Step 2
Step 3
Step 4
Step 5
Fig. A
Step 1:
Fasten the front and the rear upright supports
(#2 and #3) together at the top by using bolts
(#15), washers (#21), and plastic nuts (#25).
Repeat the same procedure for both sides.
Keep the bolts loose. See Fig. A – Step 1.
Do not tighten the bolts
after step 1. Fasten all
of the bolts after Fig A.
Step 2:
At both ends, insert the assembled upright
supports (#2 and #3) into the top cross beam
w/adjustable teeth (#1). Tighten all of the plastic
nuts and bolts now. See Fig. A – Step 2.
Step 4:
Fasten the rear cross brace (#5) to the rear
upright supports (#3) by using bolts (#17),
washers (#22), and plastic nuts (#26). Tighten
all of the nuts and bolts. See Fig. A – Step 4.
15 21
21
21
21
15
16
22
22
26
17
14
14
14
14
22
22
26
2
2
2
3
2
3
3
3
3
3
3
2
2
3
2
4
5
4
3
1
ASSEMBLY (Note: When fastening with nuts
and bolts, always use a washer (#21 or #22)
between the tube and the bolt or the tube and
the nut.)
25
25
Note:
The labelled arrow marks on the rear cross
brace (#5) should be facing upwards.
V-3
STOP DO NOT RETURN TO THE STORE!