PAGE 4 OF 7
Fig. C
34
27
28
27 28
1
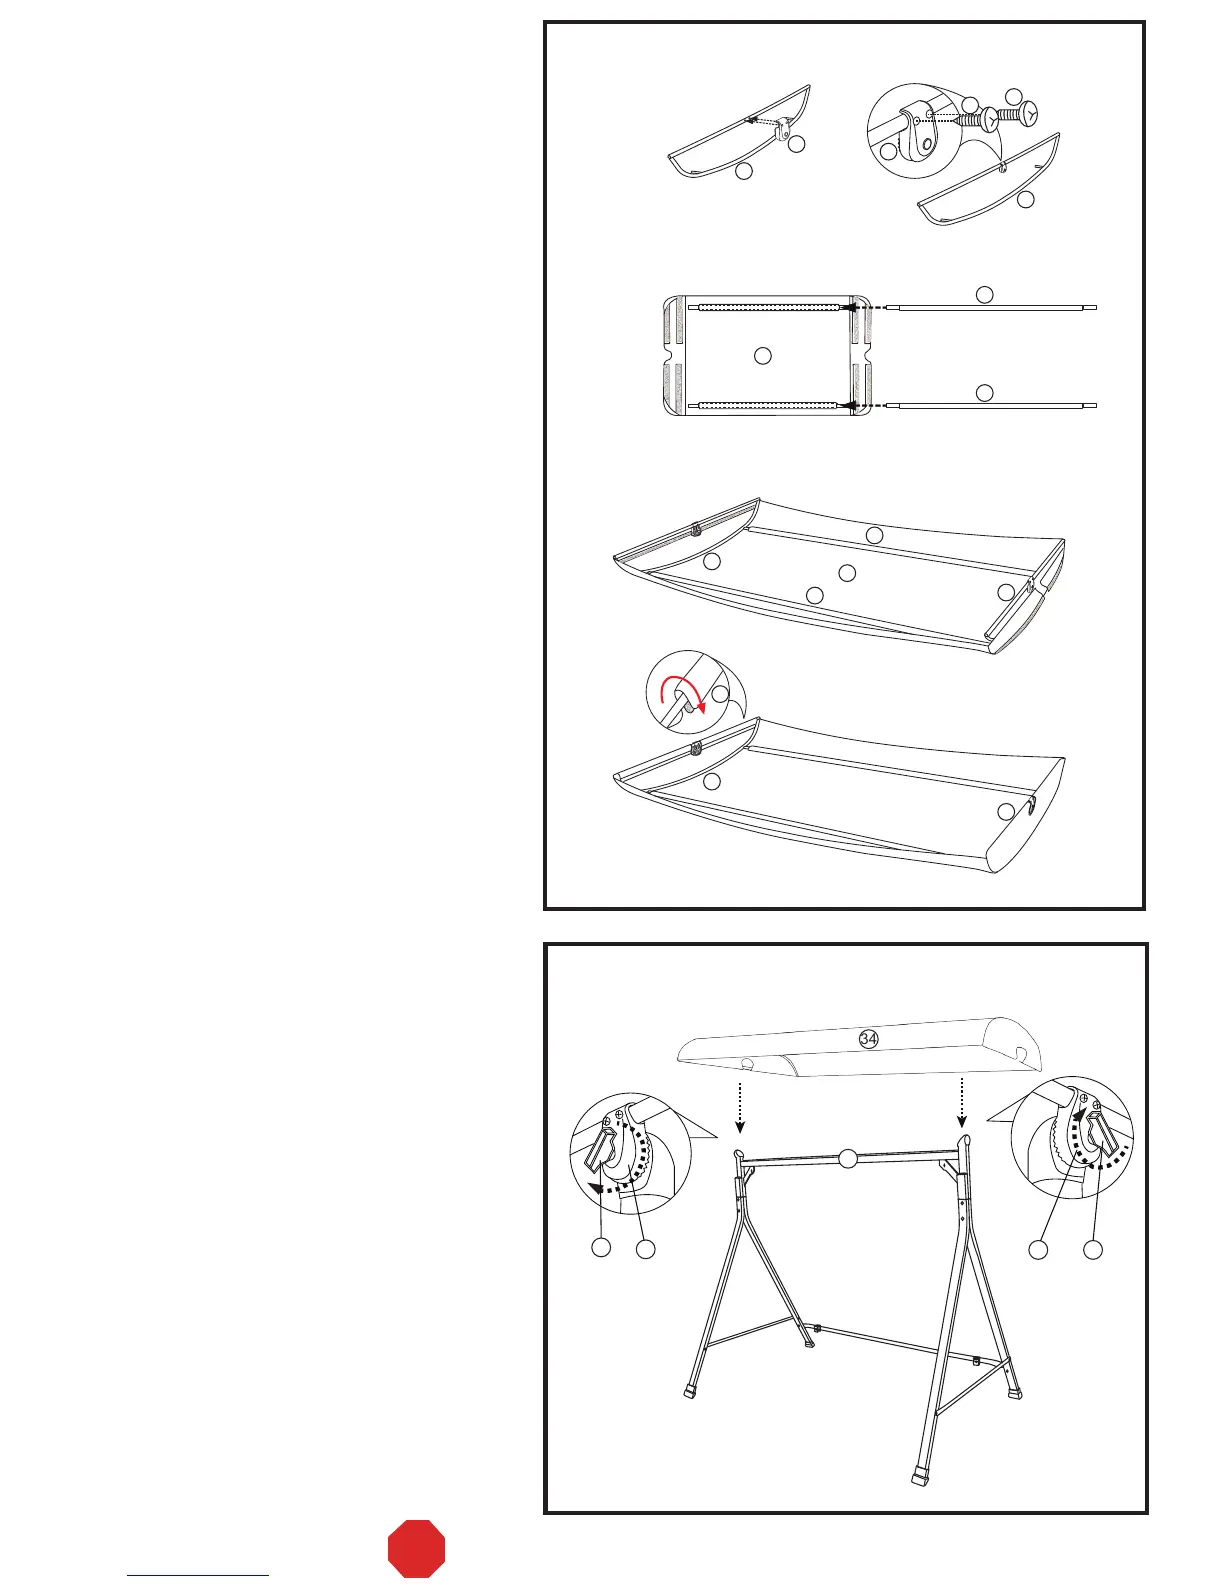
Step 10:
Fasten the canopy/frame connectors (#27) to
the adjustable teeth on the top cross beam w/
adjustable teeth (#1) by using a plastic screw
(#28). Repeat this procedure for both sides.
Fig. B
Step 1
Step 3
Step 5
Step 2
Step 6 :
Slide the canopy/frame connectors (#27) on to
the side canopy braces (#6). In the pre-drilled
holes, fasten them together by using screws
(#20). Make sure that the teeth on the
canopy/frame connectors are facing toward the
inside of the frame.
See Fig. B – Step 1 and Step 2.
Step 7:
Insert the front/rear canopy braces (#7) into
the sleeves of the canopy (#34) on both sides.
See Fig. B – Step 3.
Step 8:
Insert the tube ends of the front and rear canopy
braces (#7) into the side canopy braces (#6).
See Fig. B – Step 4.
Step 9:
Velcro the canopy (#34) to the side canopy
braces (#6). See Fig. B – Step 5.
27
27
20
20
6
6
6
6
7
34
Step 4
6
6
7
7
34
34
7
V-3
STOP DO NOT RETURN TO THE STORE!