PAGE 5 OF 7
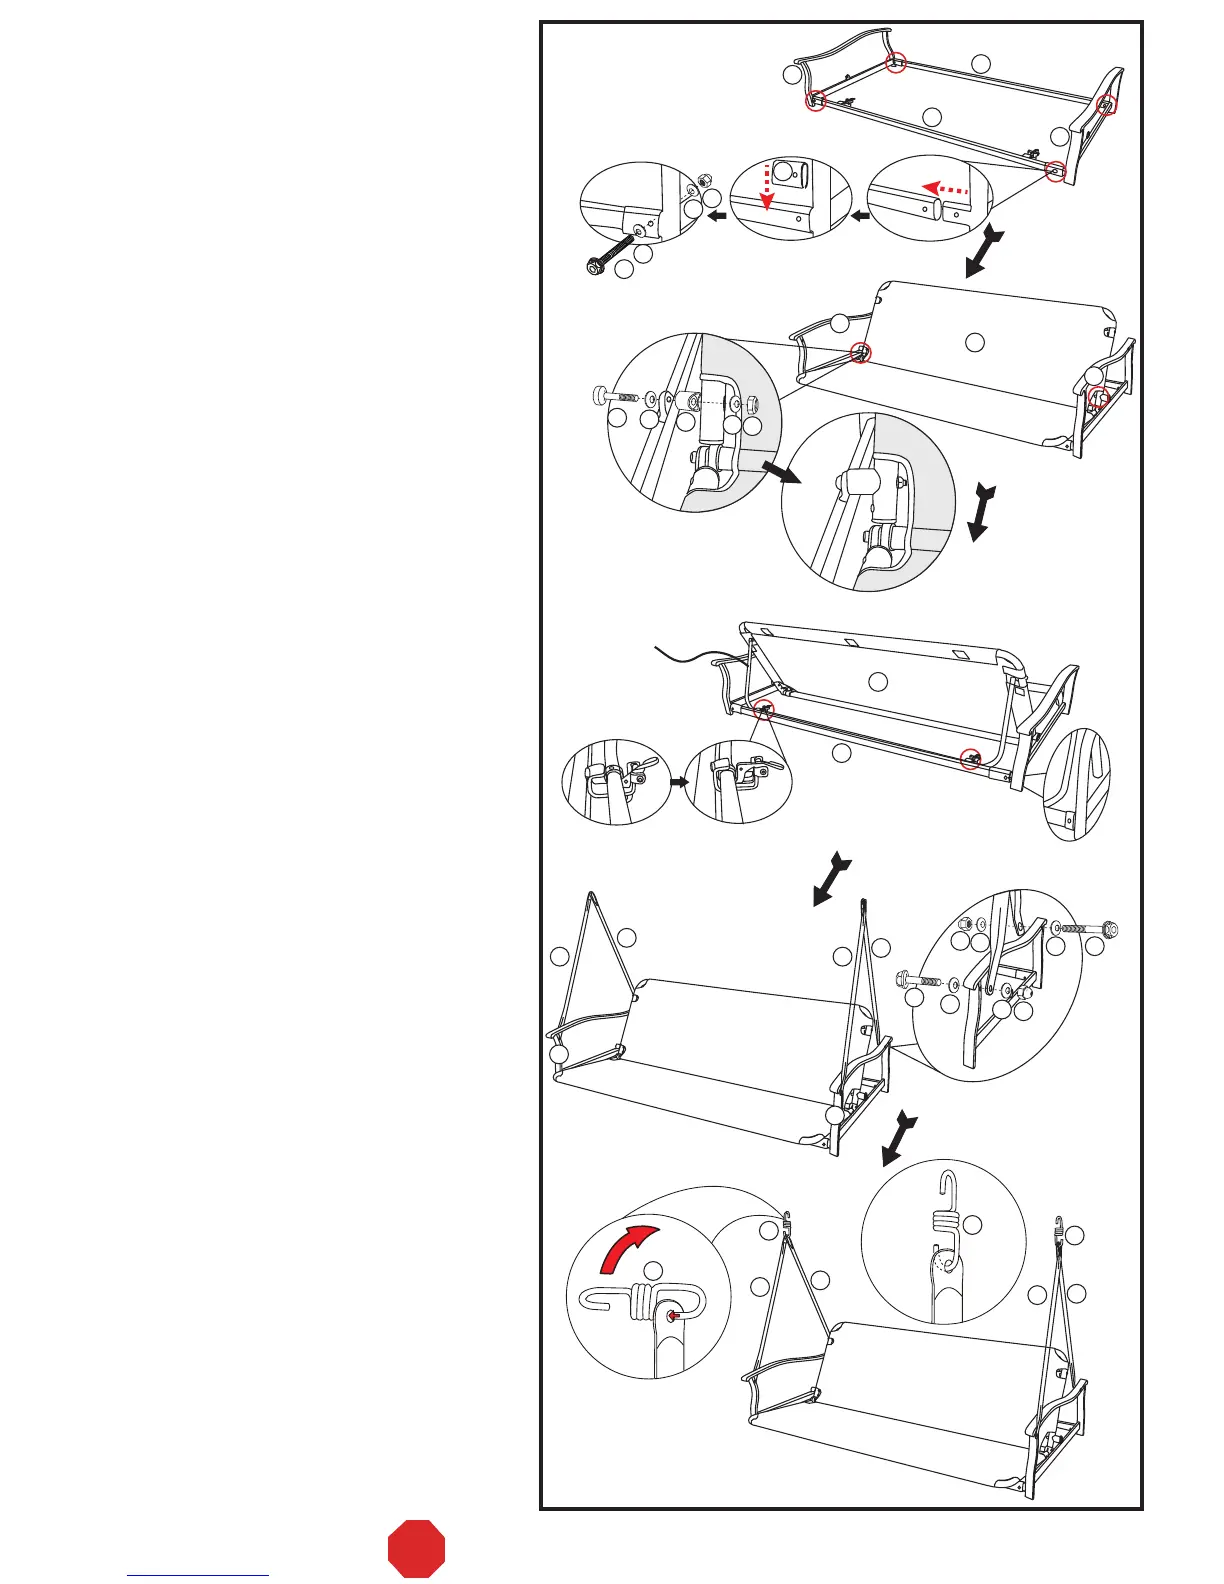
Step 11:
Insert seat arms (#8 and #9) into seat
supports (#10 and #11) and fasten them together
by using plastic joint covers (#29), bolts (#17),
washers (#22), and plastic nuts (#26).
See Fig. D – Step 1.
Note:
1. The label marked "back" on the right seat arm
(#8) should coincide with the label marked
"back" on the seat rear support (#11) to ensure
proper assembly.
2. The clip holder side of the seat rear support
(#11) must face toward the inside of the swing
and the opening side of the clip holder must
be facing upward.
Step 12:
Open the seat assembly (#12) and attach its
back to seat arms (#8 and #9) by using bolts
(#18), washers (#21), plastic washers (#30), and
jam nuts (#24). Repeat the same procedure for
both sides. See Fig. D – Step 2.
Step 13:
Make sure that the support brace on the seat
assembly (#12) is fully inserted into the clip
holders on the seat rear support (#11).
See Fig. D – Step 3.
Step 14:
Attach the swing arm tubes (#13) to seat arms
(#8 and #9) by using bolts (#19), washers (#22),
and plastic nuts (#26). Repeat the same
procedure for both sides. See Fig. D – Step 4.
Step 15:
Hook the suspension springs (#23) into the top
of both holes in the swing arm tubes (#13).
Repeat the same procedure for both sides.
See Fig. D – Step 5.
back
back
back
back
Fig. D
back
back
8
8
10
18
21
21
24
30
12
12
11
13
13
13
13
13
13
13
26
26
22
22
22
22
19
19
13
23
23
23
23
11
29
17
22
22
26
9
9
support brace
Step 1
Step 2
Step 3
Step 4
Step 5
back
back
8
9
V-3
STOP DO NOT RETURN TO THE STORE!