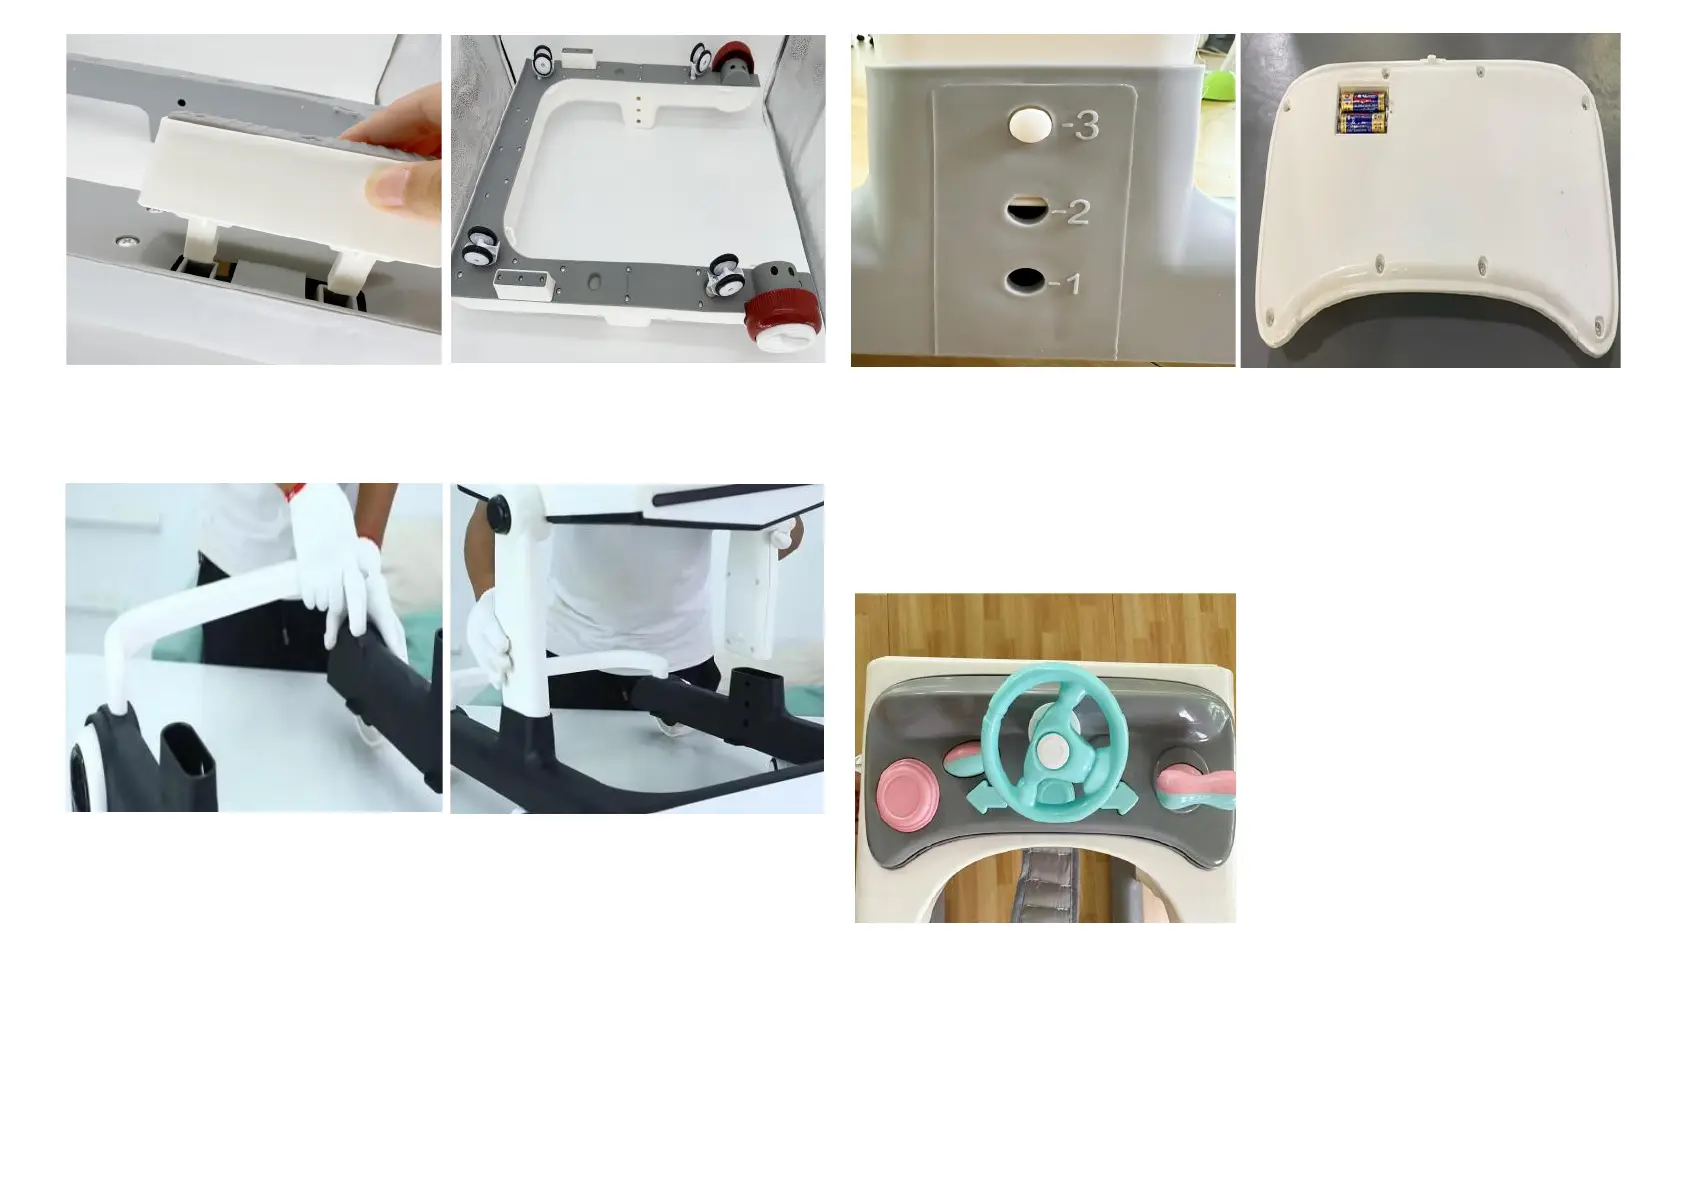
9. Placement of the step brakes.
10. After the installation is
complete, as shown in the figure.
11. Turn the base over and insert
the bumper strip into the two
holes at the end of the base.
12. Place the fully assembled
top tray into the slots on the
base, and press the button on
the inside of each leg so they
can be depressed as far as
required. Note the leg is
equipped with 3 height settings,
so the height can be adjusted to
best suit the child.
13. The button (set at the
highest level) and the 3 height
settings on the inner side of the
base.
14. Remove the cover from the
battery compartment at the
bottom of the music tray, insert
two 1.5V AA batteries, with
positive and negative terminals
properly aligned, and reattach
the cover with the screw.
15. The music panel can be
conveniently placed on the
dinner tray and removed when
necessary.
 Loading...