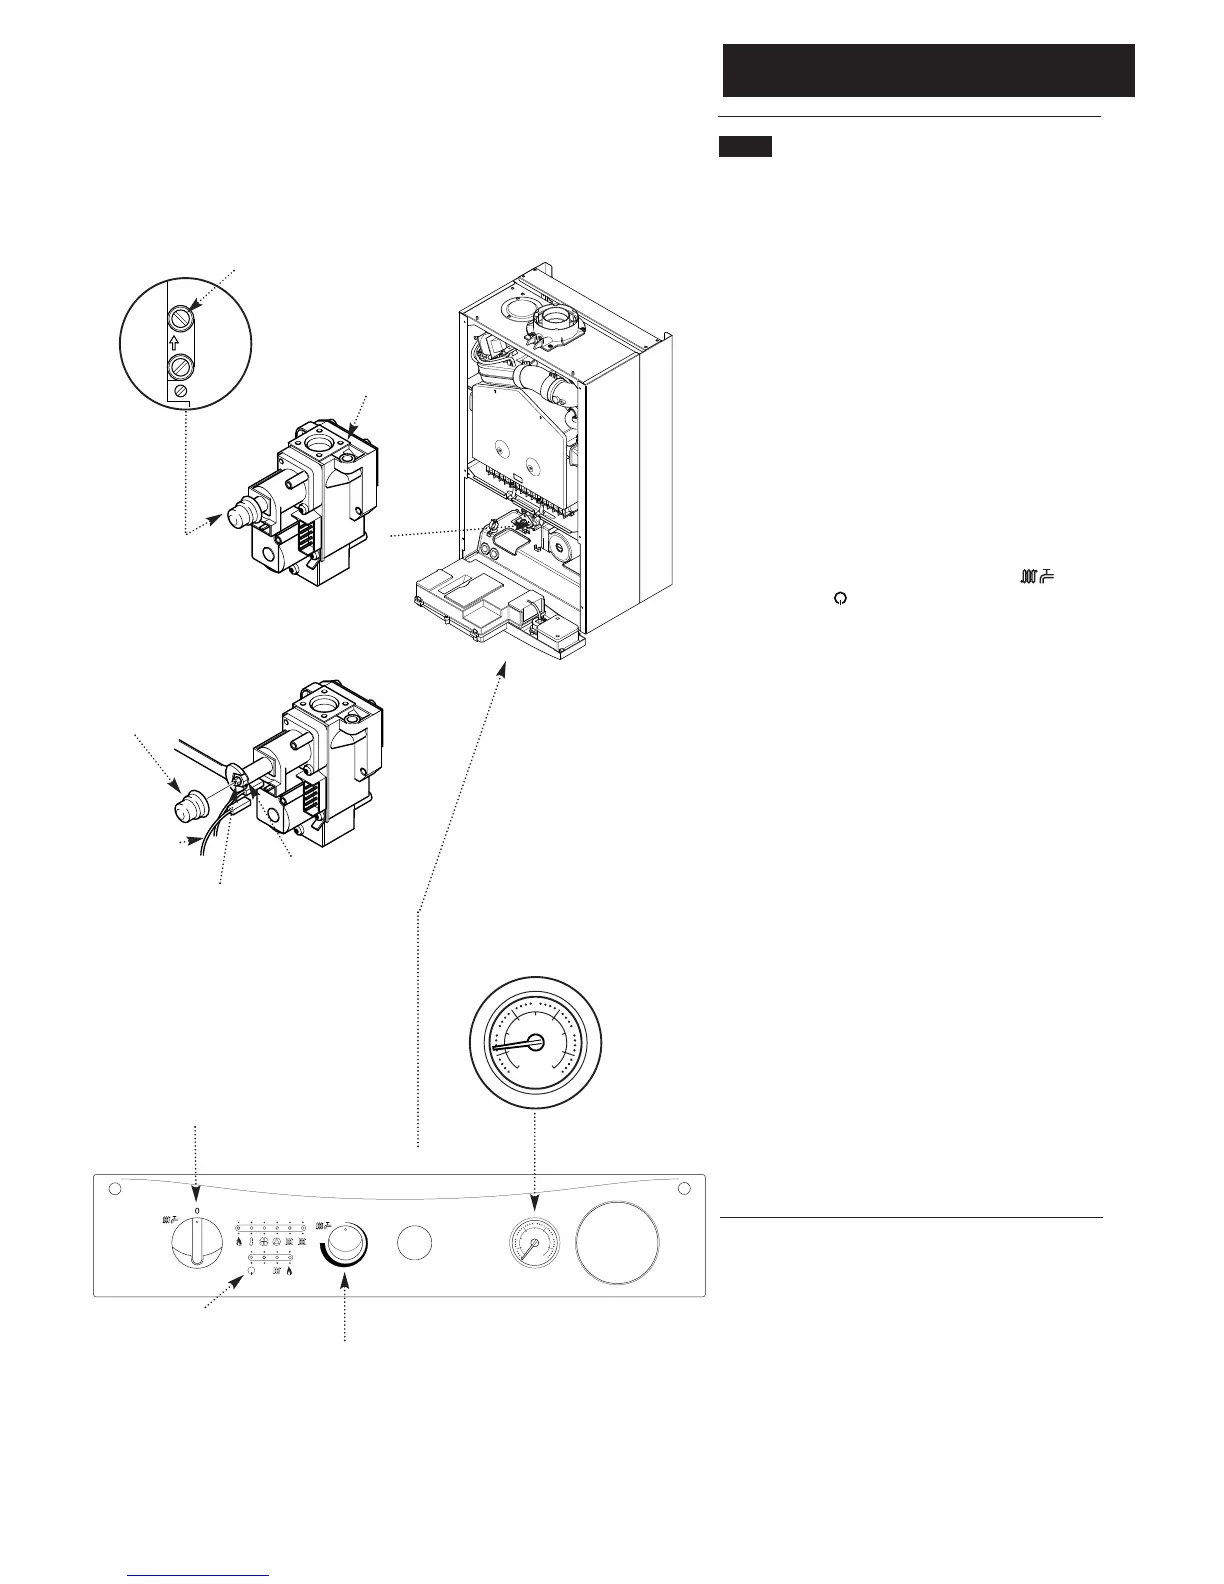
Pressure Test Point
Sealing Screw
Fig. 47
11.2 Checking the Burner Pressure
1. Turn on the gas and electrical supplies to the boiler and
ensure that all external controls are calling for heat.
2. Set the temperature control to maximum and the selector
switch to the Off position (Fig. 50).
3. Slacken the pressure test point sealing screw on the gas
valve and connect a pressure gauge (Fig. 47).
4. Undo the screws securing the inner door panel. Lift the
panel slightly to disengage it from the studs on top of the
case.
5. Turn the selector switch fully anticlockwise against the
spring pressure to the ‘Reset’ position and hold for 2 seconds
to reset the boiler.
6. Turn the selector switch to the On Position ( ). The
power On neon ( ) will illuminate (Fig. 50).
7. The pressure should be as quoted in Section 4.0 Technical
Data. If not, check that the gas supply pressure is correct
(Natural Gas 20mbar, and Propane 37mbar).
8. The pressure can be adjusted if required.
9. To check and set minimum pressure first remove one of
the modulator wires.
Adjusting the Pressure (Fig 48)
10. Remove the plastic protection cap from the pressure
adjustment nuts on the valve.
11. The smaller nut (5mm) adjusts minimum pressure and
the larger nut (8mm) maximum pressure.
12. Using a suitable spanner adjust the relevant nut until the
correct pressure is achieved.
13. Once the pressure has been set turn the boiler off and
disconnect the pressure gauge.
14. Tighten the pressure test screw and refit the modulator
to the valve. Reassemble in reverse order.
Selector Switch
Temperature Control