3
Bracket Varies
Note: Most Brackets
Have Specific Openings
for Routing the Harness
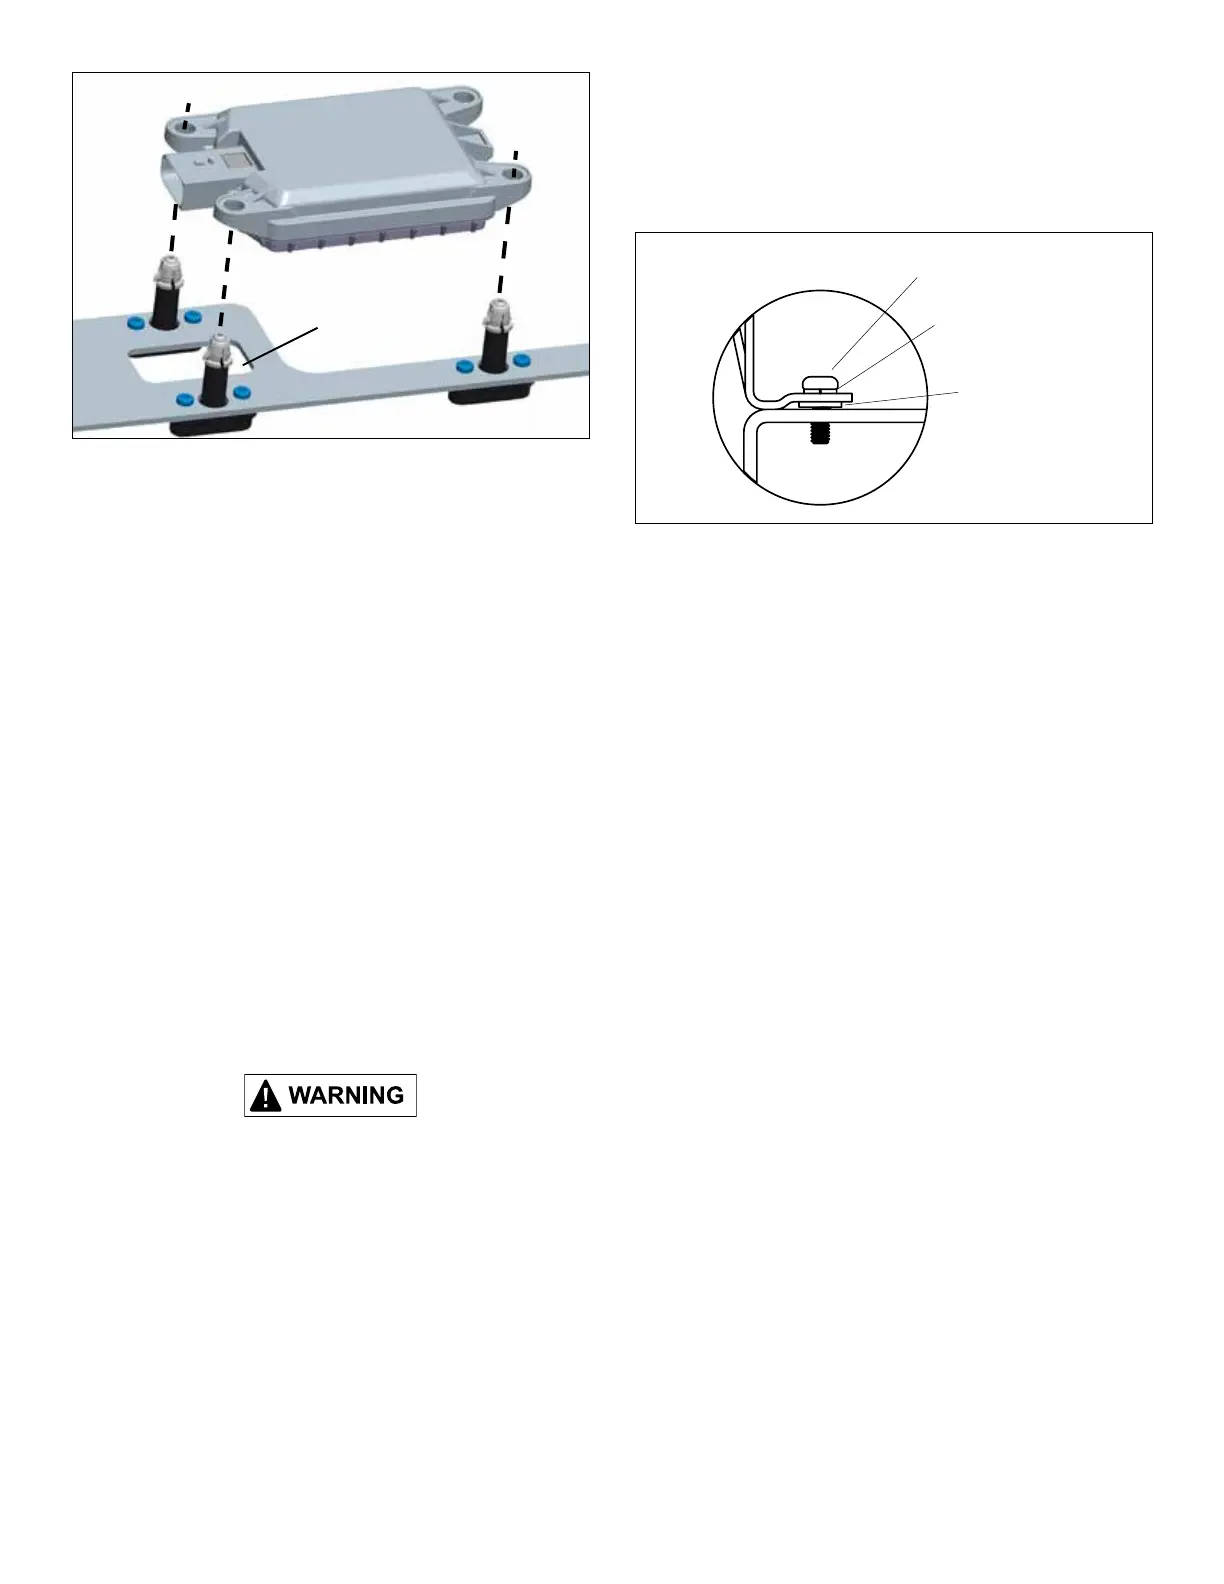
FIGURE 5 - RADAR SENSOR INSTALLATION (EXPLODED
VIEW)
12. See Figure 5. With the connector pointing to the
passenger side of the vehicle when installed, align the
holes in the radar sensor with the adjusters. Install the
new radar onto the adjusters by pressing, by hand, with
moderate force, on the front surface of the radar. Verify
that all three clips at the top of the adjusters have fully
engaged into the radar.
Install the Harness
13. Insert the connector into the Bendix
®
FLR20
™
radar.
14. Slide the orange Connector Position Assurance (CPA) tab
to the right, making sure the connector is fully engaged.
15.Routetheharnessthroughthebackofthebracket,rmly
securing as necessary.
16. Install the Radar Assembly onto the vehicle by using
two (2) bolts removed during disassembly. Torque to
vehicleOEspecications.
17. ALIGN THE RADAR, per the Appendix on pages 4-6
or refer to Bendix Service Data Sheet, SD-61-4960,
available for download or order from www.bendix.com.
Remove the steel clip or plate before returning the
vehicle to service. When removing stretch-release
adhesive strips, be sure to pull directly down on the tab
provided and clean any adhesive residue that may be
present on the sensor.
18. For installations where the bracket has a cover, insert
the supplied mounting screws through their respective
washers. These are then inserted through the cover
and retained by nylon washers on the other side. See
Figure 6. Typically the radar will be aligned before the
cover is installed.
Mounting Screw
Nylon
Retaining
Washer
Washer
FIGURE 6 - NYLON WASHER INSTALLATION (WHERE
NEEDED)
Using a Phillips screwdriver, attach the cover to the
bracket using the two screws.
19. Re-install the vehicle's bumper if it was necessary
to remove it for this installation, following the OEM's
approved practices. Check for radar clearance as shown
intheServiceDataSheet.Somebumpermodication
may be necessary.
20. Return the radar sensor removed from the vehicle,
for core return credit using the Bendix Upgrade Tag
(BW1829) supplied in the kit. The radar must be carefully
packaged using suitable materials in a separate container
from other core returns.
Bendix Technical Assistance Team
For direct telephone technical support, call the Bendix Tech
Team at:
1-800-AIR-BRAKE (1-800-247-2725), option 2. Tech Team
members are available Monday through Friday, 8:00 a.m. to
6:00 p.m. ET.
Or, if you prefer, e-mail them at: techteam@bendix.com.
Please have the following information ready when you
contact the Bendix Tech Team: Bendix product model
number;partnumberandconguration;vehiclemakeand
model.
 Loading...