You should check the operation by a common servo. Adjust the min. and max. travel range with
the potentiometers P1 and P2 in comparison to the travel at a common joystick channel(f.e.Ch1).
The installation of ANY encoder in your transmitter is on your own risk
Proper functionality is not guaranteed in ALL transmitter brands / types
After installation the proper operation and range of the radio MUST be checked
3.1.2. Teaching the sound unit for encoder control
1) Power transmitter and receiver. LED blinks fast -> normal mode
Bring all joysticks to neutral position. Model must not move.
2) Press the LEARN button at the TBS Mini until one beep plays -> LED cont. lit.
At this moment all neutral / idle positions are stored.
3) Move throttle stick to your desired acceleration point (throttle stick position where
idle sound is left and acceleration sound is started) and push the encoder trigger
button ! -> A short sequence of acceleration is played
4) Move throttle stick to full speed and push the encoder trigger button again
→ A short sequence of full speed is played.
5) Bring the encoder rotary switch to its first position and push the encoder button
→ Engine start/stop is stored to this position
Hint: The rotary switch has no mechanical limits. You can define any position as the
“first” one.
6) Bring the encoder rotary switch to the next position, wait about 2s and push the
encoder button again.
-> Reeving up the engine is stored to this position
7) Repeat step 6 until all 12 rotary switch positions are stored
8) After teaching all positions the sound unit beeps 3x and is back in normal operation
mode.
Hint:
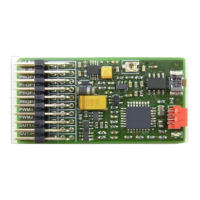
If you are using the resistor network shown above instead of the encoder, each rotary switch
position is represented by one of the push buttons.
TBS Mini V2, 11/2018 www.benedini.de Page 8 of 13