- Reactivating codes with a determined rst gure
- Reactivating all the codes
- Changing the programming password.
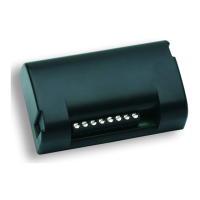
Note: In basic mode codes are inserted using the PGM key on the receiver.
In advanced mode they are inserted by means of the numerical keypad using an access password,
without any need of access to the receiver.
Conguring the channels
In both modes the channels (relays) can have two different operating modes:
1 – timed contact: the relay changes state for a time that may be set from 1 to 6000 seconds.
2 - bistable contact: the relay changes state until a new code is inserted.
To change the mode:
1 Press the PGM key on the receiver 3 times. The LED starts to blink with a frequency of 3 blinks
followed by a pause.
2 On the keypad, select the channel (relay) that you intend to congure (1 for channel 1, 2 for channel
2).
3 Press the conrmation key ‚ ù ·
4 Insert the activation time in seconds, bearing in mind that:
- typing “0” activates bistable mode
- typing a number from “1” to “6000” activates timed mode.
The factory setting considers a timing of 1 second.
3 Press the conrmation key ‚ ù · ), the buzzer gives three beeps to conrm that programming has
been completed.
1 - BASIC MODE
1.1 – Storing codes
1 Press the PGM key on the receiver once. The LED starts to blink.
2 Type the code to be stored on the keypad (minimum 4, maximum 9 gures); each time a key is
pressed the buzzer gives a sound to conrm typing.
3 Press the conrmation key ‚ ù ·, the buzzer gives a prolonged sound.
4 On the keypad, select the channel (relay) that you intend to associate with the code, bearing in
mind that:
- typing “1” activates channel 1.
- typing “2” activates channel 2.
- typing “3” activates both channels.
3 Press the conrmation key ‚ ù ·, the buzzer gives three beeps.
1.2 – Erasing a code
1 Press the PGM key on the receiver twice. The LED starts to blink with a frequency of 2 blinks
followed by a pause.
2 On the keypad, type the code to be erased; each time a key is pressed the buzzer gives a sound to
conrm typing.
3 Press the conrmation key ‚ ù ·, the buzzer gives three beeps.
1.3 - Completely erasing the memory
1 Press and hold down the PGM key for 15s. The red and green LEDs which were originally off blink
alternately; when they stop blinking, the memory is completely erased.
2 After erasure the receiver returns to the default settings: 1s timed output and access password to
advanced mode 123456.
2 – ADVANCED MODE
2.1 – Customisation of the programming Password.
1 Type in the factory-set password “123456” and press ‚ ù ·
2 Type 6 and press ‚ ù ·
3 Type in the new personal password (6 gures) and press ‚ ù ·
6

 Loading...