02/ 2019
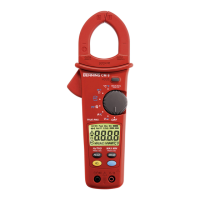
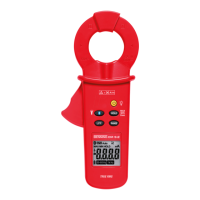
BENNING CM 8
20
8.7 Continuity tests with buzzer
- Select the function ( ) by means of the rotary switch 8 of the
BENNING CM 8.
- Connect the black safety measuring lead to the COM jack J of the
BENNING CM 8.
- Connect the red safety measuring lead to the jack for V, Ω 9 of the
BENNING CM 8.
- Bring the safety measuring leads into contact with the measuring points. If
the line resistance between the COM jack J and the jack for V, Ω 9 falls
below 30 Ω, the integrated buzzer of the BENNING CM 8 sounds.
See figure 5: Resistance measurement/ diode test/
continuity test with buzzer
8.8 Effective power measurements/ power factor measurements
- Select the function (W/ PF) by means of the rotary switch 8 of the
BENNING CM 8.
- Connect the black safety measuring lead to the COM jack J of the
BENNING CM 8.
- Connect the red safety measuring lead to the jack for V and Ω 9 of the
BENNING CM 8.
- Connect the black safety measuring lead to the neutral conductor (N) of the
supplying mains.
- Connect the red safety measuring lead to the phase (L1) of the supplying mains.
- Operate the opening lever K and clamp the single-wire live conductor cen-
trally by means of the clamp M of the BENNING CM 8. The „+“ symbol on
the clamp must be directed towards the energy source.
- By means of the blue key 5, it is possible to switch over from effective
power (W) to power factor (PF).
Note on effective power:
If the energy flow changes its direction (from the load in direction of the energy
source), the „minus“ symbol 2 is displayed.
Note on power factor:
In case of correct polarity and if no sign is displayed, there is an inductive load.
If the „minus“ sign 2 is dislayed, there is a capacitive load.
General note:
For voltages below 0.5 V
eff
or currents below 0.5 A
eff
, nothing is displayed. Over-
flow indication (0.L) at > 600 V
eff
; > 620 A
eff
; > 372 kW. Please observe figures 6b
and 6c for measurements in the three-phase supply network.
See figure 6a: single-phase load
See figure 6b: three-phase load without neutral conductor (N)
See figure 6c: three-phase load with neutral conductor (N)
8.9 Phase sequence indication
- Select the function „ “ by means of the rotary switch 8 of the
BENNING CM 8.
- Connect the black safety measuring lead to the COM jack J of the
BENNING CM 8.
- Connect the red safety measuring lead to the jack for V and Ω 9 of the
BENNING CM 8.
- Connect the black safety measuring lead to the assumed phase L3.
- Connect the red safety measuring lead to the assumed phase L1. With nor-
mal function, „L1“ is displayed for approx. 3 seconds.
*1
- If „L2“ is displayed, the buzzer sounds twice. In this case, immediately bring
the red safety measuring lead into contact with the assumed phase L2 while
„L2“ still is indicated.
- When the „L2“ indication disappears, the test result is displayed as follows:
a) „1,2,3“ indication = clockwise phase sequence, L1 in front of L2
b) „3,2,1“ indication = anti-clockwise phase sequence, L2 in front of L1
c) „----“ indication = measurement cannot be evaluated
d) „Lo V“ indication = One of the safety measuring leads has not been
contacted during measurement.
- Press the blue key 5 to repeat the measurement.
*1
Note:
If the voltage is < 30 V, „Lo V“ is displayed and if the voltage is > 600 V, „O.L
V“ is displayed. If the frequency is not within the range from 50 Hz or 60 Hz,
„out.F“ is displayed.
The three-phase network system does not have to be earthed!
See figure 7: Phase sequence indication
8.10
Temperature measurements
- Select the function (°C/ °F) by means of the rotary switch 8 of the
BENNING CM 8.
- Select the desired indication mode °C or °F by means of the blue key 5 of
 Loading...