Do you have a question about the BenQ GW2406Z and is the answer not in the manual?
This document serves as the user manual for the BenQ GW2406Z LCD Monitor, providing comprehensive instructions for its installation, operation, maintenance, and troubleshooting. The monitor is designed to offer a high-quality visual experience with user-friendly features and an emphasis on environmental responsibility.
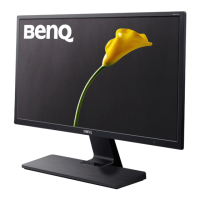
The BenQ GW2406Z is an LCD monitor designed for general computing tasks, offering a clear and vibrant display for various applications, from office work to multimedia consumption. It supports multiple input sources, allowing connectivity with a wide range of devices, including desktop computers, laptops, and other digital output devices. The monitor is equipped with a control panel that provides access to various display settings, enabling users to customize their viewing experience. Key functions include adjusting luminance, contrast, and color temperature, as well as selecting different picture modes optimized for specific content types like text, internet browsing, gaming, and movies. The monitor also features a "Blue Light Reducer" to minimize eye strain during prolonged use.
The BenQ GW2406Z monitor is designed for ease of use from initial setup to daily operation.
The manual provides detailed steps for attaching the monitor stand, which involves protecting the screen, aligning the stand base with the arm, tightening a screw, and then carefully lifting and positioning the monitor. For users who prefer wall mounting, the monitor is VESA standard compatible (100mm pattern), and instructions are provided for removing the stand and installing a wall mount bracket (purchased separately). Precautions are highlighted, such as ensuring the wall material and bracket can support the monitor's weight and disconnecting cables before installation.
The monitor offers multiple input options, including AC power, DP (DisplayPort) socket, HDMI socket, D-Sub socket, and an Audio Line Out. Users are instructed to turn off both the PC and the monitor before connecting cables to protect the equipment. The manual guides users through connecting DP, HDMI, and D-Sub cables to their respective ports on the monitor and computer. An audio line out is also available for connecting headphones or external speakers.
To optimize performance, users are advised to install the custom BenQ LCD Monitor driver software provided on the BenQ LCD Monitor CD-ROM. The manual covers two scenarios: installing the monitor on a new computer and upgrading the monitor on an existing computer. For new installations, Windows' "Found New Hardware Wizard" will guide the process, prompting users to select the appropriate driver from the CD. For existing systems, detailed steps are provided for Windows 10, Windows 8 (8.1), and Windows 7, involving navigating through Display Properties, Device Manager, and updating the driver by browsing the CD-ROM. Administrative privileges may be required for driver installation.
The monitor's control panel consists of five buttons: Source / Auto / Exit, Blue Light Reducer / -, Volume / +, Menu / Enter, and Power.
The OSD (On-Screen Display) menu is accessed via the Menu button. Users can navigate through options using the - and + buttons, confirm selections with the Menu button, and adjust settings. The AUTO button allows exiting the OSD. An OSD Lock feature is also available, which can be activated or deactivated by holding the MENU button while the monitor is off and then pressing the Power button.
The OSD menu offers extensive customization options:
The power LED indicates the monitor's status: blue for powered on and orange for standby mode.
Proper care and cleaning are essential for the longevity and optimal performance of the BenQ GW2406Z monitor.
Users are instructed to always unplug the monitor from the wall outlet before cleaning. The LCD monitor surface should be cleaned with a lint-free, non-abrasive cloth. Soft-detergents can be used for stains, but strong-detergents should be avoided as they can cauterize the product cabinet. It is crucial to prevent any detergent from leaking into the product, and the cleaning cloth should not be too rough to avoid scratching the screen.
The cabinet features slots and openings on the back or top for ventilation, which must not be blocked or covered. The monitor should not be placed near or over a radiator or heat source, or in a built-in installation without proper ventilation.
Users are warned against pushing objects or spilling liquid of any kind into the product. Servicing should only be performed by qualified personnel, as opening covers may expose users to dangerous voltages. In case of misuse, dropping, or mishandling, professional servicing is required. The AC plug isolates the equipment from the AC supply, and the power supply cord acts as a disconnect device, so the socket outlet should be easily accessible. The monitor should be operated from the specified power type, and an approved power cord (H03VV-F or H05VV-F, 2G or 3G, 0.75mm²) must be used.
The manual includes a comprehensive troubleshooting section to address common issues:
For persistent problems, users are advised to contact their place of purchase or visit the BenQ website for support. The manual also emphasizes keeping the product and accessories out of reach of small children and retaining the original packaging for future transport.
| Screen Size | 24 inches |
|---|---|
| Resolution | 1920 x 1080 (Full HD) |
| Panel Type | IPS |
| Aspect Ratio | 16:9 |
| Brightness | 250 cd/m² |
| Contrast Ratio | 1000:1 |
| Dynamic Contrast Ratio | 20, 000, 000:1 |
| Refresh Rate | 60 Hz |
| Viewing Angle (Horizontal/Vertical) | 178° / 178° |
| VESA Mount | 100 x 100 mm |
| Color Gamut | 72% NTSC |
| Connectivity | HDMI, DVI, VGA |
| Built-in Speakers | Yes |
| Power Consumption | 25W (typical) |