Introduction 11
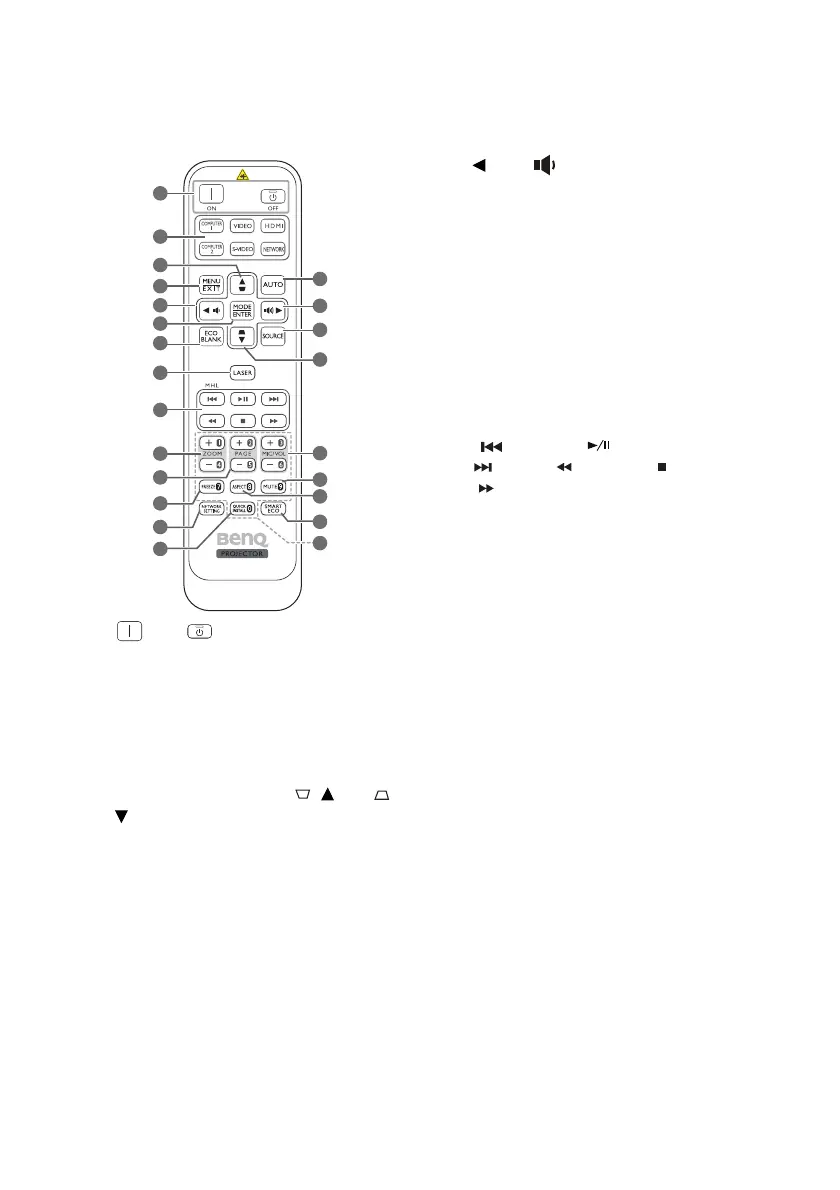
Remote control
1. ON/ OFF
Toggles the projector between standby
mode and on.
2. Source selection buttons (COMPUTER
1, COMPUTER 2, VIDEO, S-VIDEO,
HDMI, NETWORK
)
Selects an input source for display.
3. Keystone/Arrow keys ( / Up, /
Down)
Manually corrects distorted images resulting
from an angled projection.
4. MENU/EXIT
Turns on the On-Screen Display (OSD)
menu. Goes back to previous OSD menu,
exits and saves menu settings.
5. Left/
Decreases the projector volume.
6. MODE/ENTER
Selects an available picture setup mode.
Activates the selected On-Screen
Display (OSD) menu item.
7. ECO BLANK
Used to hide the screen picture.
8. LASER
Emits visible laser pointer light for
presentation purposes.
9. MHL control buttons
(Previous, Play/Pause,
Next, Rewind, Stop,
Fast-forward)
Goes to the previous file/Plays/Pauses/
Goes to the next file/Rewinds/Stops/
Fast-forwards during media playback.
Only available when controlling your
smart device in MHL mode.
10. ZOOM+/ZOOM-
Magnifies or reduces the projected
picture size.
11. PAGE+/PAGE-
Operate your display software program
(on a connected PC) which responds to
page up/down commands (like Microsoft
PowerPoint).
12. FREEZE
Freezes the projected image.
13. NETWORK SETTING
Displays the Network Settings OSD
menu.
14. QUICK INSTALL
Quickly selects several functions to
adjust the projected image and displays
the test pattern.
15. AUTO
Automatically determines the best
picture timings for the displayed image.
2
3
4
8
9
11
12
13
14
10
6
5
7
1
15
19
20
21
22
16
17
3
18