2English
Desk Clamp
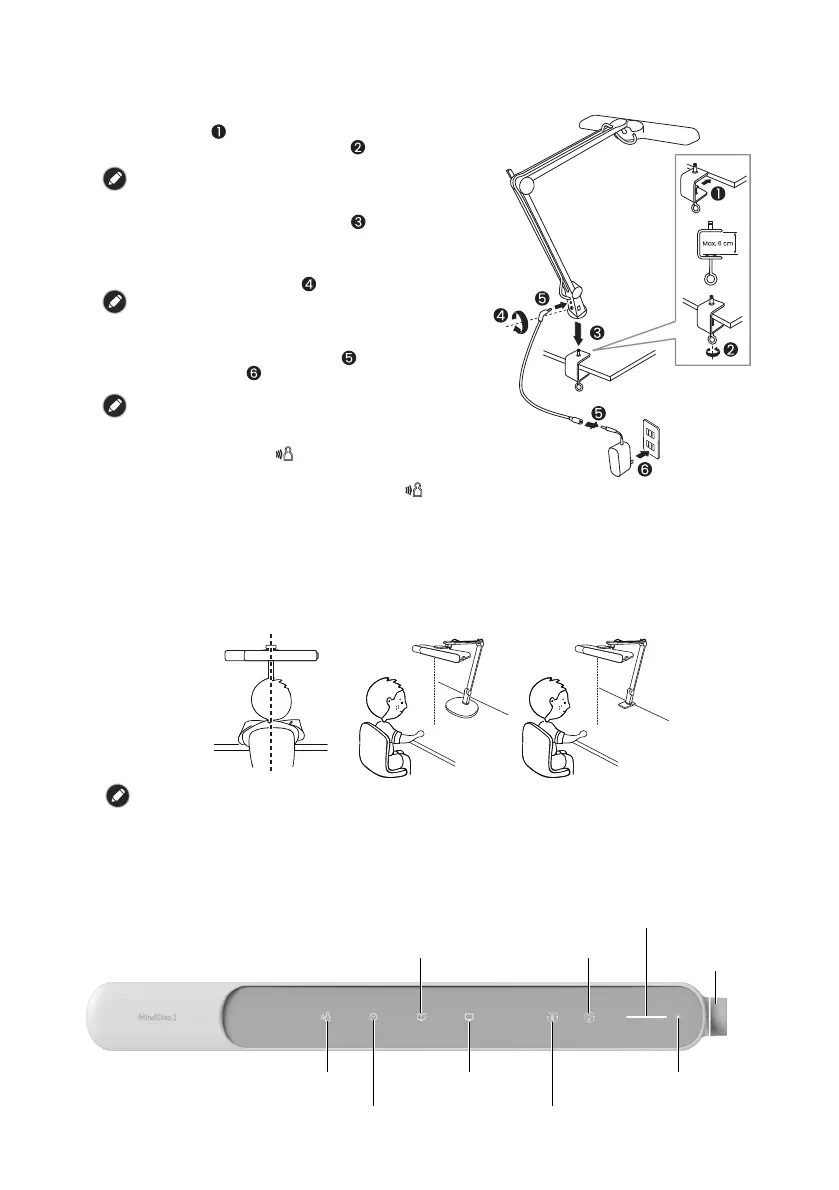
Adjusting the Position of the Lamp
• It is recommended to point the lamp head towards the front of the user and keep it level
with the desktop surface. The lamp arm can be adjusted according to the available
desktop space.
• Have the user sit at the desk and use the Quick Start Guide included in the packaging as
a ruler to adjust the height of the lamp head so that the lamp head is at least 40cm from
the desktop.
To avoid direct glare, keep the user's eyes away from the position that is lower than 10cm below the
lamp head.
Using the Lamp
Controls on the Lamp Head
You can use the touch keys and knob on the lamp head to perform various operations.
Refer to the figure below for the names and position of these controls:
1. Place the desk clamp on the edge of the desk
surface [ ] and then secure the desk clamp by
tightening the clamp screw [ ]. The maximum
clampable thickness of the desk clamp is 6 cm.
This table clamp is not suitable for installation on tubular
materials.
2. Insert the shaft on the desk clamp into the hole
on the end of the lamp arm [ ]and push the
lamp arm firmly against the desk clamp to
ensure that it is properly seated.
3. Secure the lamp arm to the desk clamp by
tightening the screw [ ].
Be sure to firmly secure the lamp arm to the desk clamp
by pushing the lamp arm all the way down and fully
tightening the screw on the lamp arm.
4. Connect the power cord to the power input
socket and power adapter [ ] and plug it into a
power outlet [ ]. When the power is plugged,
the lamp will automatically turn ON.
When the power is plugged, the human body Infrared
sensor located on the lamp head will start to calibrate
automatically. Do not cover the sensor with your hand or
any objects so as not to affect the calibration result.
During calibration, the indicator light will flash. This
calibration procedure takes about 30 seconds and do not
turn off the light while the calibration is in progress. After
the calibration procedure is completed (the
indicator
light stops flashing), it can be used normally.
40 cm
40 cm
Presence Detection Key
30-Minute Timer Key
Auto-Dimming
Book Reading Mode Key
Manual Color Temp. Adjustment Key
Manual
Dimmer Key
Ambient Brightness
Indicator
Color Temp./Brightness Indicator Light
Manual
Adjustment
Knob
Auto-Dimming
Digital Reading Mode Key
 Loading...