BV200 Plasma Viscometer Mk2/3 Customer User
Manual
Issue 9
th
Sep 2020 - Rev 1.8 Page 47 of 53
7. Quick Start Guide
Empty Waste, Fill Wash (2 litre distilled water and 1 barcoded Wash Additve) empty and rinse
Condensation bottle
Check Regulator is set between -0.40 and -0.45 and Waste Guage at -0.70 minimum
Run Daily, Weekly or Monthly Maintenance as required
Place a CHECK in the first green holder followed by 10 samples and another CHECK
Click START, more samples and CHECK calibrators may be added at any time
Place a STOP FLAG at the end of the sample line
7.1. Samples
Allow all samples to stabilise at room temperature before testing. Remember this will take longer if samples
have arrived by post or from a courier
Ensure all samples to be tested are fully centrifuged (note – controls do not need to be centirfuged)
Do not store PV samples in a fridge. When samples cool some cryoproteins can precipitate out,
Centrifugation may then remove this protein content from the sample - leading to an erroneous clinical
plasma viscosity result.
If a known High Risk sample is tested, follow laboratory procedure for working with high risk samples and
decontaminate the analyser using a STERILISER tube
7.2. Vacuum
When Calibrating use the HIGH and run blind (turn the barcode away so it cannot be read by the barcode
reader), adjust the regulator so the runtime is 2.00 ± 0.05
Vacuum on waste bottle vac gauge should be a minimum of; -0.70
Make sure the cap on the waste bottle is fully tightened and the cap tubes are fully inserted
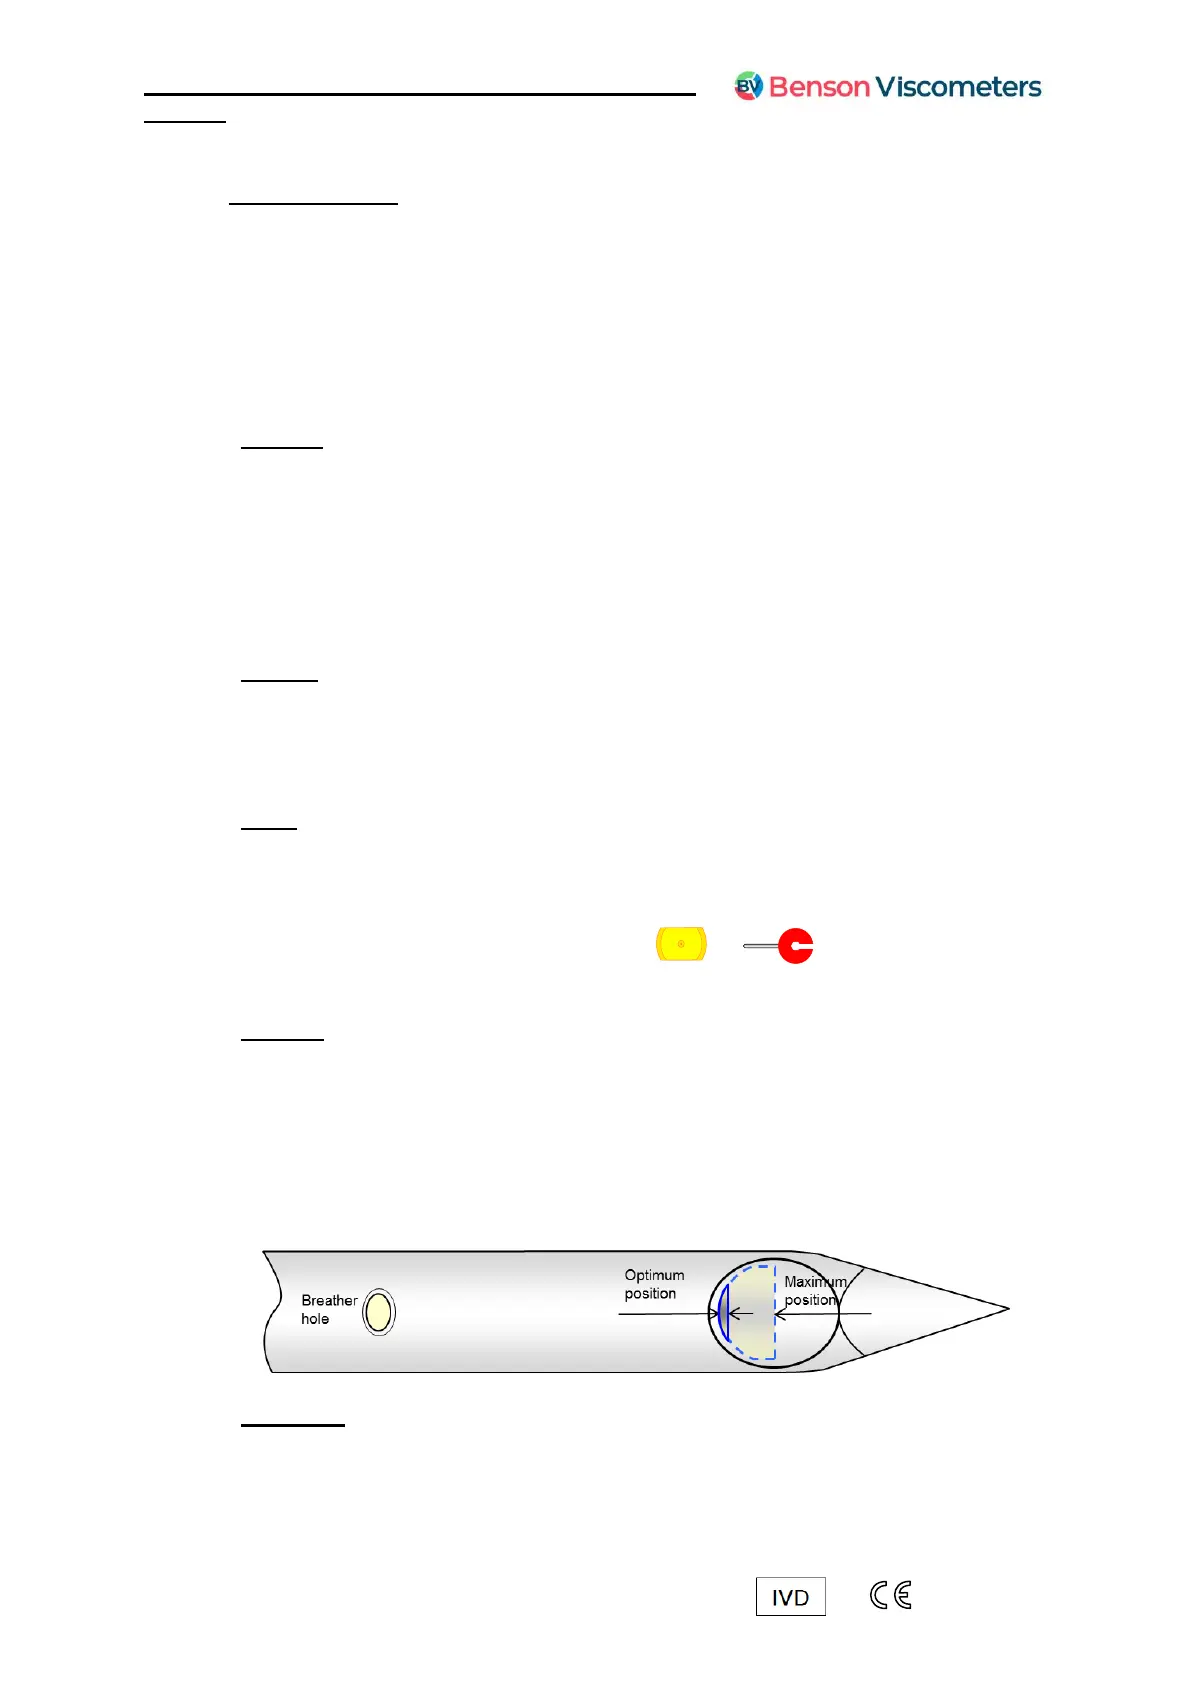
7.3. Probe
The probe air breather holes must be clear (10mm from the aspiration hole at the tip)
Light should be seen directly through the breather holes
Ensure the probe nut fitted to the cassette is as tight as possible using the red probe nut spanner
Ensure the probe tip is centred on the probe target
Probes can be aligned in the viscometer and do not need to be returned. – see Help, section 5.2.3. All
broken probes parts should be returned without the cassette, for repair or replacement
7.4. Cassette
The capillary tube connector in the back of the cassette should be secure. It should not be able to be
unscrewed easily. If you have a red coloured tube connector, this is permanently fitted so do not try to
remove it
The thin plastic tube at the back of the cassette should be pushed fully into the tube connector, through the
inner rubber seal until it cannot be pushed any further
Check the penetration of the capillary at the probe aspiration hole. Ensure the capillary end can still be
seen but is not out over halfway. A „short‟ capillary end is considered best
7.5. Calibration
Become familiar with calibration High (2.00), Low (1.32), and Check (1.67) run times
Calibrate with the calibrator caps OFF, note any large variations or swings in gradient and offset
BV200 gradient will normally be between 6.0 and 8.0