Do you have a question about the BERG SR58V and is the answer not in the manual?
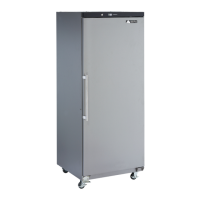
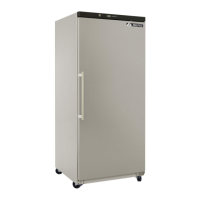
The BERG Upright Refrigerator & Freezer is a commercial-grade appliance designed for indoor use, offering reliable refrigeration or freezing capabilities for various settings. This manual provides comprehensive instructions for its service, installation, and care, ensuring optimal performance and longevity.
The unit operates on a self-contained refrigeration system, maintaining specific temperature ranges for either refrigeration or freezing. For refrigerators, the evaporator fans run continuously, stopping only when the door is open to prevent warm air from entering the cabinet. A defrost cycle is initiated every four hours, during which the unit turns off, and the evaporator fin defrosts. The controller displays a defrost symbol during this period. The unit restarts once the fin temperature reaches 46°F or after 30 minutes of defrost. The factory-set temperature range for refrigerators is 34° to 41°F.
For freezers, the evaporator fans operate continuously but cycle off during defrost periods and when the door is open. Similar to refrigerators, a defrost cycle occurs every four hours, during which the unit turns off, and an electric heater activates to defrost the evaporator. The defrost symbol is displayed on the controller. The unit resumes operation when the fin temperature reaches 46°F or after 30 minutes of defrost. The factory-set temperature range for freezers is -4° to 3°F.
The interior LED light is linked to a door switch, automatically illuminating when the door is opened. The unit features a reversible door, allowing for flexible installation to suit different layouts. The controller panel provides status indicators for various functions, including setting, refrigeration, defrost, fan operation, defrost dripping, and door switch status, offering clear visual feedback on the unit's current mode.
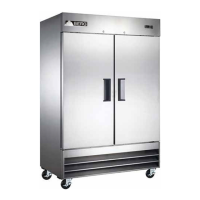
Proper installation is crucial for the unit's efficient operation. The chosen location must have a floor strong enough to support the fully loaded cabinet, which can weigh up to 1500 pounds. Good air circulation is essential both inside and outside the cabinet for efficient refrigeration. The cabinet is secured to a wooden pallet with screws for shipping; these must be removed before moving the unit. The door handle is packed inside the cabinet and needs to be installed using a cross screwdriver after the cabinet is in place.
For optimal internal air circulation, avoid overpacking the unit. Refrigerated air is discharged from the top rear of the unit and flows to the bottom. Obstructions to this airflow can lead to evaporator coil freeze-ups, temperature loss, or water overflow from the drain pan. The shelves have a rear turn-up to help prevent items from being pushed too far back. Fans mounted at the front of the coil draw air into the evaporator.
Externally, the unit requires ample air access, avoiding hot corners or locations near stoves and ovens. It is recommended to install the unit at least 2 inches from any wall and with at least 12 inches of clear space above it. Leveling the cabinet is important for proper door alignment and overall performance. All models come with casters for mobility, but the front wheels must be locked during use to ensure stability. If the unit is laid on its side or back for any reason, allow at least 24 hours before startup for compressor oil to return to its proper position, preventing potential compressor failure.
The unit's thermostat operation is managed through a display panel. Users can access and modify parameters, view evaporator sensor temperature, and manually force operations like refrigeration, defrost, or defrost dripping. The controller also supports a one-key restore function to revert all parameters to factory default settings. Internal alarms provide alerts for various issues, including sensor failures, high/low cabinet temperatures, condenser high temperatures, and programming errors.
Regular maintenance is vital for the unit's performance and longevity. Before any service, maintenance, or cleaning, the unit must be turned OFF and disconnected from the power source to prevent electrical hazards.
The interior and exterior of the unit can be cleaned with soap and warm water. For stubborn dirt, ammonia and water or a non-abrasive liquid cleaner can be used. Abrasive cleaners should be avoided as they can scratch plastic and damage breaker strips and gaskets.
The condenser coil requires regular cleaning, ideally every 90 days. In environments with significant dust, debris, or grease accumulation, cleaning every 30 days may be necessary. Light dust and debris can be removed with a simple brush, while heavier build-up may require a vacuum or compressed air. For heavy grease, de-greasing agents specifically designed for refrigeration use should be applied, followed by compressed air. Failure to maintain a clean condenser coil can lead to high temperatures, excessive run times, compressor failures, and may void the compressor warranty. High-pressure water washes should never be used on the condenser coil, as water can damage electrical components.
Condenser fans should also be cleaned of dust, dirt, and grease every three months, or more frequently if conditions warrant. A vacuum cleaner or stiff brush can be used, and for extremely dirty fans, a commercial-grade condenser cleaner may be required. Cleaning solutions should be alkaline-based and non-chloride. If chloride-containing cleaners are used, thorough rinsing and drying are essential. Routine cleaning can be done with soap and water, and extreme stains should be tackled with a non-abrasive cleaner and plastic scrub pad, always rubbing with the grain of the steel.
Gaskets require regular cleaning with warm soapy water to prevent mold and mildew build-up and maintain elasticity. Strong cleaning products should be avoided as they can make gaskets brittle. Sharp tools or knives should not be used to clean gaskets to prevent tearing. Gaskets are "Dart" style and can be easily replaced by pulling them out of the groove and pressing new ones into place.
Door hinges should be checked periodically for looseness, especially with heavy use. If doors begin to sag, tighten the screws that mount the hinge brackets to the frame. Loose or sagging doors can cause hinges to pull out of the frame, leading to damage.
Drain maintenance is also important. Each unit has an internal drain that removes condensation from the evaporator coil and directs it to an external condensate evaporator pan. Ensure the drain tube remains connected from the evaporator housing to the drain pan. Excessive water accumulation inside or underneath the unit indicates a drain problem. The unit's leveling is crucial for proper drainage. All drain lines must be free of obstructions to prevent water backup and overflow.
| Capacity | 58 liters |
|---|---|
| Energy Class | A+ |
| Number of Doors | 1 |
| Defrosting System | Manual |
| Noise Level | 42 dB |