Page 2
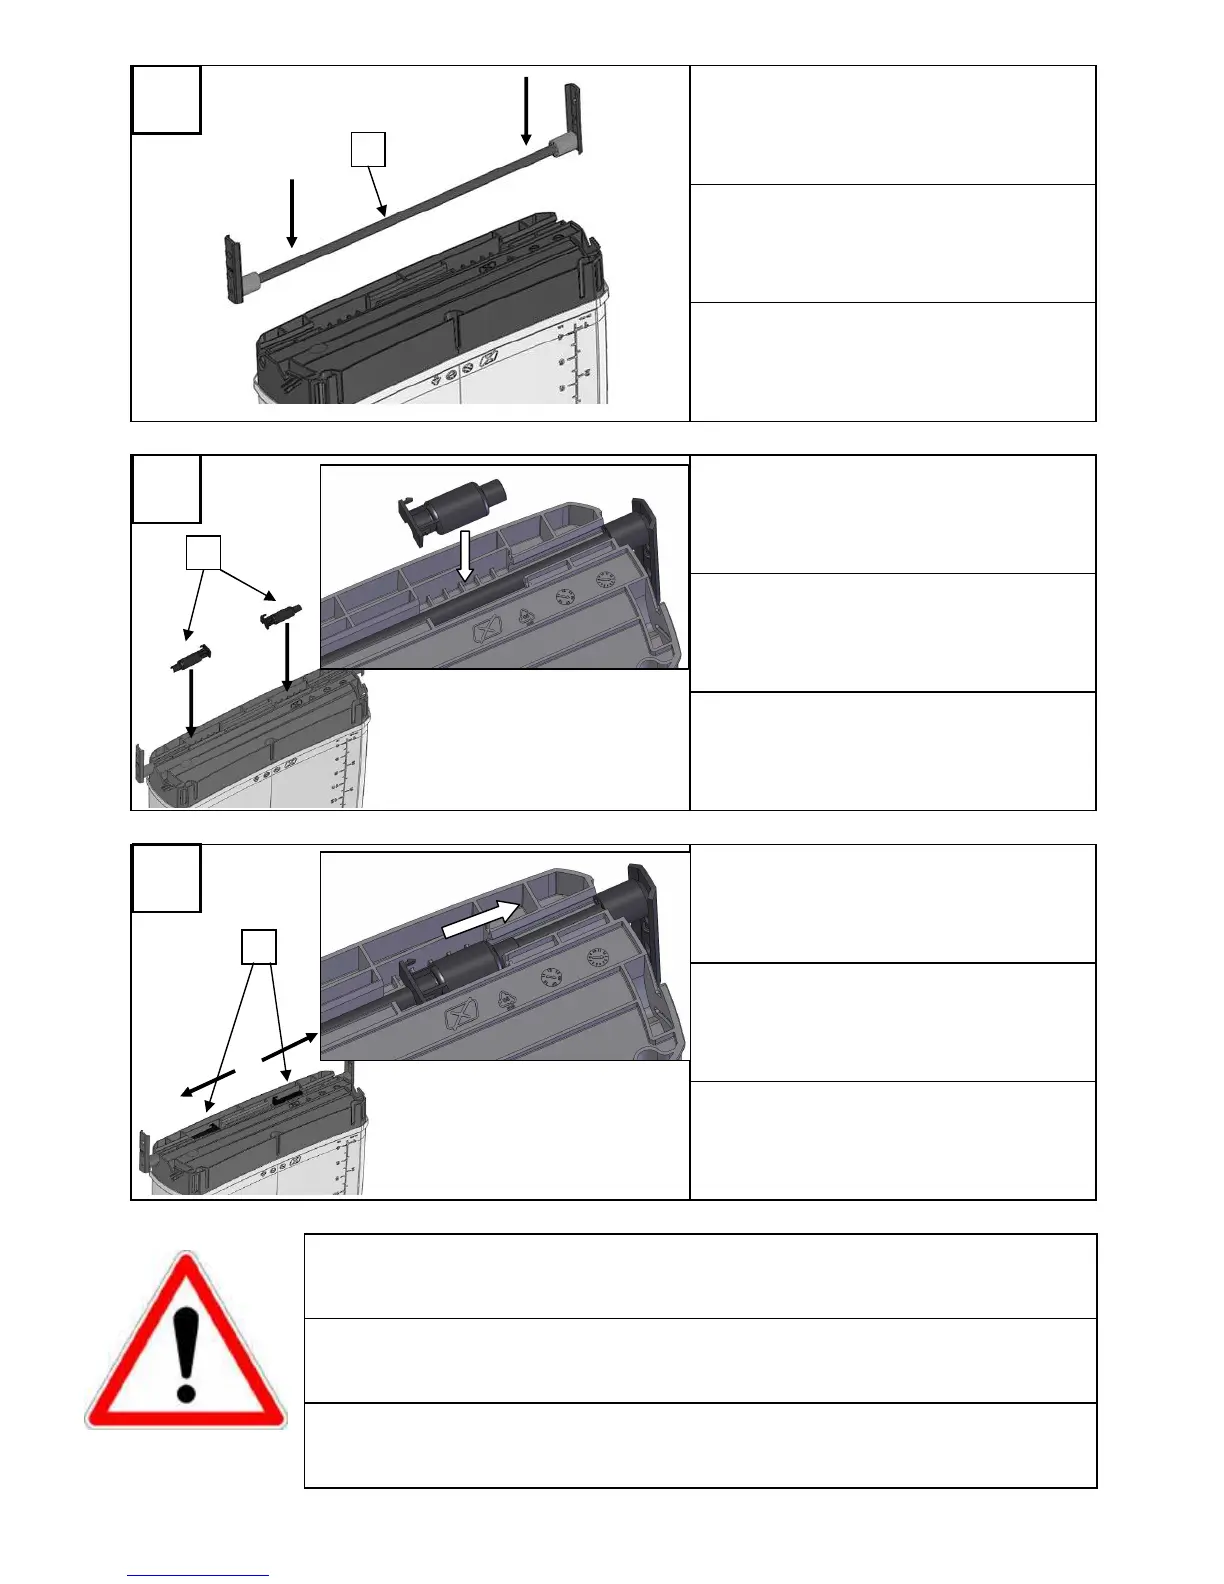
B : Placer la tige en dessous du
pulvérisateur.(Selon modèle)
B : Place the rod underneath the sprayer
(Depending on the model).
B : Colocar la varilla por debajo del pulverizador
(según modelo)
C : Poser les pièces paliers (pièces n°2) sur la
tige.(Selon modèle)
C : Attach the bearings (item n°2) to the rod.
(Depending on the model)
C : Colocar las piezas n°2 sobre la varilla (según
modelo)
D : Faire glisser les paliers (pièces n°2) vers
l’extérieur afin de les clipper à leur extrémité
dans l’encoche prévue à cet effet.(Selon modèle)
D :Slide the bearings (item n°2) to the ends of the
rod to clip them into the slots provided.
(Depending on the model)
D : Hacer deslizar las piezas n°2 hacia el exterior
con el fin de colocarlas a sus extremidades en la
muesca prevista. (según modelo)
Montage version droitier : reportez-vous à l’étape 2A page suivante
Montage version gaucher : reportez-vous à l’étape 2A page 5
Assembly for right handed use : Refer to step 2A on the next page
Assembly for left handed use : Refer to step 2A on page 5
Montaje versión diestro : ver Paso 2A pagina siguiente
Montaje versión zurdo : ver Paso 2A pagina 5
 Loading...