EQUIPMENT DAMAGE: The Next Series 8 CIJ must be Grounded/Earthed! Failure to
provide adequate grounding/earthing will result in damage to the circuit board,
printhead, and the power supply. This damage will occur over time. The Next Series 8
CIJ Power Supply generates a DC Ground to support the function of the Printer, but
this does not protect from static or power surges.
PERSONAL INJURY & EQUIPMENT DAMAGE: Do not use any power cord that is not provided by
BestCode. Power cords must have 3 prongs, live, neutral, and ground provided. Power socket-outlet
must provide reliable earth ground. Power cord and outlet must remain clean and dry. The socket-
outlet shall be installed near the equipment and shall be easily accessible. Do not use extension cords!
Follow all local safety regulations during installation and operation of the Next Series 8 CIJ.
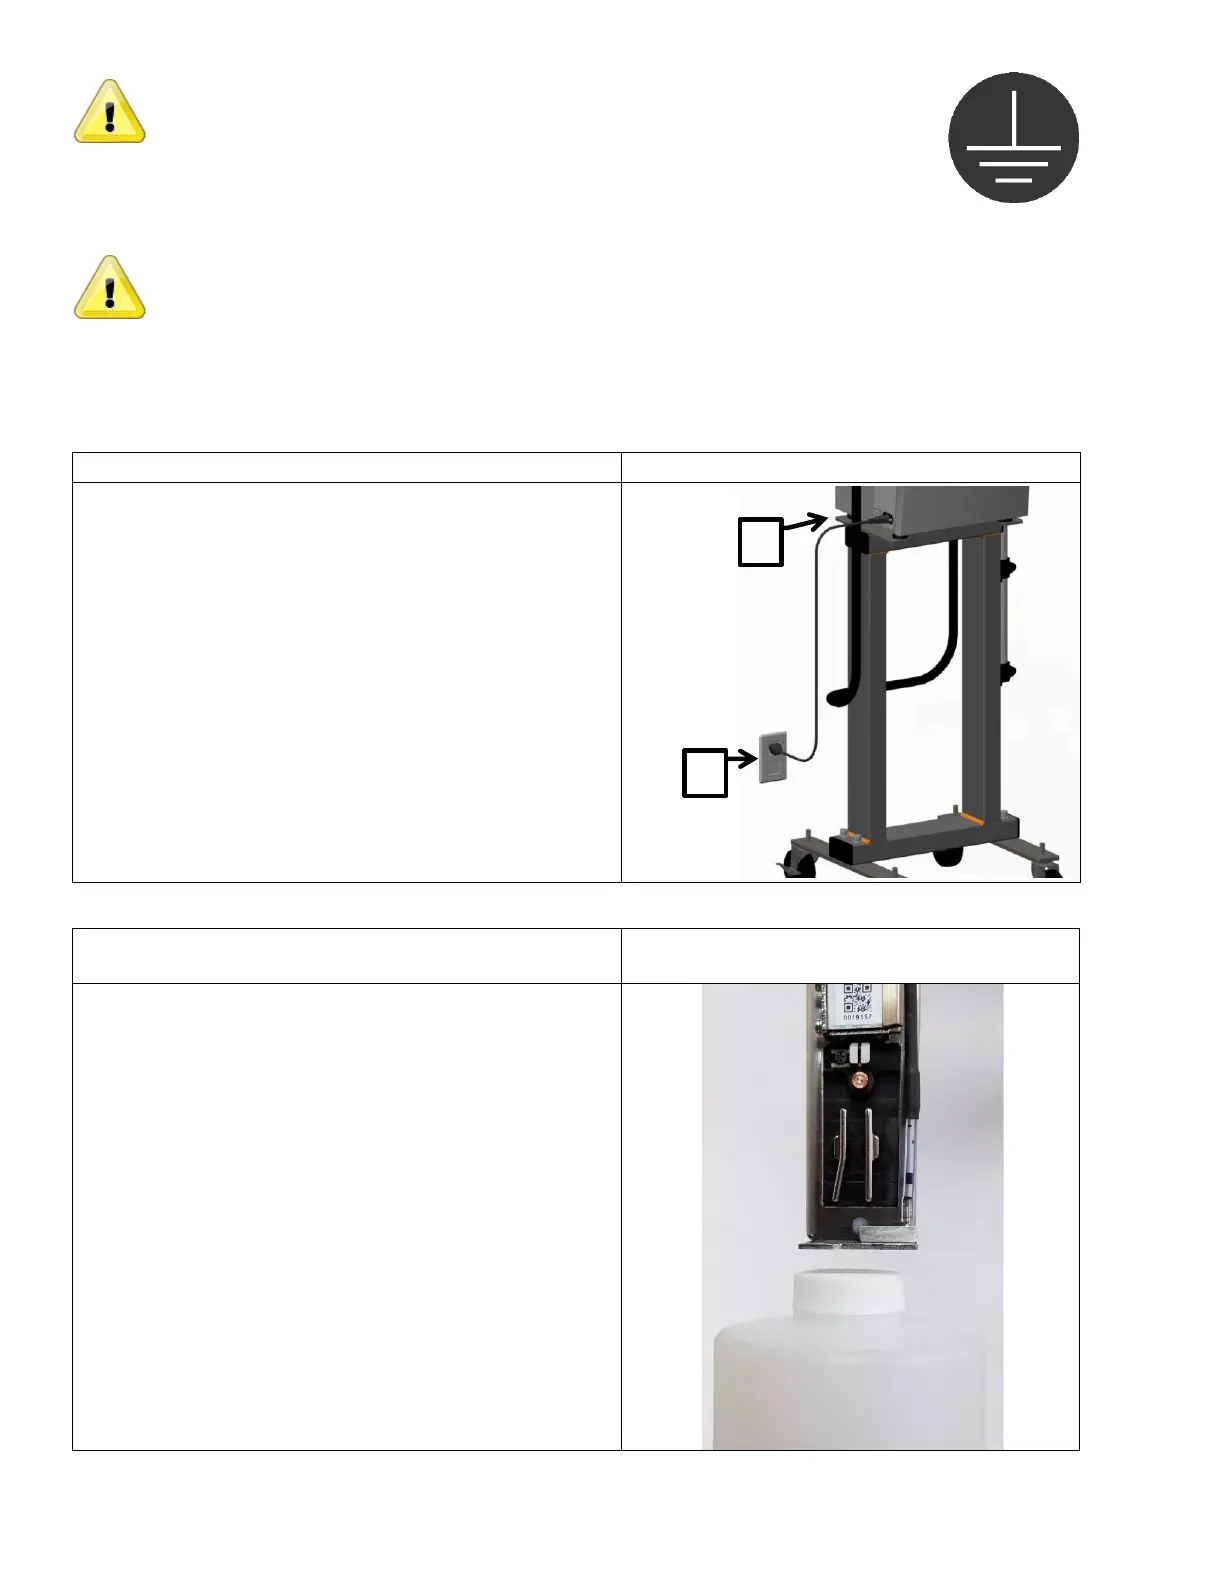
1. Follow instructions included with 40-0019-01
Controller Stand.
2. Plug the attached power cord into the power socket.
The socket-outlet shall be installed near the
equipment and shall be easily accessible.
1. Secure the printhead into the printhead clamp.
Clamp is included with:
Kit 40-0003-01 Printhead Floor Mount
Kit 40-0004-01 Printhead Conveyor Mount
2. The gutter should always be towards the floor.
3. Keep the gap between the product and the print slot
at 1/16”-1/2” inch.
4. Keep printhead square to the product to prevent print
distortion.
A 5°-10° angle between head and product may be
necessary in high static environments.