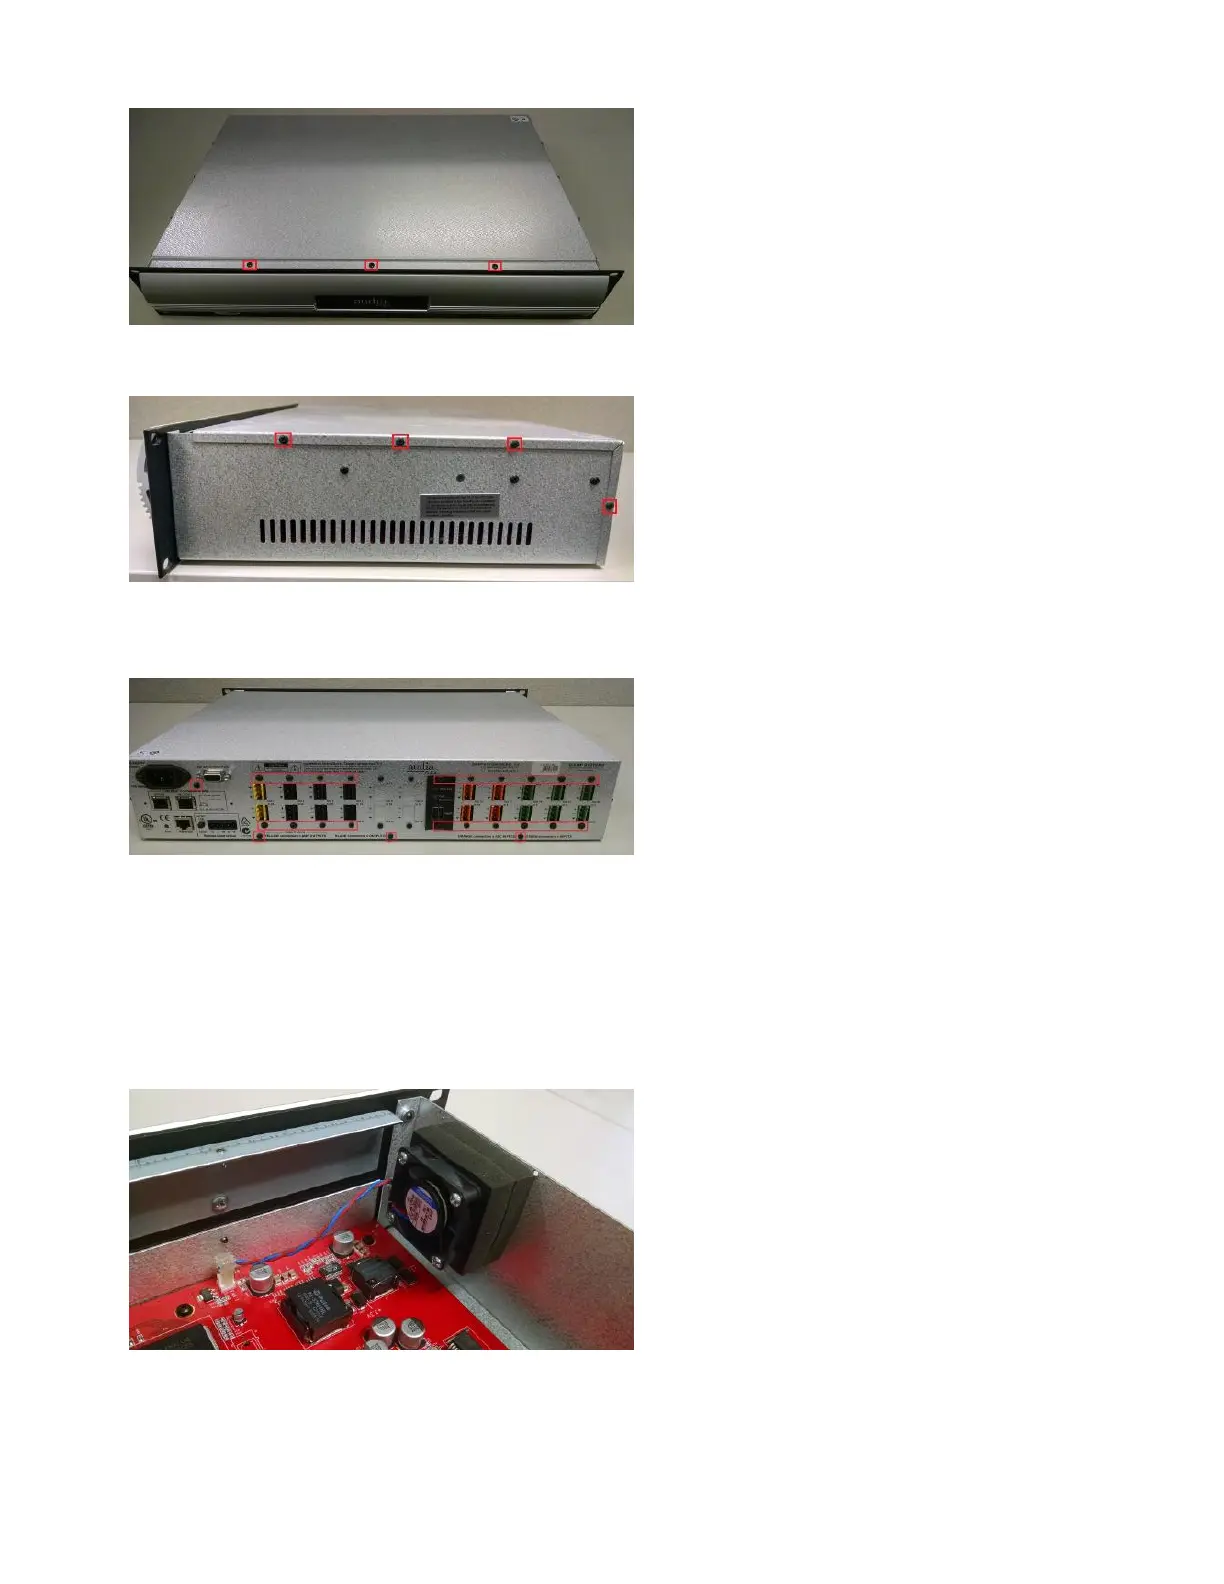
4. Remove the four screws from each side of the chassis. Note that the side opposite of where the fan is located has
some screws that do not need to be removed.
5. Remove the three screws along the bottom edge of the rear panel. Remove the screw between the power jack
and the RS232 connector. Remove the two screws above and below each pair of I/O card connectors. Any card
slots that are empty do not need to have their screws removed from the blank panels.
6. Remove the top cover by pushing it back first, and then lifting it off.
Replacing the chassis fan
1. The fan has a 2-conductor wire that connects to the main board. Note the orientation of this connector so that the
new fan's connector can be installed in the same orientation. The correct orientation might be different than the
photo below. Disconnect the fan from its connector on the board.
2. Remove the old fan by removing the four screws holding the fan in place. Note the orientation of the fan before
Copyright 2013-2020 Biamp Systems http://support.biamp.com/
2