Step 4 Preparation
This product is normally fitted directly onto the floor. Once the position has been
decided, mark out and cut the plinth to the dimensions as shown below.
It is recommended that a gap of 20mm is left between the top of the plinth and the
shelf of the cupboard to ensure adequate airflow
A B
320 mm 100 mm
A= Width of cutout
B= Height of cutout
• Floor mounting
• Plinth mounting
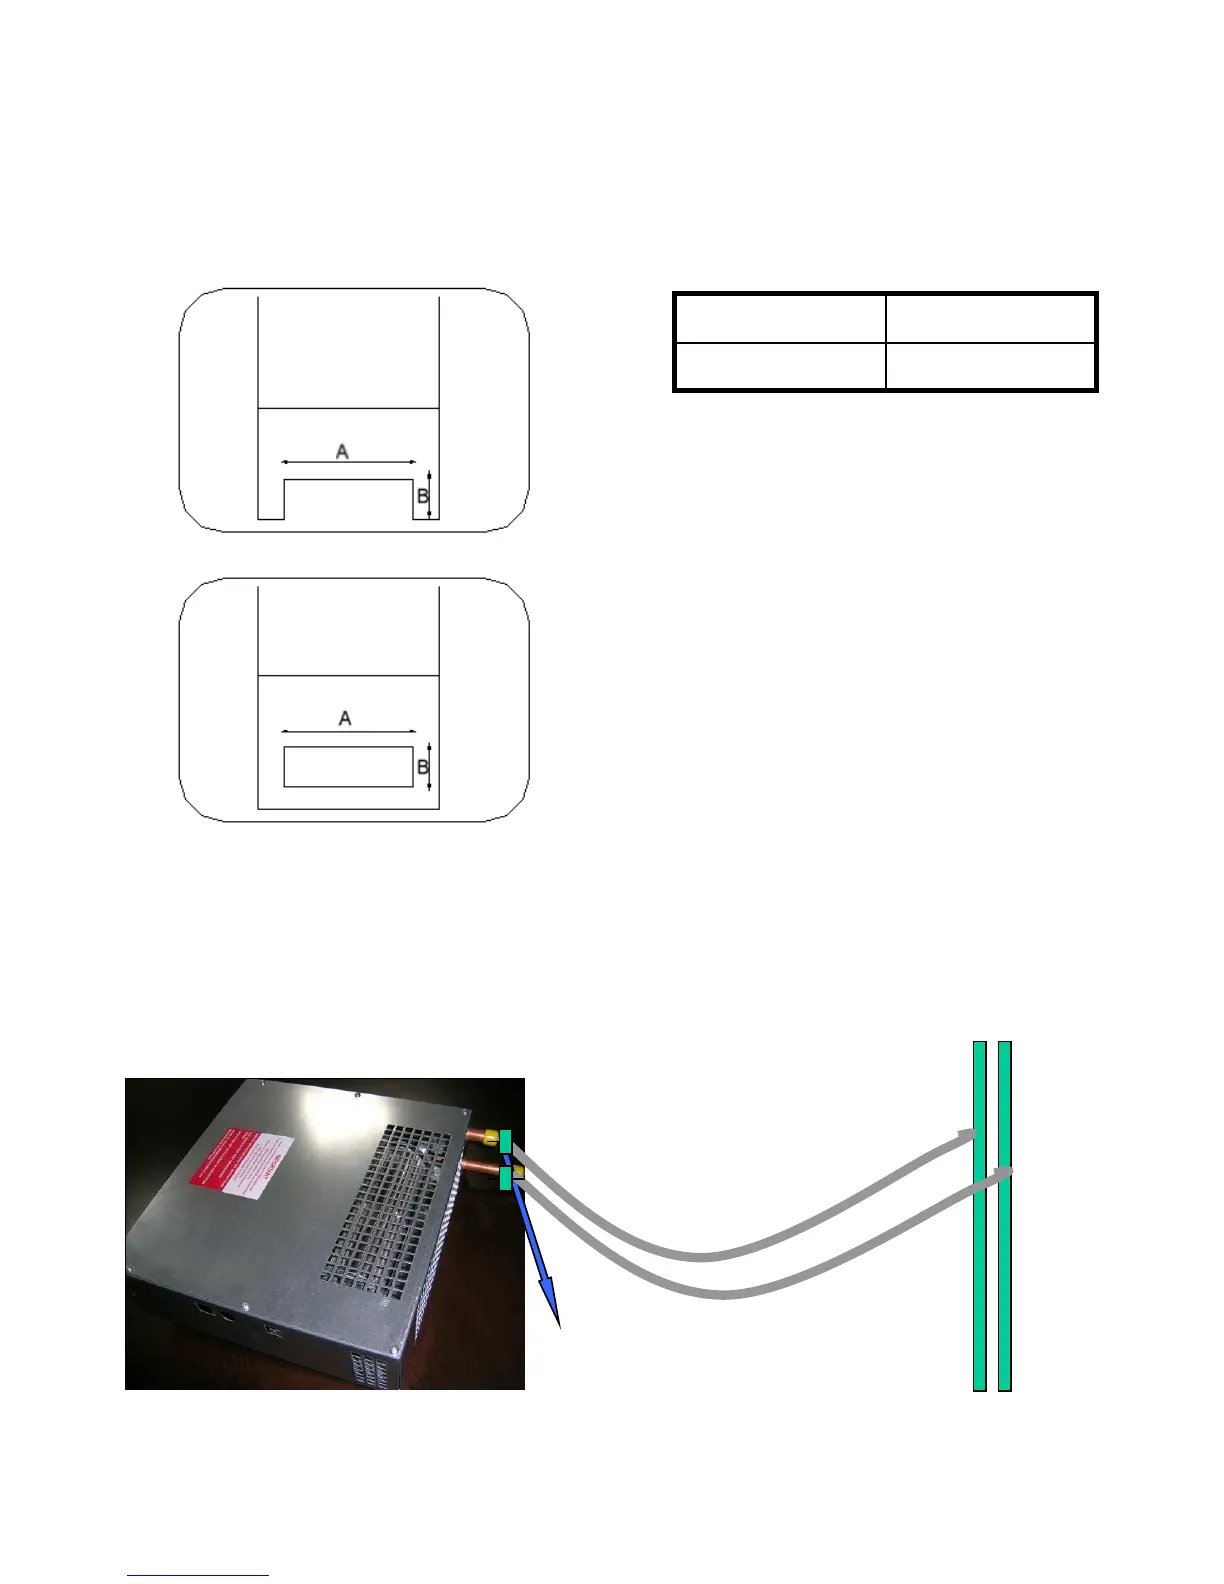
Step 5 Water Connections
Fit the valve end of the flexible hoses to the Plinth Heater and the other ends to the
central heating flow and return pipe work. Note the direction of flow arrows on the valves
are not important in this application
Isolating
Valves
System
pipe work
2
Flexible
hoses