Page 6 Technical Status: 11/2010
Gas Detector
Operating and Installation Instructions
ExDetector HC 150 / HC 150-K
0,4-2V
Br
4
5
6
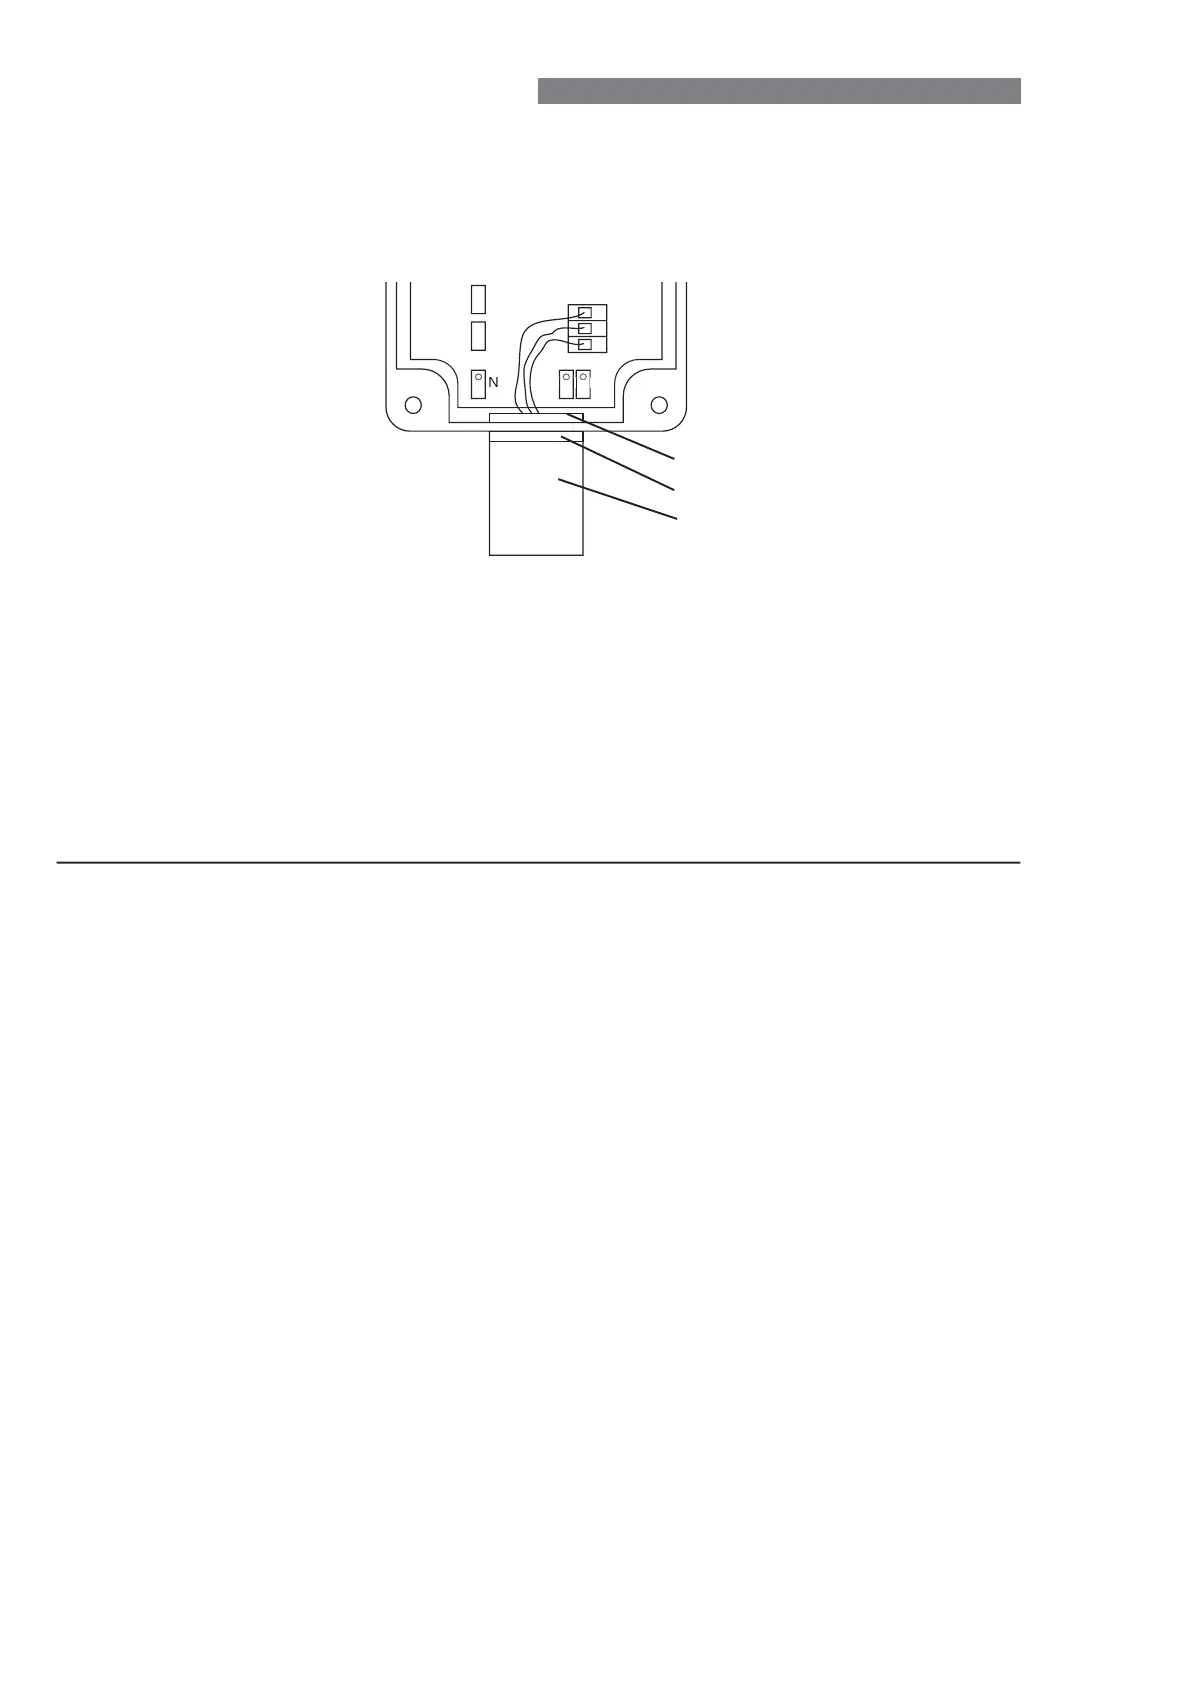
Replacing the Sensor
Please note:
Sensors may only be replaced by specialist personnel authorised to do so by
Bieler+Lang. Do not open the housing when the power supply is switched on!
locknut
seal ring
sensor
Procedure:
● Switch off the power supply to the detector
● Remove the housing cover
● Disconnect the leads from terminals 4, 5 and 6
● Undo the locknut
● Unscrew the sensor
● Screw the replacement sensor in.
Make sure the sealing ring is correctly seated.
● Screw the locknut on (serrations towards the housing wall)
● Connect the leads according to their markings
● Replace the housing cover
● Switch on the power supply
● Calibrate the detector
Spare Parts
● Replacement sensor for ExDetector HC 150 D1
● Replacement sensor for ExDetector HC 150-K D1