This controller is a wired controller, so you only need to use a Type-c data
cable to connect the controller to the console.
Note: This controller supports Xinput and Switch modes. After connecting with
the console, you need to switch to the correct mode. The default setting is Xinput.
Steam: To connect to Steam, you need to check the "Xbox Configuration
Support" in the "Settings - Controller -GENERAL CONTROLLER SETTINGS" of
Steam. Otherwise, it may cause unrecognized issues within the game.
Switch: After connecting the Switch, you need to turn on "System Settings -
Controllers and Sensors - Pro Controller Wired Communication".
02. CONNECTION
This controller supports two modes: Xinput and Switch. After connecting, you
need to switch to the corresponding mode to use it normally.
The setting method is as follows:
Hold the B+HOME button for 3 seconds until the indicator turns green, which
means switching to Xinput mode;
Hold the A+HOME button for 3 seconds until the indicator turns red, which
means switching to Switch mode.
03. MODE SWITCH
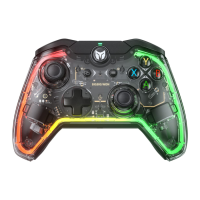
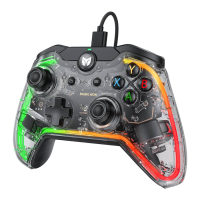
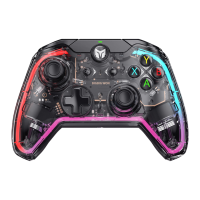
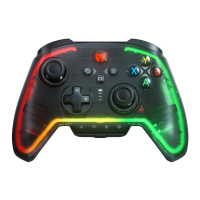
This controller has a variety of built-in lighting effects. Double-click the FN
button to switch or turn off the light.
04. LIGHT EFFECT
This controller comes has two remappable back buttons and supports changing key
values. The setting methods are as follows:
Remap: Press FN + (M1/M2), and the indicator will breathe in green, indicating that
it has entered the remapping mode;
Then press the front button that needs to be mapped, and the indicator will
flashes twice in green, indicating that the key mapping is successful.
Clear key value: Press and hold the "button need to cancel the key
mapping(M1/M2)", and double-click FN, and the indicator will flashes twice in
green, indicating that the cancellation is successful.
05. REMAP
This controller supports Turbo, and the supported buttons include A/B/X/Y/LT/RT/LB/RB
eight buttons. The setting methods are as follows:
Set TURBO: Hold FN + the "button need to be set", the LED2,3 will flash in
orange, which means it is successfully turned on. When the TURBO is triggered
the LED2,3 will flashes according to the frequency of the TURBO.
Cancel TURBO: Hold the "button need to cancel TURBO" and double-click the
FN button, the LED2,3 will stop flash, which means the cancellation is successful.
TURBO frequency: Hold FN + ← to cycle between 5/s, 10/s, and 20/s three
frequencies, the default is 5/s.
06. TURBO
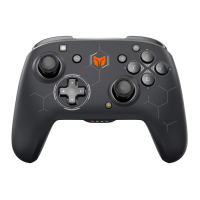
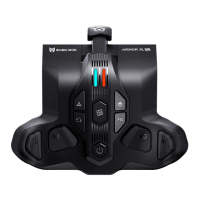
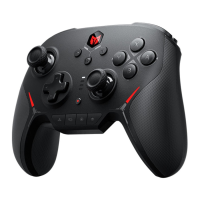
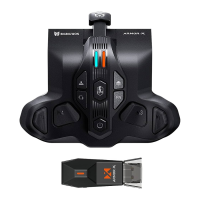
01. NAME OF EACH PART
cable
USB port
3.5mm
headphone jack
FN
M1M2
HOME
Menu
Indicator
Triangle
Right
joystick
D-pad
View
RT
RB
A/B/X/Y
LT
LB
Left
joystick
LS
LED1
LED2
LED4
LED3
RS
win10/11 / Switch
PACKAGE
CONTENTS
SUPPORTED
PLATFORM
BIGBIG WON RAINBOW LITE*1 / User Manual*1
Qualified Certification*1 / 1.8m Ultra-light soft braided data cable*1
This controller supports the MACRO recording function, each set of MACRO
must be bound with a remappable back button (M1/M2) as the trigger. The
buttons support recording: A/B/X/Y, ↑/↓/←/→, LT/RT/LB/RB, RS/LS, and
eight directions of the joystick. The setting methods are as follows:
MACRO recording: Hold FN + (M1/M2) for 3 seconds, the indicator will breathe
in red, indicating that it has entered the MACRO recording mode. Press the buttons
of the controller to record the MACRO. After finishing the recording, clicks FN
once to end the MACRO recording. The indicator will flash twice in red. During
the execution of the MACRO, the four LEDs will flash from left to right until the
MACRO ends.
Clear MACRO: Hold the "button need to cancel the macro (M1/M2)" and
double-click FN button, the indicator will flash twice in red, indicating that the
cancellation is successful.
07. MACRO RECORDING
This controller has certain deadzone in the factory default, users who want to use
0 deadzone joystick can press FN + left or right stick down (LS/RS) to change the
deadzone setting in 0/10.
Note: Joystick 0 deadzone will have higher control accuracy, but also will lead to
drift in the game.
08. DEADZONE OF JOYSTICK
This controller supports the hair trigger setting, this function can help the operation
of the linear trigger be faster. The trigger set with a quick trigger will lose its “linear”.
Press the trigger to "on", and lift the trigger for any distance to "off". You can press
the trigger again without lifting it to the original position, which can greatly optimize
the speed of operation. The setting methods are as follows:
On/Off Hair Trigger: Hold the Triangle button + Trigger (LT/RT), the indicator will
flash twice in cyan indicating that the Hair Trigger is successfully turned on.
Hold the Triangle button + Trigger (LT/RT) the indicator will flash twice in cyan again
indicating thate Hair Trigger is successfully turned off.
09. HAIR TRIGGER
This CONTROLLER supports one-click screenshots. In Xinput and Switch modes,
clicking the triangle button will be used as the screenshot button. (The screenshot
file of the PC platform is saved in "This computer - Picture - Screenshot")
11. SCREENSHOT
This controller supports audio input/output. After connecting the console, you
can plug the headset with a microphone into the 3.5mm audio port at the bottom
of the controller. And you can set the volume by press FN+↑/↓. (Only on PC)
12. AUDIO
This controller supports four-speed vibration adjustment, and the setting
methods are as follows:
Press FN + →, and the vibration of the trigger motor can be cyclically switched
between strong, medium, weak, and off.
13. VIBRATION ADJUSTMENT
Please access ”BIGBIG WON Official Website>Support” to check the instruction
https://www.bigbigwon.com/support/
15. DETAILED FUNCTIONAL OPERATION
INSTRUCTIONS
12-month limited warranty from the date of purchase.
16. YOUR RIGHTS
WELCOME TO THE BIGBIGWON COMMUNITY
The BIGBIG WON community is built to connect those who
seek the winning edge. Join us Discord and Follow our social
channels for the latest offerings, exclusive event coverage,
and opportunities to score BIGBIG WON hardware.
@BIGBIG WON
BIGBIG WON DISCORD
When the joysticks drift seriously, or they cannot be pushed to the maximum;
when the triggers automatically send a key value, or they cannot reach the
maximum linear value, please try calibrating the joysticks & triggers as follows:
1. Long press the View button+Menu buttons for 3 seconds, the four LED
indicators will breathe slowly.
2. Push the joystick to the maximum, rotate it at a constant speed. Repeat 3-5 times.
3. Press the LT/RT button to the maximum and release. Repeat 3-5 times.
4. Press the View+Menu buttons, the LED indicator lights flash twice and then
Turn off, meaning the calibration completes.
10. JOYSTICKS & TRIGGERS CALIBRATION
Long press the HOME button for 10s until the controller vibrates, which
means the controller reset the configuration successfully.
14. RESET THE CONFIGURATION
BIGBIG WON SUPPORT
Scan the QR code to
watch video tutorial
Visit the official support page for a detailed video
tutorial / FAQ / User manual / APP Downlod
www.bigbigwon.com/support