EasyManua.ls Logo

BIGBIG WON GALE - User Manual

Default Icon
10 pages
Print Icon
To Next Page IconTo Next Page
Loading...
产品手册 / 取扱説明書
PRODUCT MANUAL
Wireless Game Controller
GALE
Question and Answer IconNeed help?

Do you have a question about the BIGBIG WON GALE and is the answer not in the manual?

Summary

PC Tool and Controller Setup

PC Tool Features and Download

Customize controller parameters, upgrade firmware, and download the PC Tool.

Power On;Off and Connection

Instructions for powering the controller on/off and connecting via 2.4G, Bluetooth, or wired.

Mode Switching

Switch between Xinput and Switch modes for optimal compatibility.

Controller Customization and Calibration

Button Mapping and Turbo Settings

Configure custom button mappings and enable/disable turbo functionality.

Joystick and Trigger Calibration

Calibrate joystick dead zones and trigger responsiveness for accuracy.

Gyroscope, Vibration, and Volume

Adjust gyroscope, vibration intensity, and PC volume settings.

Status, Maintenance, and Warranty

Screenshot and Battery Status

Capture screenshots and monitor battery levels and charging status.

Charging Stand and Reset

Utilize the charging stand and perform a controller reset.

Warranty Information

Review the 12-month limited warranty terms.

Overview

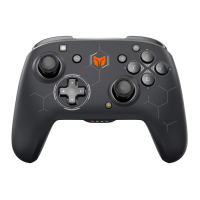
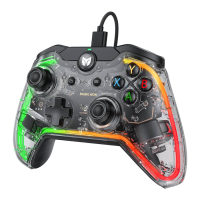
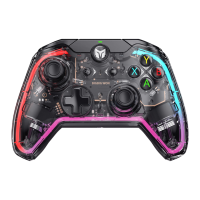
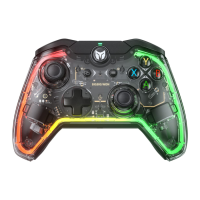
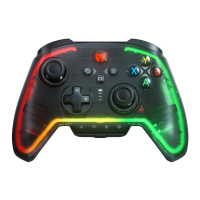
This document describes the BIGBIG WON GALE Wireless Game Controller, a versatile gaming peripheral designed for a range of platforms including Switch, Windows 10/11, Android, and iOS. The controller offers multiple connection methods, customizable settings, and various features to enhance the gaming experience.

Function Description

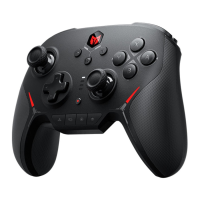
The GALE Wireless Game Controller serves as a primary input device for gaming across supported platforms. It features a standard gamepad layout with two joysticks (LS and RS), a D-pad, action buttons (A, B, X, Y), shoulder buttons (LB, RB), triggers (LT, RT), and additional function buttons such as View, Screenshot, Menu, and HOME. For advanced customization and control, the controller is equipped with four remappable additional buttons (M1, M2, M3, M4) located on the back. These buttons can be assigned to various functions, allowing users to tailor the controller to their specific gaming needs.

The controller supports two primary modes: Xinput and Switch. Xinput is the default mode and is generally used for PC (Windows) and Android/iOS platforms, while Switch mode is specifically for Nintendo Switch consoles. Switching between these modes is a simple process, ensuring compatibility across different gaming environments.

A key feature of the GALE controller is its integration with the PC Tool. This software allows users to customize a wide array of parameters in real-time, upgrade firmware, and unlock advanced functionalities. Through the PC Tool, users can adjust joystick dead zones, visually edit macros, fine-tune parameters for motion control simulation, toggle the rate of return, and adjust vibration settings. This level of customization provides a highly personalized gaming experience, catering to individual preferences and game requirements.

The controller also includes a Turbo function, which allows users to set rapid-fire capabilities for specific buttons (A, B, X, Y, LT, RT, LB, RB). This feature can be particularly useful in games requiring quick, repetitive button presses. The turbo frequency can be adjusted, offering flexibility in how this function is utilized.

Usage Features

Turning On/Off: The controller can be turned on or off by pressing and holding the HOME button for 2 seconds.

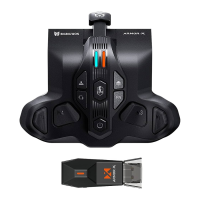
Connection Methods: The GALE controller offers three distinct connection methods:

  1. 2.4G Connection: This method utilizes a dedicated 2.4G adapter. To connect, users first turn on the controller and press and hold the pairing button on its back for 3 seconds, causing the HOME button indicator to flash. Simultaneously, the 2.4G adapter is plugged into the computer, and its pairing button is pressed and held for 3 seconds, making its indicator light flash. Successful pairing is indicated when both the controller's HOME button indicator and the adapter's indicator light remain steadily on.
  2. Bluetooth Connection: For Bluetooth connectivity, the controller is turned on, and its pairing button is held for 3 seconds until the HOME button indicator flashes. Users then search for the controller's signal on their computer or device and click "Connect." The controller will appear as "Xbox Wireless Controller" in Xinput mode or "Pro Controller" in Switch mode. A steady HOME button indicator light signifies successful pairing.
  3. Wired Connection: A straightforward wired connection can be established by connecting the controller to the console using a Type-C cable. For Switch users, enabling "Settings-Controllers & Sensors -Pro Controller wired communication" is necessary for wired play.

Mode Switching: To ensure proper functionality across different platforms, the controller's mode must be set accordingly:

  • To switch to Xinput mode, press and hold the B+HOME buttons for 2 seconds until the HOME indicator turns green. This mode is recommended for PC, Android, and iOS.
  • To switch to Switch mode, press and hold the A+HOME buttons for 2 seconds until the HOME light turns red. This mode is for Nintendo Switch consoles.
  • Note: For Bluetooth connections on iOS and Android platforms, the controller must first be switched to Xinput mode.

Mapping: The four remappable buttons (M1, M2, M3, M4) on the back of the controller can be configured directly on the device or through the PC Tool.

  • Set Mapping: To map a button, press and hold FN + (M1/M2/M3/M4) for 2 seconds. The FN button indicator will display orange, signaling mapping mode. Then, press the desired button on the front of the controller to be mapped. The FN indicator will double flash orange to confirm successful mapping.
  • Clear Mapping: To clear a mapping, long press the mapped button (M1/M2/M3/M4) and double-click the FN button. The FN indicator will blink orange to confirm the mapping has been cleared.
  • PC Tool for Mapping: The PC Tool offers more comprehensive mapping options, allowing users to modify all buttons on the controller, not just the back buttons.

Turbo Function:

  • Setting Turbos: Press and hold FN + "button to be set." The FN indicator will flash orange, indicating that turbo is activated for that button. When triggered, the FN indicator will flash according to the set turbo frequency.
  • Clear Turbo: Press and hold the "button to cancel turbo," then double-click FN. The FN indicator light will flash orange, confirming that the turbo setting for that button has been cleared.
  • Turbo Frequency: The turbo frequency can be cycled between 5/s, 10/s, and 20/s by pressing FN + ←. The default frequency is 5/s. The PC Tool also allows for turbo settings for all buttons.

Deadzone of Joystick: The controller has a default joystick dead zone. Users who prefer a 0 dead zone can press FN + press down left OR right joysticks (LS/RS) to switch between 0/10 dead zone for the respective joysticks. A 0 dead zone offers higher control precision but may lead to joystick drift in games without a built-in dead zone. The PC Tool provides advanced settings for joystick dead zones, including joystick curve and dead zone compensation.

Vibration Control: The vibration motor can be toggled on or off by pressing FN + →. The PC Tool allows for more granular control over vibration, enabling users to adjust the start and maximum intensity of the vibration.

Volume Adjustment: In Xinput mode, the PC volume can be adjusted by pressing FN + ↑ / ↓. This feature is exclusive to Xinput mode.

Screenshot:

  • In Xinput mode, pressing the Screenshot button will capture a screenshot on your PC, saving it to the "PC - Photos - Screenshots" folder.
  • In Switch mode, pressing the Screenshot button will capture a screenshot on your Switch.

Battery Status:

  • When the battery is low, the HOME button indicator light will flash orange 5 times at a frequency of 2 times per second, repeating every 30 seconds.
  • When connected to a power supply, the HOME button indicator light will breathe orange, indicating charging. Once fully charged, the charging light effect will turn off.

Charging Stand:

  • Placing the controller on the charging stand automatically turns it off and initiates charging. During charging, both the charging stand indicator light and the controller's HOME indicator light will be orange. They will turn off automatically when the controller is fully charged.
  • Picking up the controller from the charging stand automatically turns it on and reconnects it to the last active connection state.

Maintenance Features

Joystick Trigger Calibration: If the joystick experiences severe drift, fails to reach maximum values, triggers automatically, or doesn't reach maximum linear value, calibration can be performed:

  1. Press and hold the View button + Menu button for 3 seconds. The HOME button indicator light will breathe white, signaling calibration mode.
  2. Push the joystick to its maximum value and rotate it in a circle at an even speed, repeating 3-5 times.
  3. Press LT/RT to their maximum value and release, repeating 3-5 times.
  4. Finally, press View + Menu simultaneously. The HOME indicator will blink white to confirm successful calibration.
    • Note: All steps must be strictly completed for successful calibration.

Joystick Dynamic Calibration (via PC Tools): This feature, which can be enabled or disabled in the PC Tool, calibrates the joystick in real-time by comparing the center point of each joystick's return. This helps achieve a relatively equal amount of drift in all directions (up, down, left, right). It's important to note that joysticks with 0 dead zone may still experience unavoidable physical drift.

Gyroscope Calibration: If the controller's gyroscope drifts, it can be calibrated:

  1. Place the controller horizontally on a desktop and simultaneously press the Menu and Screenshot buttons. The HOME button indicator will breathe purple, indicating entry into calibration mode.
  2. Wait for a few moments for the HOME button indicator to double flash in purple, signifying that calibration is complete.

Reset: If the controller is misconfigured or functions abnormally, a reset can be performed by long pressing the HOME button for 10 seconds until the controller vibrates, indicating that the reset is complete.

Warranty: The GALE Wireless Game Controller comes with a 12-month limited warranty from the date of purchase.

BIGBIG WON GALE Specifications

General IconGeneral
Battery Life20 hours
Charging Time2-3 hours
ConnectivityWireless, Wired
CompatibilityPC, Android
FeaturesTurbo function
ButtonsA, B, X, Y, D-pad, Home
VibrationDual motors
GripTextured grip
Software SupportYes, with customization options
BatteryBuilt-in rechargeable lithium battery

Related product manuals