STEP 5
ATTACH LEG SUPPORT TO LAP PAD
Locate the Leg Support Assembly Hardware Kit (D11021).
Figure 5: Thread the washers onto the bolts. With the Leg Support Adjustment Knob facing down, slide the
Leg Support Shaft into the receiving end of the Lap Pad Assembly. Lining up the two holes, insert the Hex
Bolts with washers. Secure with one of the wrenches provided.
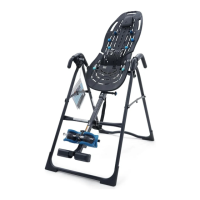
Figure 6: Test that all fasteners are secure and for smooth and steady rotation of the lap pad:
1. Stand between the Cane Handles with your body facing the machine.
2. Grasp the Traction Handles and rotate the Lap Pad toward you.
Apply your full weight to the Traction Handles by lifting your legs off the floor and lightly bouncing.
Figure 5
Figure 6
7
Bolts x2
Washer x2
Traction Handles
Main Shaft
Rear
FRONT
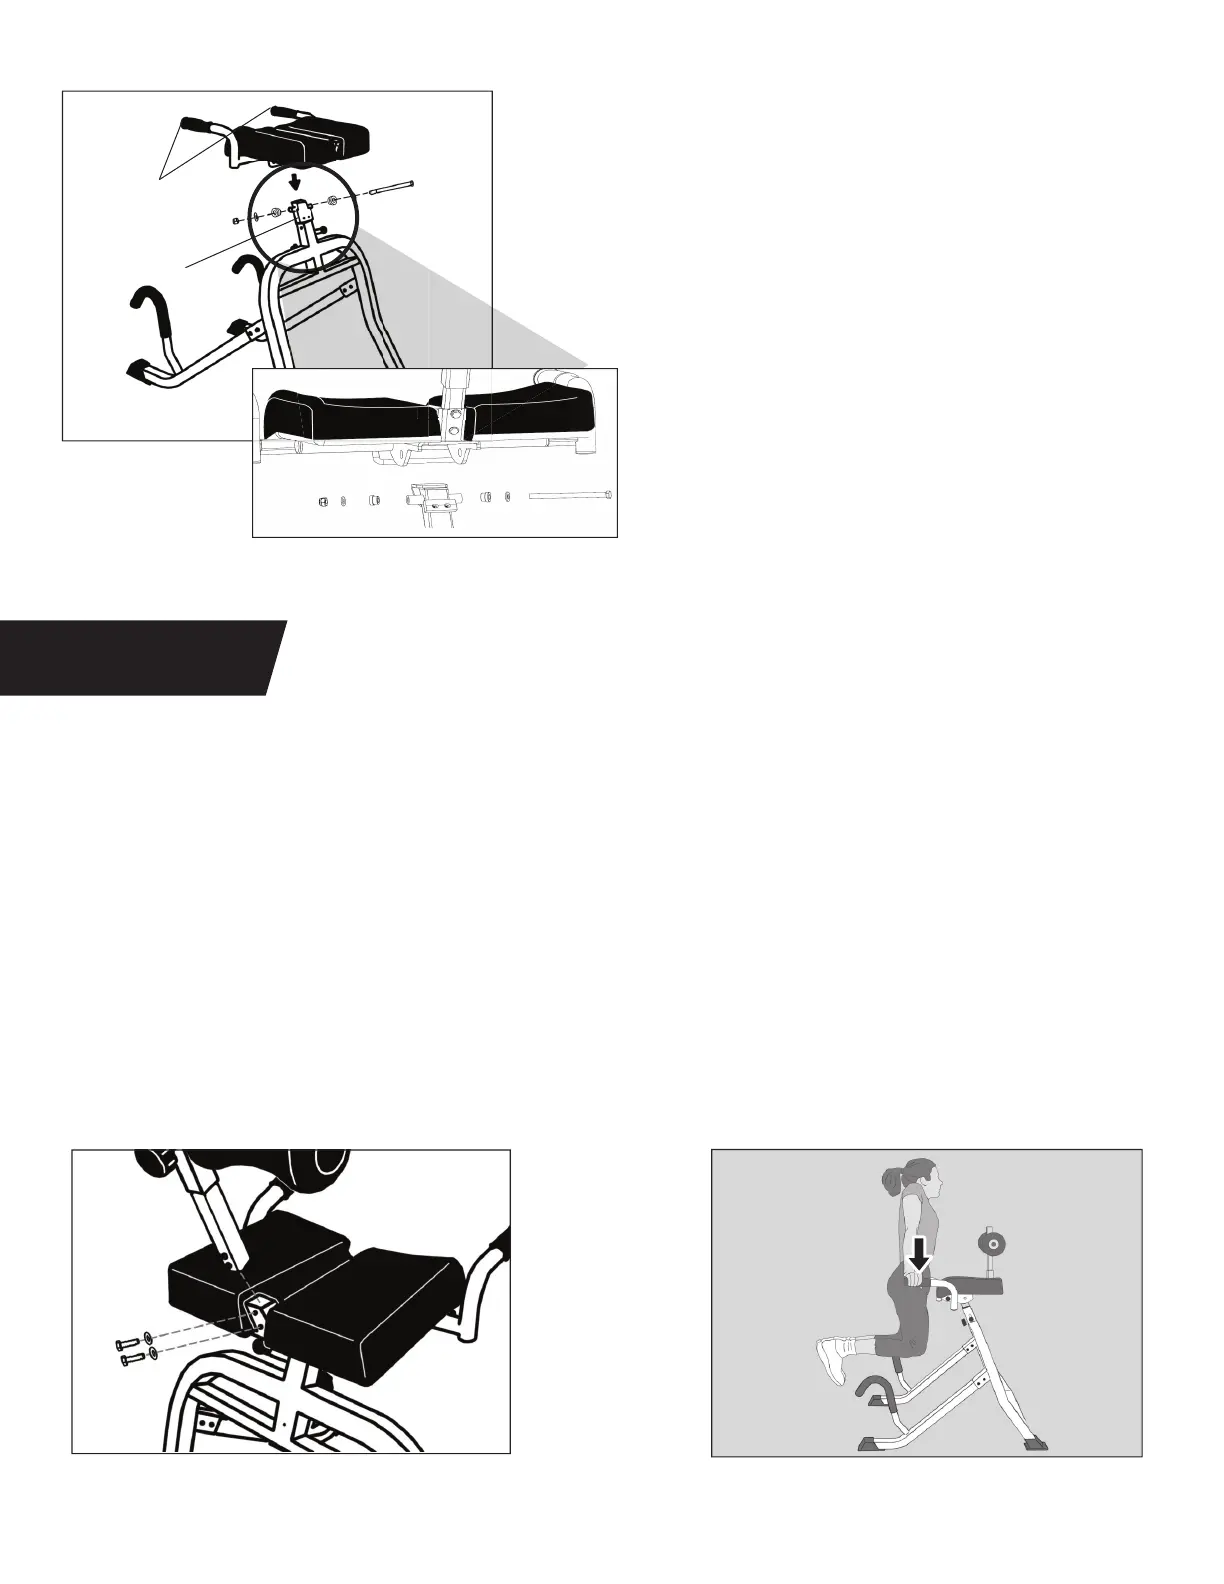
Figure 4a
Figure 4b
Insert the Hex Bolt with Flat Washer and Spacer through
the holes to secure the Lap Pad Assembly to the Main Shaft.
Thread the remaining Spacer (with the small end facing the
Main Shaft) and Flat Washer onto the end of the Hex Bolt.
Figure 4b: Fasten the Hex Nut using the wrenches
provided. Make sure the fasteners are securely
tightened and the Lap Pad rotates smoothly.
With the Traction Handles facing the rear of the Base Assembly,
place the Lap Pad Assembly over the Main Shaft of the Base
Frame and align the holes.