Change base ringer melody
Press MENU button
Press the DOWN button to select
Press the PHONE/OK button
Press the PHONE/OK button
Use the UP/DOWN button to change the melody.
There are options.
Press the PHONE/OK button to confirm
“MELODY 1”
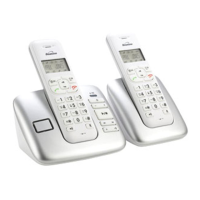
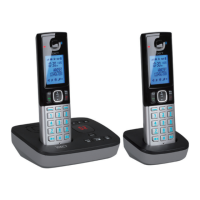
Using a multi-handset system
Make intercom calls
Press the INTERCOM button on any handset (i.e.
handset 1)."
The intercom icon INT will appear, e.g. "INT 2".
Use the digit buttons to press the handset number 2 you want to call, and the
display shows e.g. "CALL INT 2".
Handset 2 will ring
On the handset being called, press the PHONE/OK button to answer and the
intercom icon ‘INT’ will appear on the display
e.g. “INT 1”
Press the HANG UP/C button to end the call
Transfer calls
When one handset is on an external call and wants to trans er the call to another handset
O K
IN T
C
intercom
Press the INTERCOM button on the handset on the external call(i.e.
handset 1)
The intercom icon would appear
Use the digit buttons to press the handset number
you want to transfer the call to (the
external line will be on-hold at this moment)
e.g. “INT 2”
Handset 2 will ring
Press PHONE/OK of handset 2 to answer the
Press HANG UP/C button on handset 1 to transfer the call to handset 2
intercom call
Shuttle between two calls
Set up a three-way conference
You can have a three-way conference when you are
on a call with an external line
When you are on the phone press the INT
button
Press the handset number you want to join the
conference
Handset 2 will ring
Press PHONE/OK to answer intercom call
Press and hold * key to enter conference
MEN U
OK
IN T
O K
IN T
O K
IN T
IN T
Press the PHONE/OK button
Press the PHONE/OK button, the display shows
Use the UP/DOWN button to adjust volume.
There are three levels.
“
VOLUME2
”
.
Press the PHONE/OK button to confirm
11
, the display shows “PHONEBOOK”
“BS RINGER”
, then
, the display shows
When an external call and an intercom call are in
progress at the same time you can shuttle between
the two calls by
O K
C
O K
O K
C
Press the DOWN button to select
“BS MELODY”
3
pressing the INTERCOM button on your handset.
O K
O K
, the display shows “BS VOLUME”
Press and hold the HANG UP/C button to go back to idle mode
Press and hold the HANG UP/C button to go back to idle mode
New call tone
When there is an external call during your intercom call, a new call tone will be heard.
external
Press the R button to answer the
Paging handset
The paging function is useful when you need to locate your handset(s).
On the underside of the base set you will find the
HANDSET LOCATOR button.
Press the HANDSET LOCATOR button and your
handset(s) will ring
Press PHONE/OK button to stop it ringing.
Advanced use of your phone
Handset advanced settings
Auto-answer
With auto-answer turned on, you can answer an incoming call by simply lifting the handset
from its place on the base unit or charger pod.
To turn auto-answer on and off:
Press MENU button
Press the DOWN button to select
Press the PHONE/OK button
Press the DOWN button to select
Press PHONE/OK to turn off auto answer,
*Press PHONE/OK again to turn auto answer back
on.
/(ON)
“AUTO ANS X” (OFF)
To clear handset phonebook and redial memories.
MEN U
O K
C
O K
, the display shows “PHONEBOOK”
“HANDSET”
, the display shows “H/S NAME”
“AUTO ANS
the display shows
for a short while until it links with the new base.
you can register other GAP compatible handsets to your Style1200/1210 base unit,
but we do not guarantee that all features or display messages will be available when
other manufacturers' equipment.
To register to a different brand of base unit.
Your Style1200/1210 handset can be registered to any GAP-compatible base unit, or
Select your base using the digit buttons, e.g. press 1 for BASE 1.
Enter the PIN using the digit buttons (default PIN is 0000).
Press MENU button
Press the DOWN button to select
Press the PHONE/OK button
Press the DOWN button to select
Press the PHONE/OK button
Press the PHONE/OK button to clear or press the HANG UP/OK button to not clear
the memories and then to return to idle mode
“CONFIRM?”
O K
MEN U
O K
O K
O K
O K
Set to Default Settings
Set handset settings to default
Press MENU button
Press the DOWN button to select
Press the PHONE/OK button
Press the DOWN button to select
Press the PHONE/OK button
Press the PHONE/OK button to reset
“DEFAULT”
MEN U
O K
O K
O K
C
Set base settings to default
Press MENU button
Press the DOWN button to select
Press the PHONE/OK button
Change your pin code
Press the PHONE/OK button, the display shows "NEW _ _ _ _"
Key in your new Pin code
Press MENU button,
The PIN code is only used when registering new handsets to the base, see page 2.1
Press the DOWN button
Press the PHONE/OK button
“PHONEBOOK”
“BASE”
“PIN CODE”
If the current Pin code is not the default (0000) the display shows "PIN _ _ _ _".
Then key in the current Pin code.
(If the current Pin code is the default (0000), this step will be skipped.)
Press the PHONE/OK button to confirm, , the display shows "NEW _ _ _ _"
Key in the new pin code again
C
O K
MEN U
O K
O K
C
Select Dialing Mode
You should normally leave the dialing mode at its default setting of TONE (also called DTMF).
To change the dialing mode if necessary.
the display shows
the display shows
,
to select
Press the PHONE/OK button to confirm
O K
Press the DOWN button to select
Press the PHONE/OK button
Press the PHONE/OK button to reset,
“CONFIRM ?”
“DEFAULT”
O K
MEN U
O K
O K
Press MENU button,
Press the DOWN button to select
Press the PHONE/OK button
“PHONEBOOK”
“BASE”
“PIN CODE”
Press the PHONE/OK button,
“TONE”
O K
the display shows
Press the UP or DOWN button to change between TONE and PULSE
Press the DOWN button once,
Press the PHONE/OK button to confirm your selection,
“DIAL MODE”
“DIAL MODE”
O K
C
O K
MEN U
Note: If PULSE dialing is set, you can press the * key to switch to TONE dialing for
the rest of that call.
12
De-registering a handset
*This may be necessary if one of your handsets is lost or out of order and needs to be replaced.
Press MENU button
Press the DOWN button seven times,
“PHONEBOOK”
“DEL H/S”
Enter the handset number you want to de-register
MEN U
OK
C
the display shows
,
the display shows
Wait until the handset beeps and the free handset numbers are shown on the display
Select the handset number you require using the corresponding digit button.
There will be a double beep tone and the handset will return to idle mode with the new
handset number shown.
Press the PHONE/OK button to confirm
* The handset that has been de-registered will show "UNREGISTER" on its display, if
it is not registered to any other base.
All the handset numbers registered to that base will appear on the display
13
14
, the display shows “PHONEBOOK”
“HANDSET”
, the display shows “H/S NAME”
“CLEAR MEM”
, the display shows
, the display shows “PHONEBOOK”
“HANDSET”
, the display shows “H/S NAME”
“DEFAULT”
, the display shows “CONFIRM ?”
, the display shows
, the display shows “PHONEBOOK”
“BASE”
, the display shows “PIN CODE”
“DEFAULT”
the display shows
,
the display shows
the display shows
the display shows
,
the display shows
the display shows
Handset registration
* When you purchase a Style1200/1210 multi-handset system, all handsets are already
* Handset registration is only necessary when you buy an extra-handset by itself.
* Up to 4 handsets can be registered to your Style1200/1210 base.
* Each handset can be registered to up to 4 base units.
Registering a handset
Press the HANDSET LOCATOR button
tone (continuous beeps).
The base station will stay in registration mode for 60 seconds.
station until
you hear the registration
at the base
Press MENU button
Press the DOWN button six times
Press the PHONE/OK button
* Flashing numbers indicate base registrations not used
“REGISTER”
“BS 1234” (234 will flash)
MEN U
O K
O K
Select a base unit
Press MENU button,
Press the DOWN button to select
Press the PHONE/OK butto
“PHONEBOOK”
“SEL BASE”
MEN U
registered: you do not need to register any of the handsets.
, the display shows “PHONEBOOK”
, the display shows
the display shows
Press PHONE/OK to confirm, the display shows
“WAIT”
Select the base unit you want to register your
Press the PHONE/OK button to confirm.
The handset will display "RANGE OUT"
flashing is the base which is currently selected.
(Select 0 = Auto mode to automatically link with the first available base)
O K
n
handset to. The number not .
Press and hold the HANG UP/C button to go back to idle mode
Press and hold the HANG UP/C button to go back to idle mode
Press and hold the HANG UP/C button to go back to idle mode
Press and hold the HANG UP/C button to go back to idle mode
Press and hold the HANG UP/C button to go back to idle mode
Press and hold the HANG UP/C button to go back to idle mode
Set Flash time (Recall)
You should not need to change the setting from the default of SHORT (100ms), unless
you're having a problem with the Flash (Recall) when using your phone on a PBX.
Press MENU button
Press the DOWN button to select
Press the PHONE/OK button
“PHONEBOOK”
“BASE”
“PIN CODE”
Troubleshooting
ALWAYS check
first that:
You have followed all the steps listed on page to install and set up 5
your Style1200/1210
All connectors are firmly inserted in their sockets
Mains power to the base unit is switched on at the socket
The handset’s batteries are correctly and securely installed and are
not run down
Everyday use
“I cannot make or
answer calls”
If the handset’s display is blank. It may be switched off. Press the
HANG UP button to switch it back on.
Check that the base unit’s mains power adapter is plugged in and
power is switched on. The base unit needs mains power for normal
operation of the phone – not just for charging the batteries.
Make sure you are using the telephone line cable supplied with your
Style1200/1210. Other telephone line cables might not work.
Move the handset closer to the base unit
Check the battery Level symbol on the display. If it is low, replace the
handset on the base unit or charger pod to recharge the batteries.
Baby Monitor may be turned on. You need to turn it off before you
can make calls.
Switch off power at the mains socket, wait for a short time and then
switch back on. This may solve the problem.
MEN U
O K
Press the DOWN button twice
Press the PHONE/OK button,
Press the DOWN button to select SHORT (100ms), MEDIUM (250ms) or
LONG (600ms).
Press PHONE/OK to confirm,
“FLASH”
“SHORT”
“FLASH”
O K
O K
C
To turn Baby call ON/OFF:
Press MENU button
Press the UP button
Press the PHONE/OK button
“PHONEBOOK”
“BABYCALL”
Press the PHONE/OK button
If you have selected to the ON( ), press " " button and you can enter the number
to select Baby call,
O K
O K
MEN U
C
“ON/OFF ” (X)
ON (
) or OFF (X)
When Baby Call is turned on, the number is shown on the display, with a lock symbol
on the display.
15
the display shows
,
the display shows,
the display shows
the display shows
the display shows
,
the display shows
the display shows
,
the display shows
to select,
Press and hold the HANG UP/C button to go back to idle mode
Press and hold the HANG UP/C button to go back to idle mode
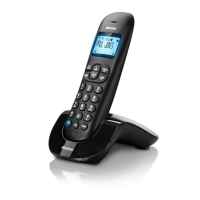
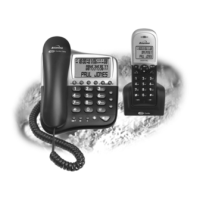
Digital Cordless Telephone with Caller
Display, Nam e and Number Phonebook
and
Machine (Style 1210 only).
Answering
and adapter
Important note: This telephone is not designed for Emergency calls
when the main power fails
For Emergency calls you should have a basic phone that does not need
a mains power, connected to your line so that you can make calls during
a power failure.
Binatone Helpline (for UK only)
Monday to Friday from 9:00am to 5:00pm
Tel: 0845 345 9677
**Please note that all calls are charged at local rate
Or visit our website: www.binatoneonline.com
Charging batteries for the first time
Before you start to use your telephone make sure that all batteries are fully
Unpacking your phone
In the box you will find:
the cordless handset (two handsets with a
Twin system, three with a Triple system and
Quad system)
the base unit, with attached mains power lead
rechargeable batteries and a battery
compartment
cover for each handset
a telephone line cable for the base unit
charger pods, each with an attached mains power
lead and adapter, for multi-handset system
** Keep your sales receipt as it is your guarantee
USER GUIDE
charged for 15 hours.
The handset’s keypad may be locked. Unlock it before you make a
call.
“I cannot make a
call”
Only one handset (or the base unit) can be connected to the outside
line at once. If another handset is already using the line, you need to
wait until it’s finished its call.
“When I press
keys, nothing
happens”
Make sure the batteries are fitted in your handset. If the Battery
Try a different position for the base unit – somewhere higher if
possible, or further from other electrical equipment.
“When I key in a
number, it appears
on the display, but
I can not make an
outside call.
Try moving the handset closer to the base unit.
“The phone does
not ring”
Check that the base unit’s mains power adapter is plugged in and
power is switched on. The base unit needs mains power for normal
operation of the phone – not just for charging the batteries
Make sure you are using the telephone line cable that was supplied
with your Style1200/1210. Other telephone line cables might not work
“My call was cut
ge. Now I can’t
Move the handset closer to the base unit before you try again to
use my handset.
Move the handset closer to the base unit, or to a different position.
“There is
interference and
noise on the line”
Try moving the base unit so that it’s not near other electrical
equipment, such as a television or a computer.
You’ll get the best sound if you place the base unit as high as
possible. For example, in a two-storey house, the first-floor landin
You may be going out of range of the base unit. Move closer or
“I hear ‘beeps’
from my handset
while I’m on a call”
Check the Battery Level symbol on the display. If it’s low, recharge
the batteries.
You need to subscribe to the Caller Display feature from your
network service provider. You should find contact details on your
phone bill.
“The Caller Display
feature isn’t
working”
The caller may have withheld their number by dialing 141. Or they
may be calling from a network that does not transmit the caller’s
number (e.g. it may be an international call.)
“When I try to
make a call, I hear
Busy tone.”
If you’re using a Style1200/1210 multi-handset system, check
whether another handset is already on a call.
Make sure you’re holding the earpiece correctly over your ear.
“The volume in the
earpiece is low
when I’m on a call”
Adjust the volume using the UP/DOWN button.
Intercom and transfer
Make sure the other handset is in range of the base unit.
“I can’t transfer a call"
Make sure you are dialing the correct number for the other handset.
Batteries
Before you first use the handset, you should have left it on the base
unit or charger pod for 15 hours to charge the batteries fully.
You may need to replace the batteries
“The handset’s
battery pack is
running low within
an hour or two”
Check the connection between the base unit and the mains power
socket
You need to replace the batteries. To find out how to obtain
replacements call the Binatone Spares Department on 0845 345
9677 from 9:00am to 5:00pm, Monday to Friday.
“I try to recharge
the batteries but I
still get a warning
that they are low”
Dispose of used batteries safely – never burn them, or put them
where they could get punctured.
Do not use non-rechargeable batteries in your Style1200/1210 –
they may burst, causing damage.
If the fault persists…
Disconnect all other instruments connected to the same line as
Level symbol on the display shows ‘low’, put your handset back on
the cradle for it to charge.
off when I went out
of ran
make a call.
is an ideal place.
g
your call may be cut off.
the Style1200/1210 and try to make a call
Disconnect the base unit from the telephone line and plug a
If the call does not work, and you are using a two-way socket
adapter, remove it and plug a telephone directly into the socket.
If you cannot make a call, the fault may be on the exchange line.
Contact the service provider (the BT engineers on 151, or your cable
company).
If you still cannot identify the cause of the problem, contact the
Binatone Help Line on 0845 345 9677.
Declaration of conformity
Binatone Style1200/1210 complies with the essential protective requirements and objectives of:
EC R&TTE Directive 2006/95/EC
And conforms to the following relevant harmonized standards:
Radio: EN 301406 (TBR 6)
EMC: EN 301489
Safety: EN 60950, EN 41003
Cleaning and care
Do not clean any part of your Style1200/1210 with benzene, thinner or other solvent
chemicals – this may cause permanent damage which is not covered by the Guarantee.
When necessary, clean it with a damp cloth.
Keep your Style1200/1210 away from hot, humid conditions or strong sunlight, and
don’t
let it get wet.
Every effort has been made to ensure high standards of reliability for your Style1200/1210.
However, if something does go wrong, please do not try to repair it yourself – consult
your supplier or the Binatone Help Line.
different phone into the master telephone socket. Try making a call.
If this works, the line is OK.
If the call now works, the adapter may be faulty.
1
1
1
17
6
8
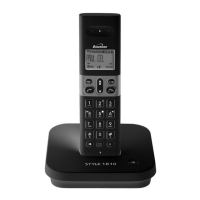
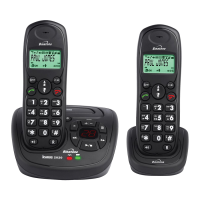
Stylish Digital Cordless Telephone
Style
x
x
x
x
x
four with a
1200/1210
this may take a short while).(
f
using
is
then press OK
Technical details
Standard Digital Enhancement Cordless Telecommunication (DECT)
Frequency range 1.88 to 1.9 GHz (bandwidth = 20 MHz)
Channel bandwidth 1.728 MHz
Operating range Up to 300m outdoors; up to 50m indoors
Operating time Standby: 80 hours
Talking: 8 hours
Battery charge time: 15 hours
Temperature range Operating 0 ºC to 40 ºC
Storage -20 ºC to 60 ºC
Electrical power HANDSET – 300mAH NiMH rechargeable battery pack.
Base UNIT/CHARGER POD – input 230V 50Hz 30mA; output DC7.5 300mA 2.25VA
Port specification
The port (connected to the telephone line) is a TNV port
with respect to EN41003.
Guarantee and service
The Binatone Style1200/1210 is guaranteed for 12 months from the date of purchase shown
Please keep your sales (till) receipt – this is your guarantee. You should also keep the
original packaging material.
In the unlikely event that you need to return your Style1200/1210 to our Repair Centre while
it is under guarantee, there will be a £5 handling charge.
on your sales receipt.
While the unit is under Guarantee
1. Disconnect the base unit from the telephone line and the mains electricity supply
2. Pack up all parts of your Style1200/1210, using the original packaging. Remember to
3. Return the unit to the shop where you bought it, making sure you take your sales receipt.
After the Guarantee has expired
If the unit is no longer under Guarantee, first follow steps
1 and 2 as for repair under
3. Call our Service Department on 0845 345 9677 and ask for a quotation of the repair
4. Make sure you include with your Style1200/1210:
Your name and address
A cheque or postal order for the value of the repair charge
5. Return your Style1200/1210 to the address given by the Service Department.
* This does not affect your statutory rights.
This guarantee does not cover any faults or defects caused by
accidents, misuse, fair wear and tear, neglect, faults on the telephone line, lightning,
tampering with the equipment, or any attempt at adjustment or repair other than
through approved agents.
include the mains adapter
Guarantee. Then…
charge and details of where to send your Style1200/1210 for repair.
UK (BTP) Ver 2, 07June
 Loading...