RL39 - Repair instructions for changing the frame
Version 1.0, last revised 03/2016
42/58
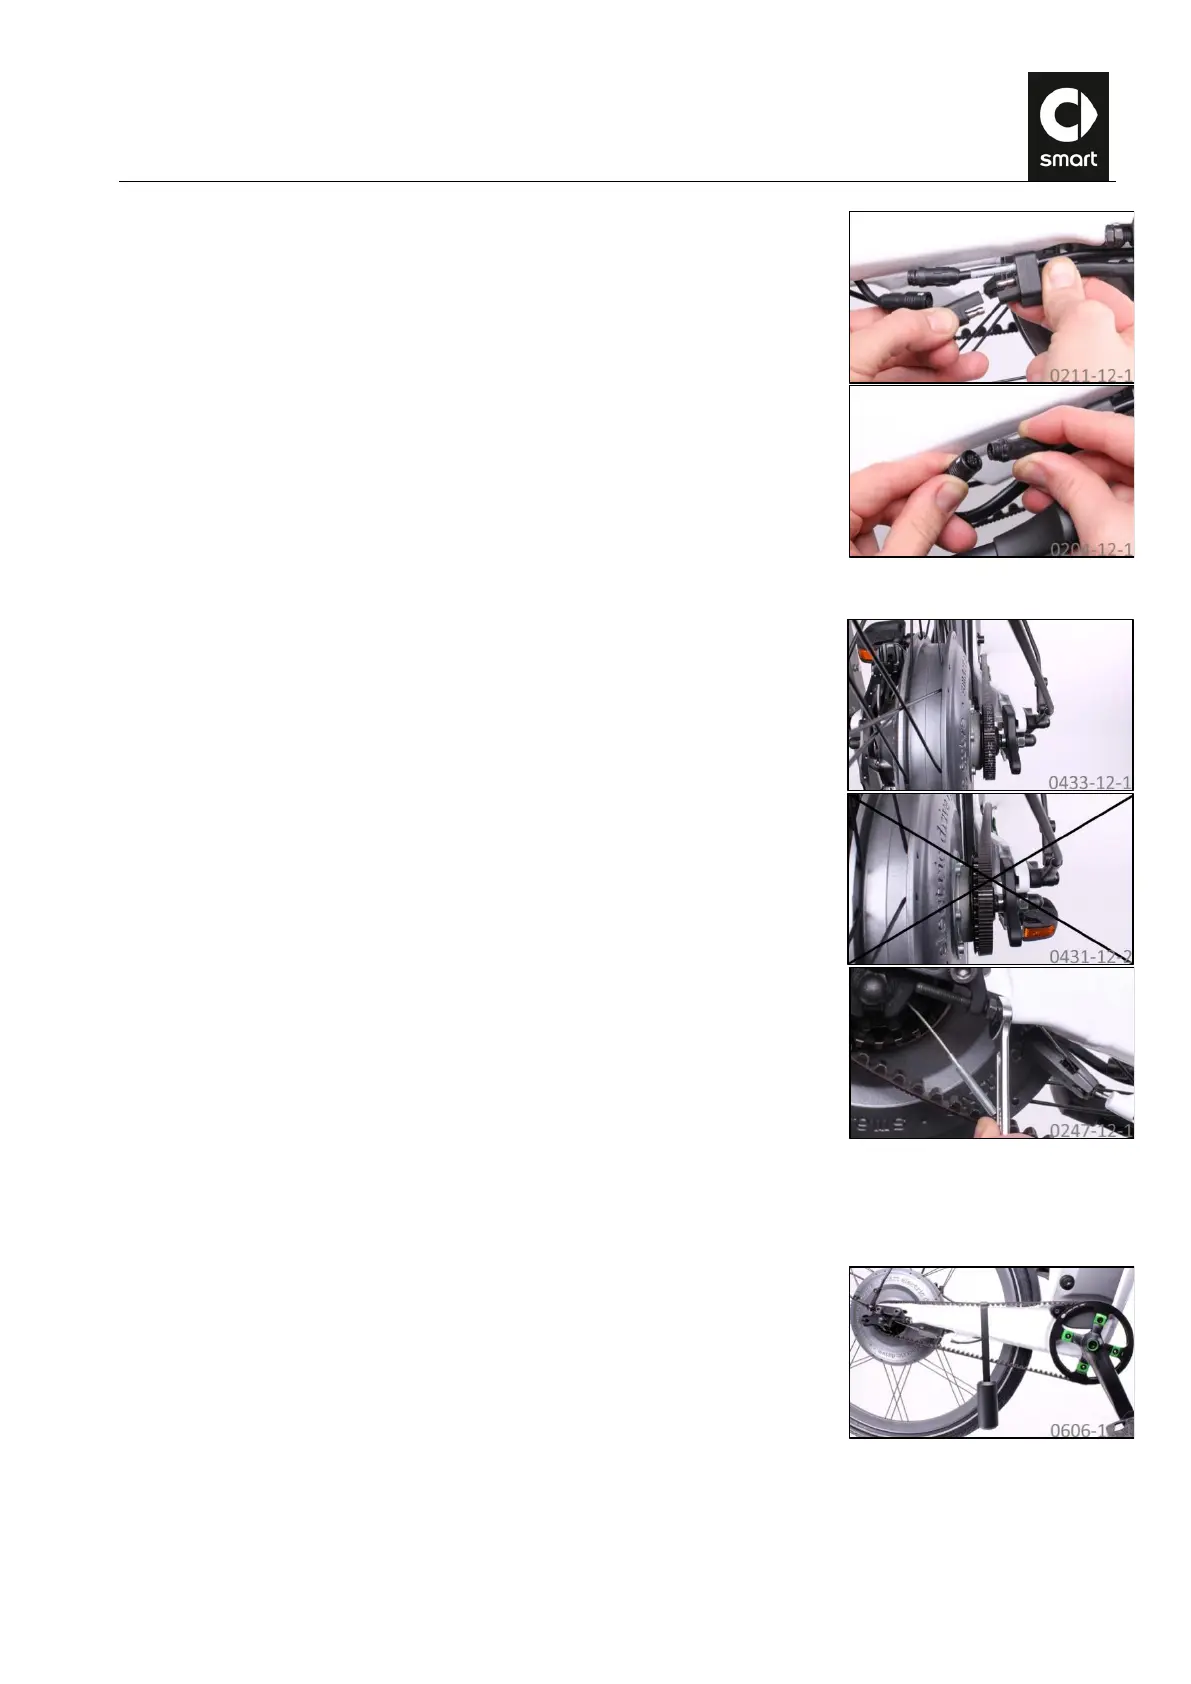
Feed the cables through the cable guide and connect first the power cable and
then the data cable to the motor.
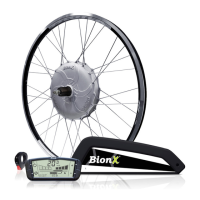
LL. Aligning the belt
Turn the crank forwards and backwards 10 - 15 times and watch the line that
the belt follows. The belt should only slightly touch the side stop (flange) of
the rear belt pulley or it should have a gap of no more than approx. 1 mm.
A constant distance of 0.5 mm is ideal.
Tightening the axial adjustment bolt at the dropouts on the drive side or
loosening on the opposite side moves the line of the belt closer to the side stop
(flange) of the rear belt pulley. Align the rear wheel so that the belt follows the
correct line.
Turn the crank again, check the line of the belt and readjust it if necessary.
Repeat this step until the line of the belt is correctly adjusted. Always observe
the required belt tension.
MM. Adjusting the belt tension
Use the Eco Tension Tester to set the required belt tension exactly. To do this,
hang the weight from the upper span of the belt halfway between the rear wheel
hub and the bottom bracket.