EasyManua.ls Logo

Bircher Reglomat ProLoop 2 User Manual

Bircher Reglomat ProLoop 2
4 pages
To Next Page IconTo Next Page
Page #1 background imageLoading...
Page #1 background image
ProLoop 2 loop detector DIN variant, mounting rail installation
LCD display
«Mode» button
«Data»-button
Terminals
Info LED
1
ProLoop 2
Loop detector for industrial doors and gates,
car parks and parking bollards
2
Mechanical mounting in the switch cabinet
3
Electrical connection
ProLoop2 terminal connection diagram
Translation of the original instructions
Safety instructions
1
G
eneral
These devices and their accessories may only be operated in compliance with the operating instructions (intended use)!
These devices and their accessories may only be commissioned by trained and qualified personnel.
These devices may only be operated with the intended operating voltages and parameters.
If malfunctions occur that cannot be rectified, shut down the device and send it in for repair.
These devices are only allowed to be repaired by the manufacturer. Tampering and alterations are not permitted. This will invalidate all guarantee and
warranty claims.
The ProLoop 2 is mounted on a 35 mm mounting rail acc. to EN 50 022 in the switch cabinet.
The terminals are pluggable and coded.
A:
Supply
voltage
connection
B:
Loop connection
1-channel device
C:
Loop connection
2-channel device
D:
Alarm output
connection
(optional)
E:
Relay connection
output 1
F:
Relay connection
output 2
AC
AC
A1
A2
31
32
34
no
nc
common
14
11
12
no
nc
common
24
21
22
n
o
nc
common
L3
L4
L3
L4
L5
L6
1
2
The loop connection wiring to the loop detector must be twisted at least 20 times per meter.
Please ensure the unit is wired properly with correct input voltage and all terminals are connected according to the wiring diagram on the label.
1-loop device
Relay assignment:
Output connection
diagram:
Output 1 E
Output 2 F
Alarm output D
2-loop device
Relay assignment:
Output connection
diagram:
Output 1+2 E, F
Alarm output D
Output connection options (depending on the options ordered):
3.1
ENGLISH
General
Explanation of the LCD display Explanation of the LED
Standard display
1-loop device
Standard display
2-loop device
Control button Control button
1
1
2
Mode
Sim1
Data
Sim2
1
2
Loop 2
Example:
Parameter «h»
set
Function
Example:
Time
function set
Loop 1
Red + green: Start-up phase
Green: Operation
Red + green: Configuration
Flashing green: Output 1 and/or
2 activated
Flashing red: Error
Flashing
red + green: Simulation
The settings of the ProLoop devices in this chapter are shown and explained for the 1-loop device. The settings for loop 2 of a 2-loop device should be
made using the corresponding method.
4
Value and parameter setting options
LCD display and controls
4.1
265335H
10/17
Question and Answer IconNeed help?

Do you have a question about the Bircher Reglomat ProLoop 2 and is the answer not in the manual?

Bircher Reglomat ProLoop 2 Specifications

General IconGeneral
BrandBircher Reglomat
ModelProLoop 2
CategorySecurity Sensors
LanguageEnglish

Summary

Safety Instructions

Mechanical Mounting

Electrical Connection

ProLoop2 Terminal Connection Diagram

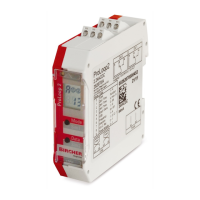
Diagram showing terminal connections for supply voltage, loop, and outputs.

Value and Parameter Setting Options

LCD Display and Controls

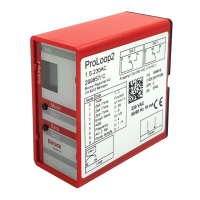
Explains the LCD display and LED indicators for device status.

Basic Functions

Defines core functions like Door/gate, Barrier, Quiescent current, and Direction logic.

Time Functions

Details On delay, Off delay, Activation pulse, Max. presence, and Impulse by leaving.

Sensitivity Adjustment

Explains sensitivity adjustment stages for loop detection.

Automatic Sensitivity Boost (ASB)

Describes ASB for recognizing trailer drawbars.

Frequency Settings

Explains setting different frequencies to avoid interference.

Direction Logic Function

Details the direction logic function for 2-loop devices.

Output 2 Configuration

Explains activation/deactivation of the second output.

Protection Against Power Failure

Explains the function to retain settings after power loss.

Signal Characteristics with Power Failure Protection

Describes signal behavior during power failure for different basic functions.

Changeover to Configuration Mode

How to switch between operation and configuration modes.

Configuration Mode Parameters

Details various settings within the configuration mode.

Simulation Mode

Troubleshooting

Error Display and Codes

Explains error codes and LED indicators during malfunctions.

Reset Functions

Technical Data and Declaration

Most Important Technical Data

Lists key specifications like voltage, inductance, dimensions, and operating conditions.

Declaration of Conformity

States manufacturer and directives observed.

Related product manuals