Do you have a question about the Birlea CORONA 3 DOOR WARDROBE and is the answer not in the manual?
Crucial safety guidelines for handling and using the wardrobe, including checks for missing/damaged parts and keeping small items from children.
Instructions for assembling, cleaning, and maintaining the wardrobe's finish, emphasizing checking fixings and avoiding extreme environmental conditions.
Details on inserting hardware parts A, B, Q, and O using a mallet, and part L with a screwdriver, cautioning against power tool use.
Attaching left and right frames to panels and securing base and top side plinths using specified hardware and a screwdriver.
Fixing the centre frame to the centre panel using hardware part A and a screwdriver, with a warning against power tools.
Connecting the centre panel to the top panel, top shelf, and base panel using hardware parts A and K with a screwdriver.
Attaching the right and left panels to form the main wardrobe structure using hardware part A and a screwdriver.
Connecting top front plinth, outer and inner top frames, securing with hardware parts K, P, G, and M using a screwdriver.
Attaching the completed top frame assembly to the main wardrobe structure using hardware part A and a screwdriver.
Securing the base support using hardware part K and parts M with hardware part G, using a screwdriver.
Attaching the base plinth to the structure using hardware part A and a screwdriver, with a warning against power tools.
Securing the inner top frame to the structure using hardware part P and a screwdriver, with a caution against power tools.
Attaching handles, hinges, and connectors to the right door using hardware parts D, G, F, H, and J with a screwdriver.
Attaching handles, hinges, and connectors to the left door using hardware parts D, G, F, H, and J with a screwdriver.
Attaching handles, hinges, and connectors to the centre door using hardware parts D, G, F, H, and J with a screwdriver.
Securing the assembled doors (left, right, centre) to the main wardrobe frame using hardware part G and a screwdriver.
Inserting side shelves and the hanging rail, securing with hardware parts I and G using a screwdriver.
Attaching door stoppers to the wardrobe frame using hardware part P and a screwdriver, with a warning against power tool use.
Positioning and securing side back panels, centre back panel, and spine using hardware parts E and P with a mallet and screwdriver.
Inserting hardware part C using a small mallet and screwdriver, with a final warning against power tool use.
Details on accessing more product information, contacting customer support, and sharing assembly photos on social media.
| Brand | Birlea |
|---|---|
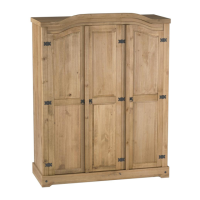
| Model | CORONA 3 DOOR WARDROBE |
| Category | Indoor Furnishing |
| Language | English |