4
INSTALLATION
• ALWAYS Use Qualied Technician and Electrician for Installation.
• ALWAYS Install Equipment in Work area with Adequate Light and Space.
• ONLY Operate on a Solid, Level, Non-Skid Surface.
• NEVER Operate with the Saw Guide Bar with Saw Guard in the Raised Position or the Saw
Guard Removed from the Saw Guide Bar.
• ALWAYS Adjust Saw Guide Bar with Saw Guard to Within ½” of Product to be Cut.
• NEVER Operate Without all Warning Labels Attached and Wall Chart Posted.
1. Read this Manual thoroughly before installation and operation. Do not proceed with installation and
operation if you have any questions or do not understand anything in this Manual. Contact your local
Distributor, or BIRO rst.
2. Install machine on a level, solid, non-skid surface in a well-lighted work area away from children
and visitors.
3. To assemble meat gauge plate (Item No. AS10275) to the machine; Loosen the lock knob
(Item No. 272-7-1) on the right side meat gauge bracket. Raise the meat gauge gear rack
(Item No. S10272) and slip the meat gauge plate over the gear rack. Lower the gear rack back to its
original position, tighten lock knob. Keep gear rack well oiled with food grade oil to ensure free
movement.
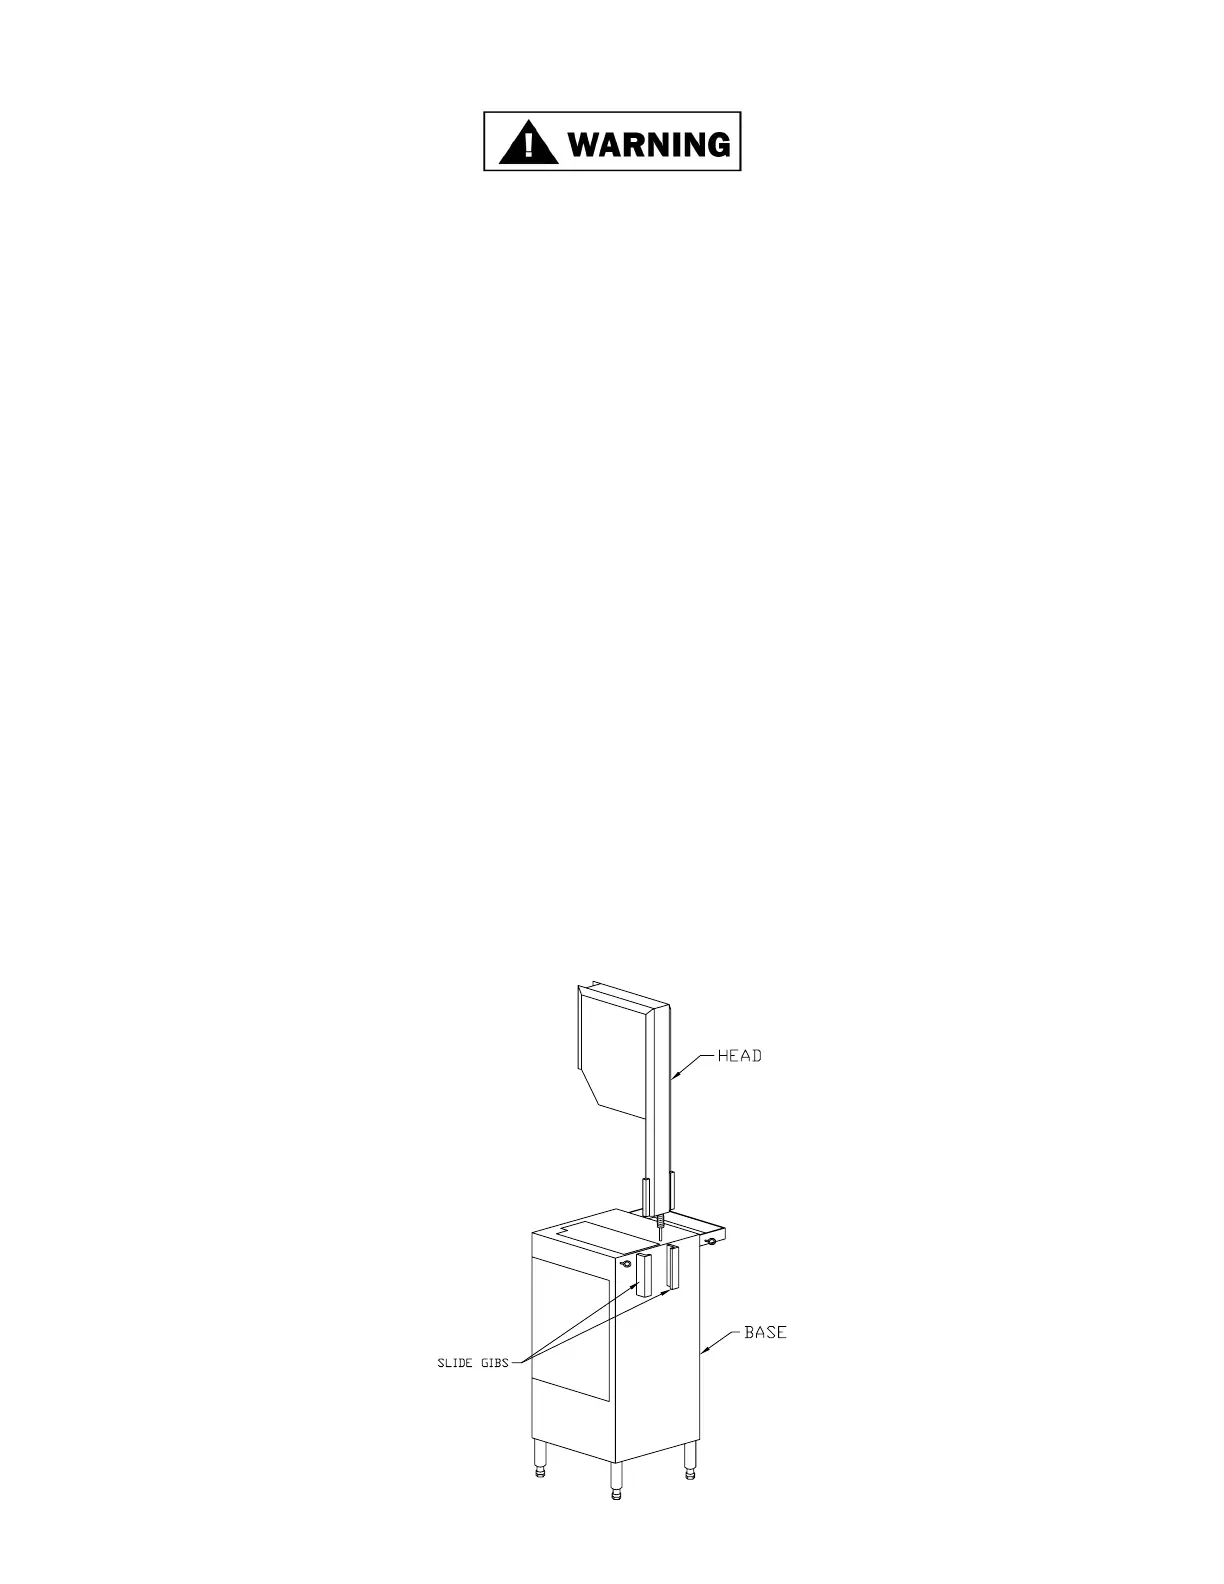
4. The aluminum head (Item No. 10005) comes detached from the base. Slip the head into the slide gibs
(Item No. 260) located on the back of the base structure. Make sure the slide gibs are oiled or greased to
ensure free vertical movement of the head structure.
TO AVOID SERIOUS PERSONAL INJURY
PROPERLY INSTALL EQUIPMENT IN ADEQUATE WORK AREA