4 KW-541-2
3 Remove shaft seal
Warning!
The compressor may be under
pressure!
Incorrect handling can lead to
serious injuries.
Relieve the compressor of
pressure.
Preparatory tasks
• Connect the hoses of the refrige-
rant extraction station to the service
connections of the shut-off valves
• Shut the suction and discharge
shut-off valve on plant side
• Extract the refrigerant with extrac-
tion station until ambient pressure
is attained
• Relieve belt tension and dismount
belt
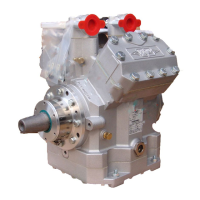
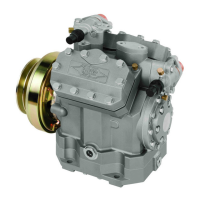
Remove magnetic clutch
Refer to KW-540 chapters 6.1
and 6.2 for detailed descriptions
on how to fit and dismantle the
compressor as well as how to
exchange the magnetic clutch.
Remove shaft seal
Type 1 with oil collection chamber
• Remove the oil drain tube (13) from
the fixing plate (16)
• Remove then plug at the oil drain
tube (14) and fully discharge the oil
collection chamber (9). Afterwards
close the oil drain tube with the
plug and place it on the fixing plate
• Release screws M5 (12) at the oil
collection chamber
• Pull off the oil collection chamber
(9) manually from the sealing
cover (5) (pay attention to rests of
oil in the oil collection chamber!)
and remove the O-rings (11a, 11b)
Type 2 without oil collection
chamber
• Remove bandage and felt ring (10)
3 Démonter la garniture d'étanchéité
Avertissement !
Le compresseur peut être sous
pression ! Risque de blessures gra-
ves en cas d'interventions inappro-
priées.
Amener le compresseur à pressi-
on atmosphérique.
Travaux préparatoires
• Raccorder les tuyaux flexibles de la
station d’aspiration du fluide frigor-
igène aux raccords de service des
vannes d'arrêt
• Fermer les vannes d'aspiration et les
vannes d'arrêt au refoulement du côté
de l'installation
• Aspirer le fluide frigorigène à l'aide de
la station d'aspiration jusqu'à la pressi-
on ambiante
• Détendre la courroie et la démonter
Démonter l'embrayage
électromagnétique
Pour obtenir des descriptions
détaillées sur le montage et le
démontage du compresseur ainsi
que sur le remplacement de l'em-
brayage électromagnétique, voir
KW-540, chapitre 6.1 et 6.2.
Démonter la garniture d'étanchéité
Type 1 avec chambre collectrice
d'huile
• Retirer le tuyau flexible de drainage de
l'huile (13) du tôle de fixation (16)
• Retirer le bouchon de vidage (14) et
vider la chambre collectrice d'huile (9)
complètement. Ensuite fermer le tuyau
flexible de drainage de l'huile avec le
bouchon et fixer le au tôle de fixation
• Dévisser les vis M5 (12) dans la
chambre collectrice d'huile
• Enlever avec la main le couvercle de
fermeture (5) de la chambre collectrice
d’hulie (9) (faire attention aux restes
d'huile dans la chambre collectrice
d'huile !) et retirer les joints toriques
(11a, 11b)
Type 2 sans chambre collectrice
d'huile
• Retirer le ruban de serrage et la bague
feutre (10)
3 Wellenabdichtung ausbauen
Warnung!
Verdichter kann unter Druck
stehen!
Bei unsachgemäßen Eingriffen
sind schwere Verletzungen
möglich.
Verdichter auf drucklosen
Zustand bringen.
Vorbereitende Arbeiten
• Schläuche der Kältemittel-Absaug-
station an die Service-Anschlüsse
der Absperrventile anschließen
• Saug- und Druckabsperrventile zur
Anlagenseite schließen
• Kältemittel mit der Absaugstation
bis auf Umgebungsdruck absaugen
• Riemen entspannen und demon-
tieren
Magnetkupplung ausbauen
Für detaillierte Beschreibungen
zum Ein- und Ausbau des Ver-
dichters sowie zum Austausch
der Magnetkupplung siehe
KW-540 Kapitel 6.1 und 6.2.
Wellenabdichtung ausbauen
Typ 1 mit Ölauffangbehälter
• Ölablaufschlauch (13) aus Befesti-
gungsblech (16) lösen
• Stopfen am Ölablaufschlauch (14)
entfernen und Ölauffangbehälter
(9) vollständig entleeren.
Anschließend Ölablaufschlauch mit
Stopfen verschließen und am
Befestigungsblech anbringen
• Schrauben M5 (12) am Ölauffang-
behälter lösen
• Ölauffangbehälter (9) mit der Hand
vom Abschlussdeckel (5) abziehen
(im Ölbehälter zurückbleibendes Öl
beachten!) und die O-Ringe (11a,
11b) entnehmen
Typ 2 ohne Ölauffangbehälter
• Spannband und Filzring (10) ent-
fernen
 Loading...