This installation guide contains quick information required for the product installation.
Please refer to the Software and Documents provided on the Download section of the
BIXOLON Website(http://www.bixolon.com) for more information on how to setup.
1. Manual: User’s Manual, Code Table, Control Commands, Software manuals
2. Driver: Windows, OPOS, CUPS(Linux, Mac), VCOM(USB, Ethernet)
3. SDK: UPOS SDK(iOS)
4. Utility: Unified POS Utility, Net Configuration Tool, Android Utility, iOS Utility
We at BIXOLON maintain ongoing efforts to enhance and upgrade the functions and quality
of all our products. In following, product specifications and/or user manual content may be
changed without prior notice. Please refer to the BIXOLON website for the addresses and
phone numbers of the company's headquarters and branch offices.
1. Turn off the printer and peripheral devices.
2. Connect the power cord to the adapter and connect the adapter to the power supply
connector of the printer.
3. Interfaces at the back of the printer (USB, Serial, Parallel, Ethernet, Powered USB,
Bluetooth, Wireless LAN) and connect the interface cable.
4. Connect the drawer kick-out cable to the drawer kick-out connector of the printer.
※ Do not use an adapter that was not supplied with the printer.
1. Press the Cover-Open button to open the cover.
2. Insert new roll paper in the correct direction.
3. Pull the paper out slightly and close the cover.
After the paper is rolled about 70mm, it switches
to the black mark mode if there is a black mark,
otherwise, it is automatically set to the continuous
paper mode.
Note
When closing the cover, press down on the center of
the cover to ensure that the paper is in contact with
the roller.
Printing quality may not be optimal if
recommended paper is not used.
(Refer to the User's Manual.)
POWER LED
The POWER light is on whenever the printer is on.
ERROR LED
This indicates an error.
PAPER LED
This light indicates the near end of the paper roll. Install a new paper
roll and the printer will continue printing. When the light blinks, it
indicates the self-test printing standby state or macro execution
Standby state when the macro execution command is used.
FEED Button
Press the FEED button once to advance paper one line.
You can also hold down the FEED button to feed paper continuously.
◈ Mounting Partition(40, 58, 62mm)
Refer to the user manual for detailed instruction.
Refer to the user manual for detailed instruction.
DIP switch settings should be changed when the printer power is turned off.
Any changes made while printer power is on are not recognized.
1. DIP Switch 1
• Serial Interface Setting
Baud Rate(bps) Refer to the following Table 1
• USB / Ethernet Interface Setting
• Table 1 – Baud Rate(bps) Selection
9600
2. DIP Switch 2
Printing Density Refer to the following Table 2
*1)
both taken sensing and back feeding are disabled when 2-4 is on.
• Table 2 – Printing Density Selection
2-5 2-6 2-7 Default
- Level 1 is Default
- Level 6 is Darkest
※ Print Density
The print density can be set to one of eighteen different levels through virtual memory
switches.
Dip Switch
Speed
Memory Switch
Speed
* Choose Unified Utility or Self-Test mode to set the print density using the VMSM.
(Virtual Memory Switch Management)
* Change in DIP Switch settings are recognized only when the printer power is turned on or
when the printer is reset by using the interface. If the DIP Switch setting is changed after
the printer power is turned on, the change does not take effect until the printer is turned
on again or is reset.
1. Check whether the paper is inserted correctly.
2. Turn on the printer while depressing the Feed button. Self-diagnostics will begin.
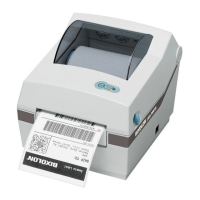
Oracle SRP-S300 Thermal Printer Installation Guide