Maintenance
Operating instructions GLP
4 -- 9
6.562.98.5.01.18
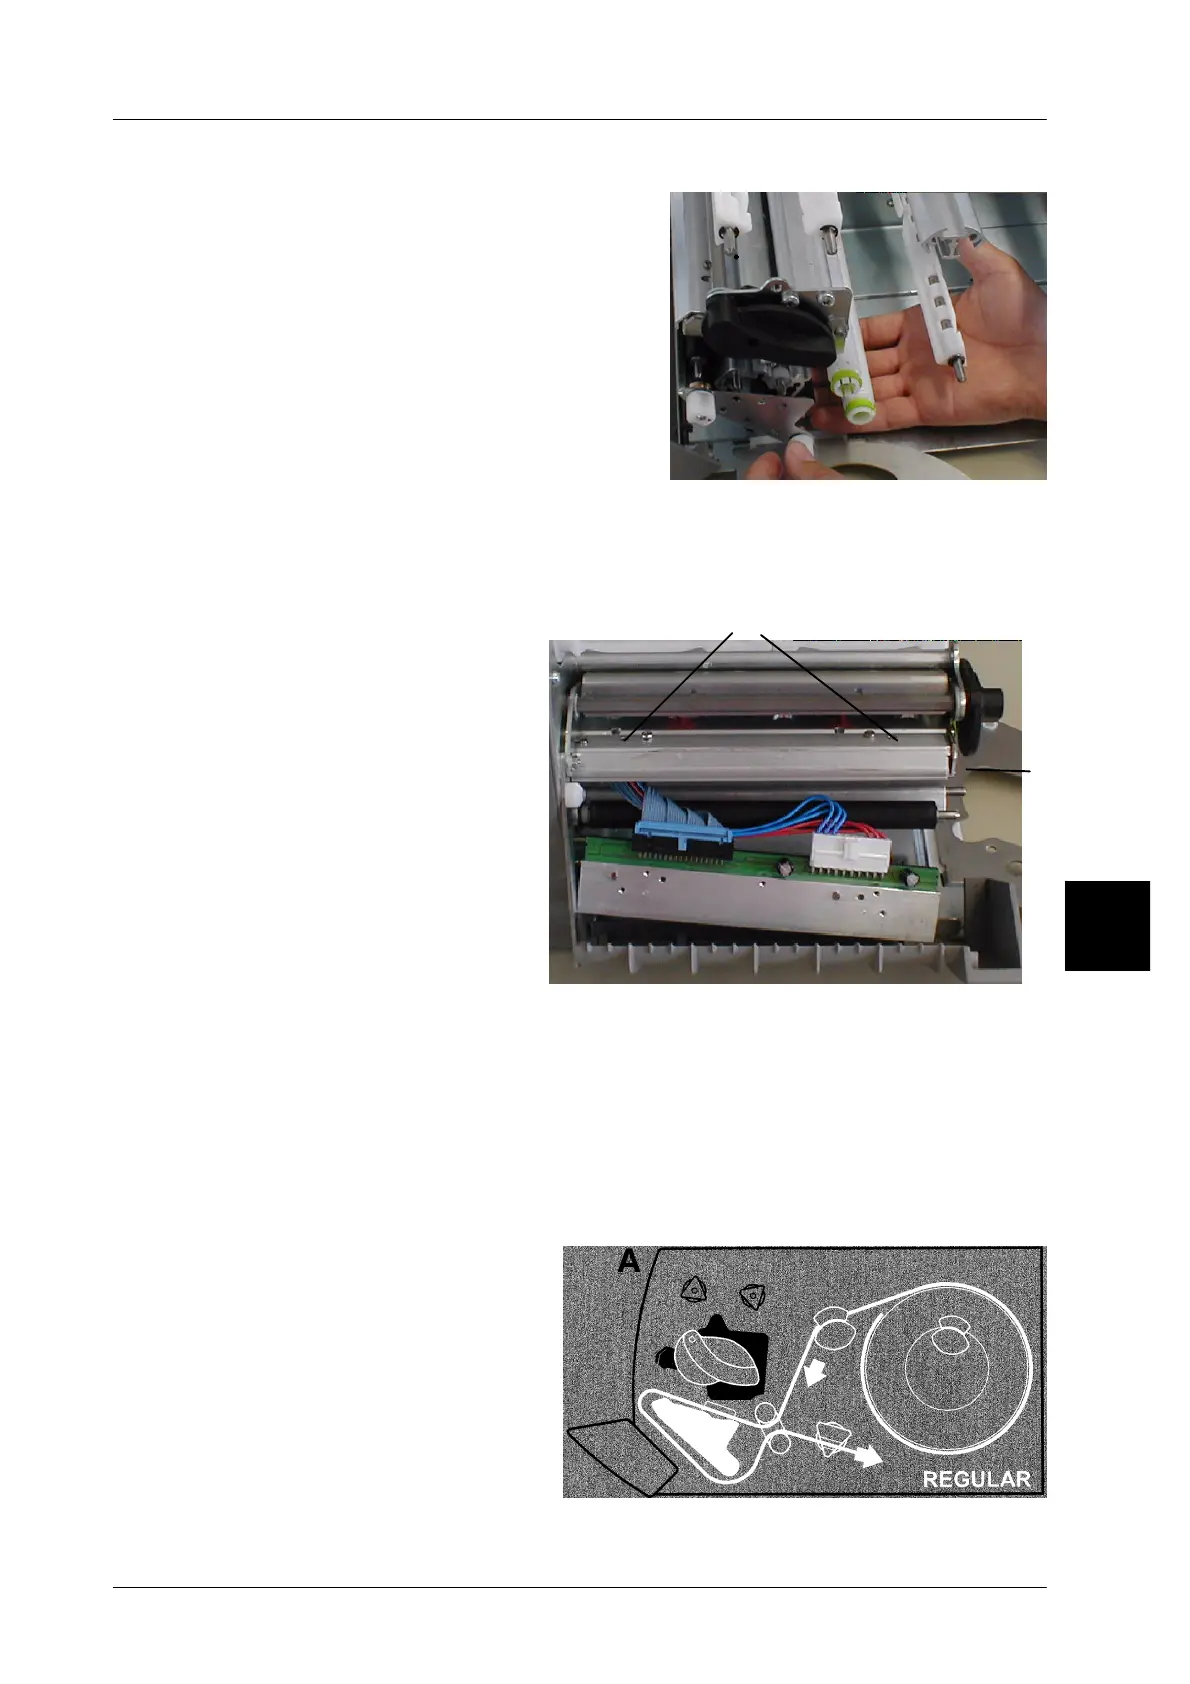
Reinserting the guiding unit:
-- Two plastic lips are located on the left
side of the guiding unit which are
moved into the slots of the aluminium
profiled section during the reinsertion
of the guiding unit. Before reinserting
the guiding unit completely, lift the
right rubber roller using the right hand
until it rests in the bushing (see adja-
cent illustration). The locking device
engages automatically when the
guiding unit is completely moved in.
4.2.1.3 Replacing the GLP 160 thermal strip
The therm strip may be replaced by the user as described in the following.
IMPORTANT: always replace the thermal strip by the same type.
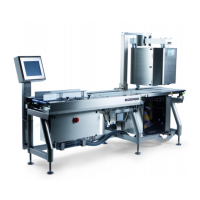
-- Move the swivel lever on the
printer to the right and open
the printhead.
-- Loosen countersunk screws
A using a Torx screw--driver
and remove the thermal strip
from the holding device.
-- Detach both plugs and reat-
tach them to the new ther-
mal strip.
-- Insert the thermal strip into
the holding device and re-
tighten both screws.
4.2.1.4 Replacing the GLP 80 thermal strip
Open the printer. Using a screw--driver, press in the spring through the opening B
on the right of the thermal strip until the thermal strip falls out. Detach the plug. Plug
it to the new thermal strip and have the thermal strip reengaged.
IMPORTANT: always replace the thermal strip by the same type.
4.2.1.5 Making the GLP printer ready for use
--
Reinsert the backing paper
into the printer and close the
latter by moving the swivel
lever to the left.
-- Have some blank labels out-
put using the [FEED] key
and simultaneously check
the guide and tape winder of
the backing paper.
-- Close the housing.
4.2



 To Next Page