Options
Operating instructions GLP
5 -- 3
6.562.98.5.01.18
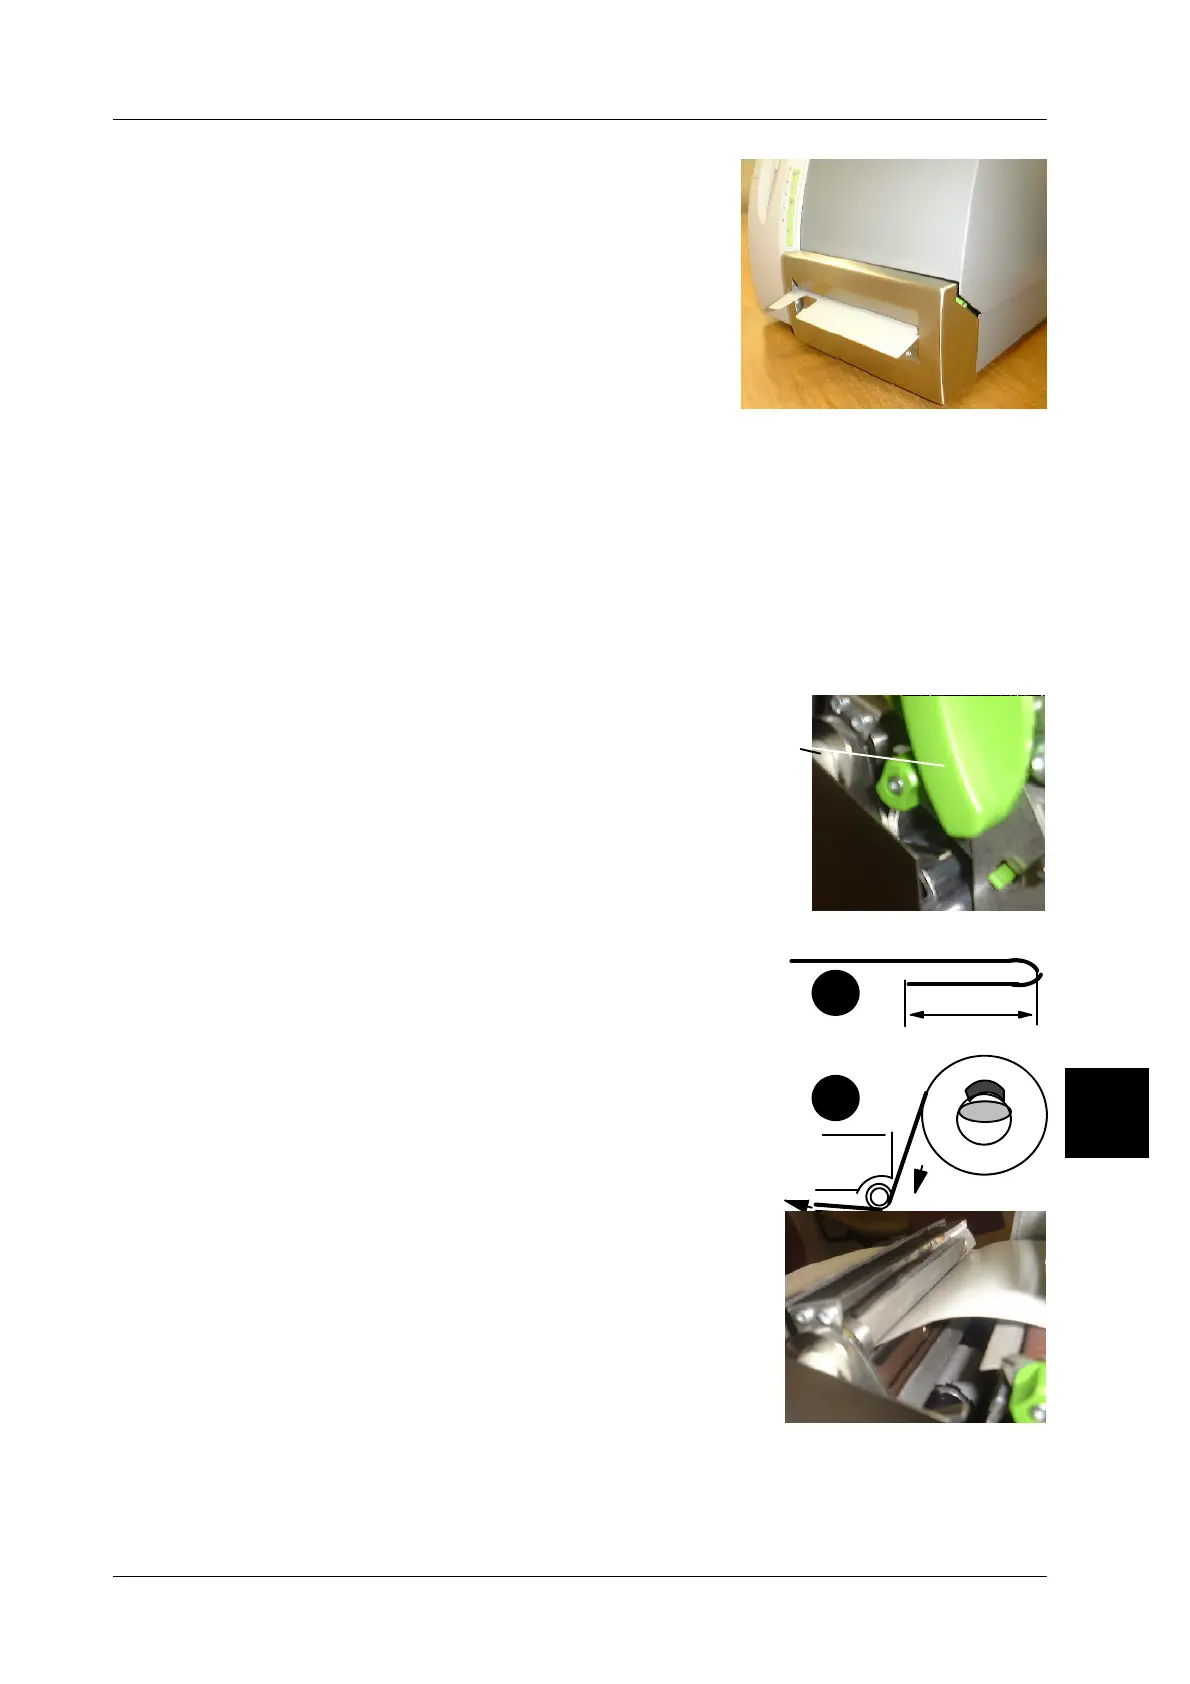
5.2 Label cutting device
5.2.1 Description
If the GLP printer is equipped with a label cutting
device, ticket stripes, or if it’s the Linerless ver-
sion, Linerless labels or standard self--adhesive
labels may be cut.
5.2.2 Deactivating the cutting device
If required, and as described on page 3--120 the cutting device may be either acti-
vated or deactivated.
5.2.3 When cutting Linerless labels, activate retract operation
If Linerless labels are to be cut, the retract operation must be activated to retract
the labels (see page 3 -- 143).
5.2.4 Changing Linerless or ticket roll
If the roll is empty a new one must be inserted. Move the leading end of the roll
through the open printer and the open cutting device.
Proceed as follows:
-- Open printer housing on right side (see page
2 -- 15)
-- First lift the stop lever A, than move the cutting de-
vice forward.
-- Open the printer by turning the green knob to the
right.
-- The side cover of printer on the GLP 160 must only
be opened on the green plastic profile.
-- Remove the reamining roll from the takeup device
and insert a new one. The leading end of the roll
must be folded at approx. 100 mm (adhesive sides
facing to each other (see fig. 1). Then, as shown
in figure 2 move the leading end of the roll through
the printer.
-- If the knife is not in its basic position it may be tur-
ned by means of the right knurled ring until the pa-
per can be moved through the cutting device.
-- Move the leading end of the roll that comes out of
the printer, through the cutting device. An approx.
100 mm overlapping length is required.
-- Hold the leading end of the roll to avoid a paper roll
jam when bringing cutting device back to its basic
position.
-- Close side cover on GLP 160 printer.
-- Close printer by turning the green knob.
-- Test the cutting device and the winding by printing the PRINT key.
-- Move the printer cover back in place.
5
A
100
1
2