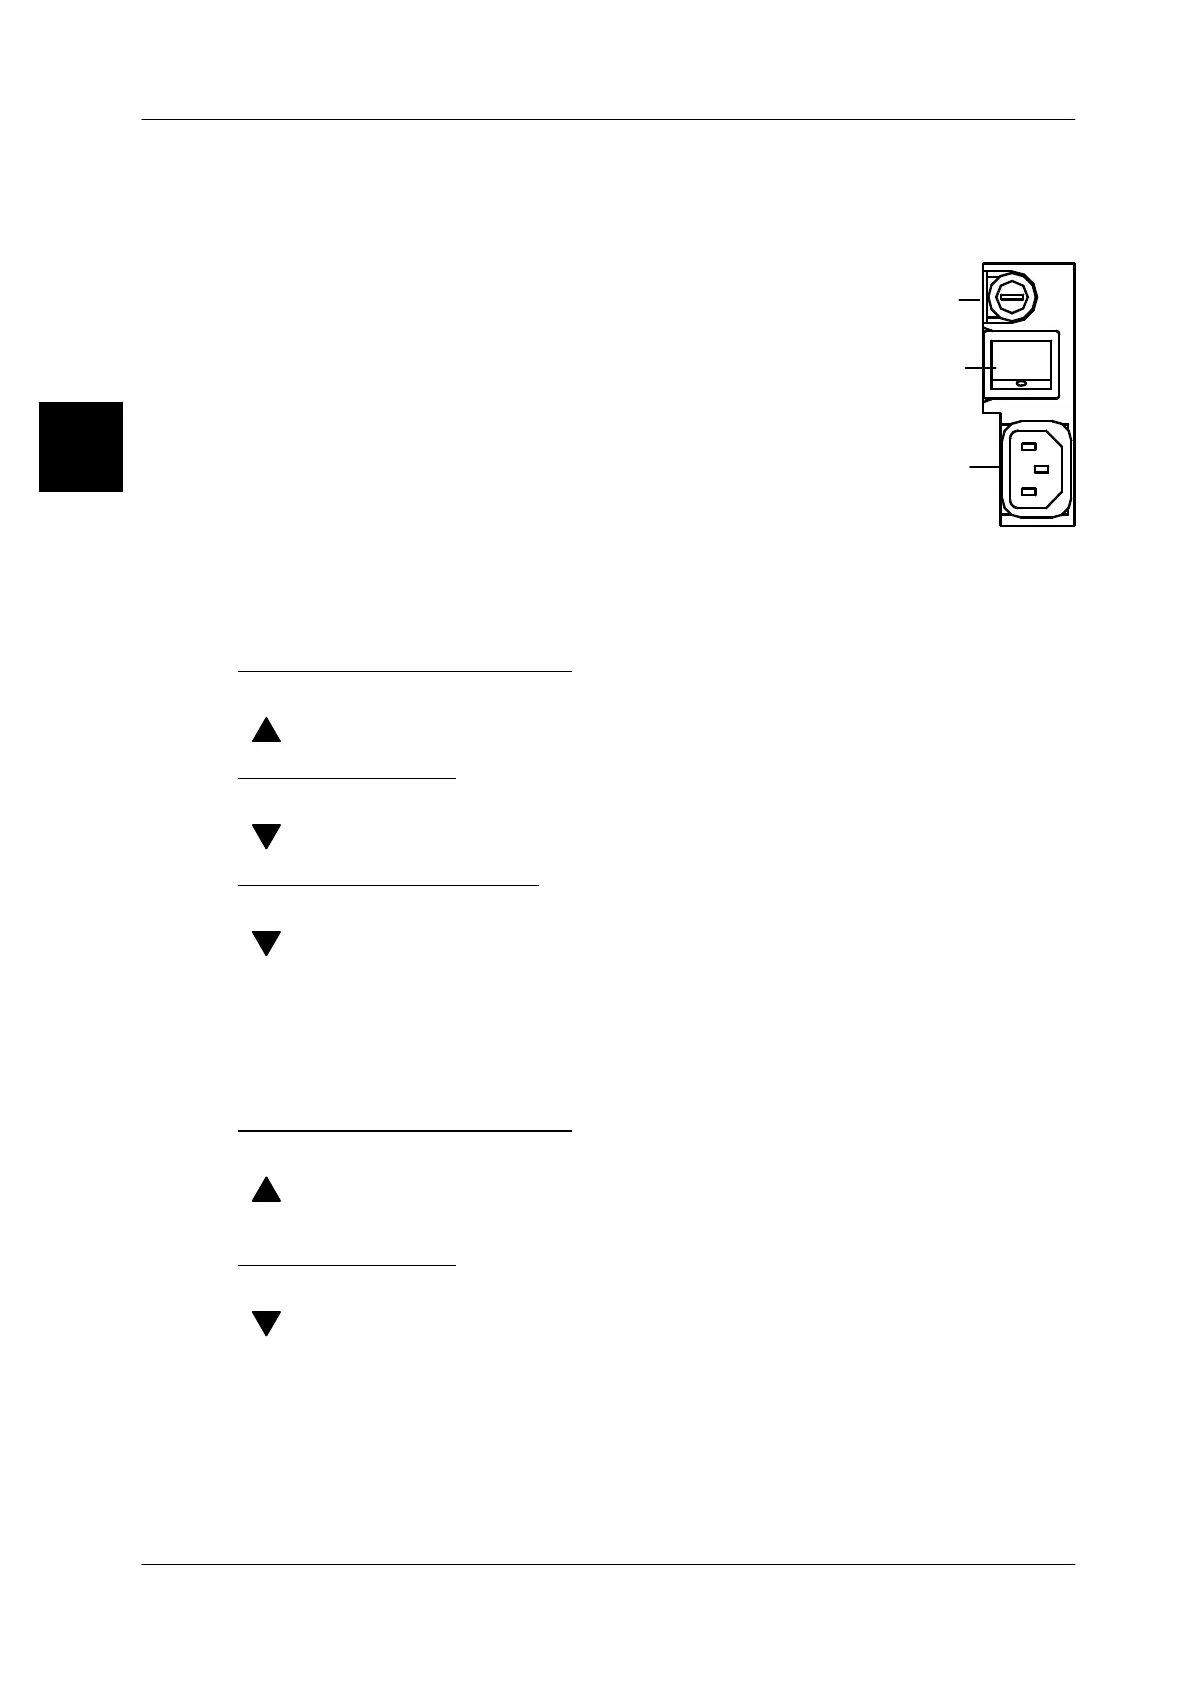
Mains fuse
Power switch
Power outlet
0
1
Installation and commissioning
Operating instructions GLP
1 -- 20
6.562.98.5.01.18
1.3.4 Commissioning
-- When using the GLP with a load receptor, it should be checked before it is
switched on whether or not packages are applied to the load receptor.
-- Switch on the labeler via the power switch loca-
ted on the back of the unit.
1 = ON, 0 = OFF
-- First a test pattern appears, followed by the op-
erator display.
-- Please refer to section 4.1 for the significance
and treatment of status messages appearing on
the display.
1.3.5 Setting display brightness for GT 240 display
If required, the display may be manually adjusted to the lighting conditions prevai-
ling at the installation site.
To make the display brighter:
[ALT] + [SECOND] --
Press both keys simultaneously and hold them depressed.
[ ] --
Press this key until the display has the brightness desired.
To dim the display:
[ALT] + [SECOND] --
Press both keys simultaneously and hold them depressed.
[ ] --
Press this key until the display has the brightness desired.
Saving the set brightness:
[SECOND] + [ALT] + [ESC
]
-- Press the keys successively and hold them depressed.
[ ] --
Select “Save settings” in the upcoming selection menu.
[SECOND] + [ALT] + [ESC] Press the keys successively and hold them depressed.
The set display brightness is saved.
1.3.6 Setting display brightness for GT 240 display
To make the display brighter:
[ALT] [SECOND] -- Press the touch buttons successively.
[ ] -- Hold touch button depressed until the display has the re--
quired brightness.
To dim the display:
[ALT] [SECOND] -- Press the touch buttons successively.
[ ] -- Hold touch button depressed until the display has the re--
quired brightness.
1.3.7 Displaying program version of device (for GT 240)
Via a shortcut the software version of your device may be displayed at any time.
[SHIFT] + [ALT] + [V] --Press the keys successively and hold them depressed.
1.3