Display and operation
Operating instructions GLP
1 -- 73
6.562.98.5.01.18
1.4.13.4
Programming keys for PLU call up
Activate programming by pressing SET key and then
press the article quick button to be programmed. The follo--
wing selection menu is then displayed:
Programming master key
Cancel
OK
(see page down)
(see page 1 -- 74)
(see page 1 -- 75)
Assign key with GxNet command
Assign key with PLU
Aborting function:
Cancel
Confirm with “Cancel” and exit function.
Assign key with PLU:
[ENTER] -- Confirm displayed function “Assign key with PLU”.
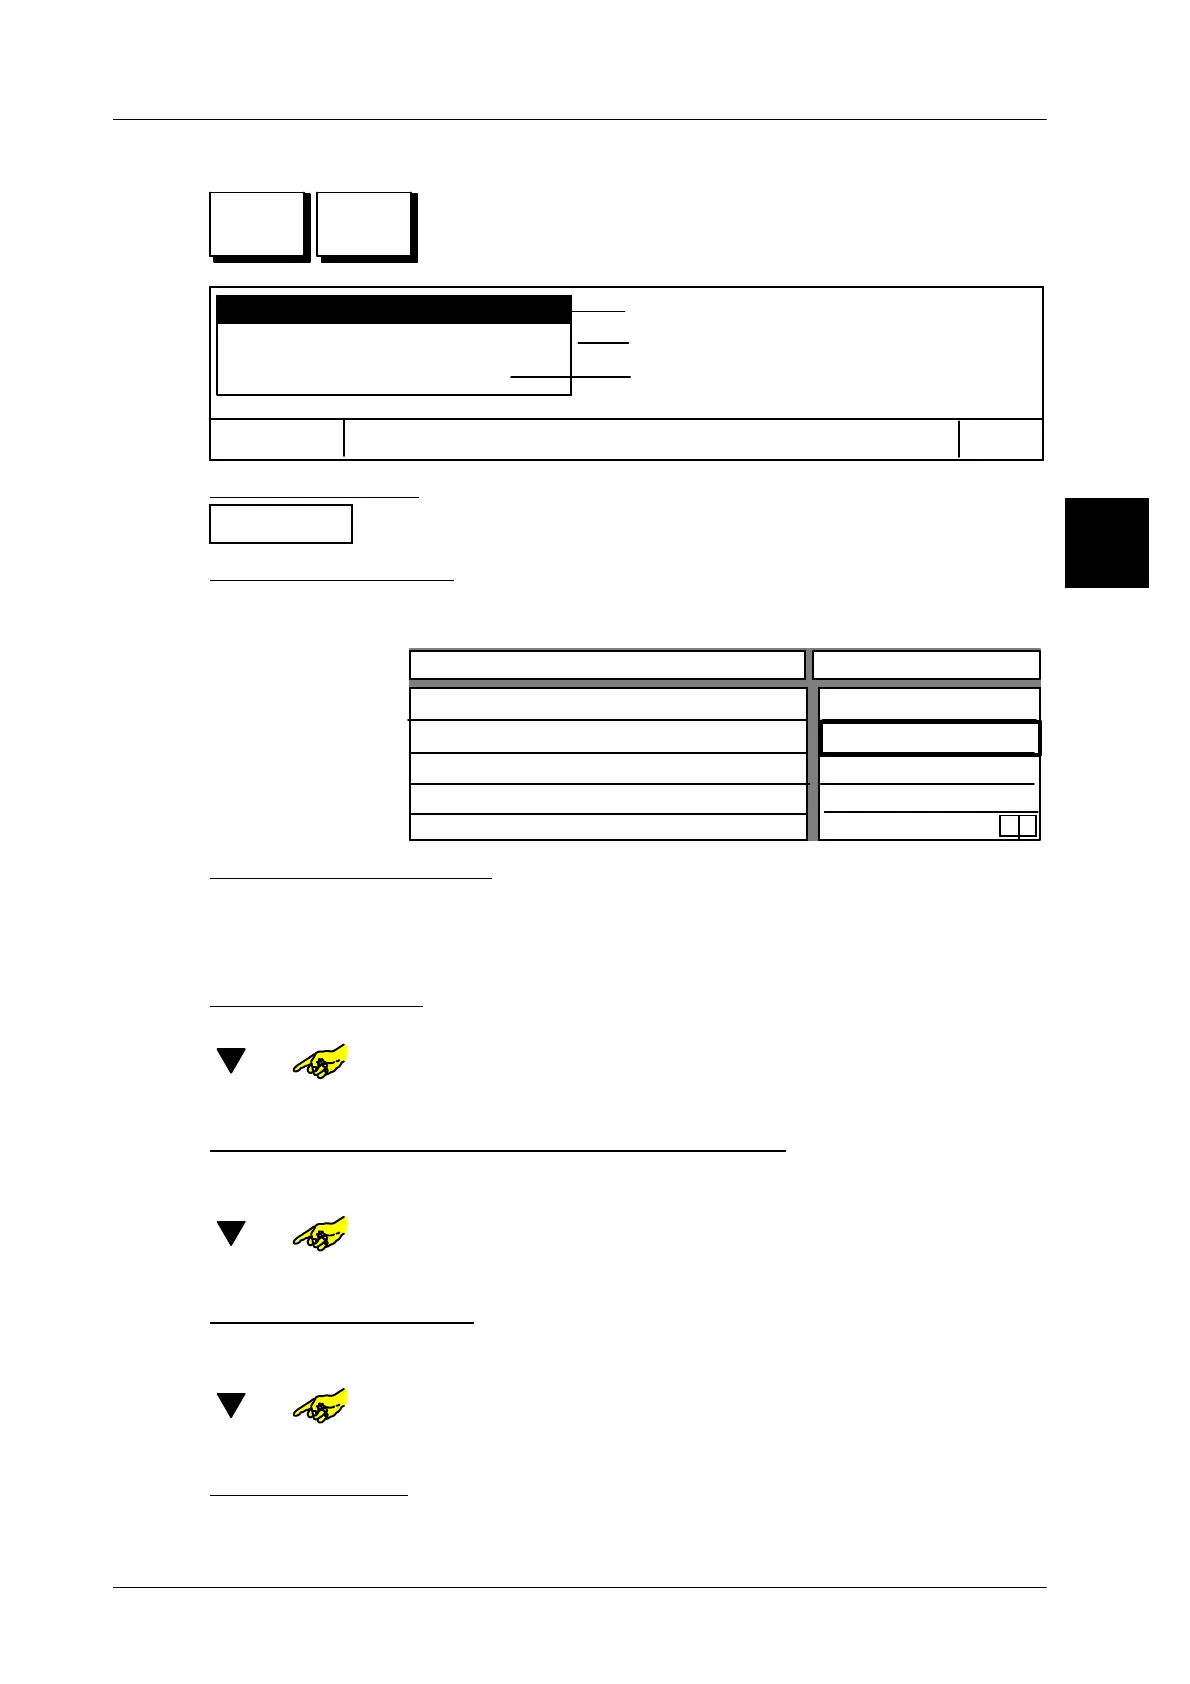
The following configurable input table is displayed:
Logo number
PLU No.
Customer No.
Key activated
0
0
0
yes
0
x
Configurable key
Value
Text key
Enter article text for key:
With the alphanumeric keyboard diplayed you can enter the text for the PLU key.
Layout options for text and logo are described on page 1 -- 71.
x x [ENTER] --
Enter the article text for the key concerned and confirm.
Enter logo number
If you enter the logo number the respective logo is displayed in the key.
[ ] or --Select ”Logo number” entry field.
x x [ENTER] -- Enter the logo number concerned and confirm.
Enter PLU and, if necessary, the customer number
The article in question must be assigned to each article key by entering a PLU
number and, if necessary, a customer number.
[ ] or -- Select the “PLU--No.” or “Customer--No.” entry field.
x x [ENTER] --
Enter the PLU or customer number in question and confirm.
Deactivate/activate key
If necessary, article key can be locked (deactivated) against being called or relea-
sed (activated). A locked key is displayed in gray.
[ ] or -- Call entry field for activate/deactivate key.
[TOGGLE] --
Switch the activated key appropriately to “no” or “yes”.
Store presettings
[ENTER] -- Store presetting as decsribed on page 1 -- 78
1.4
SET
 Loading...