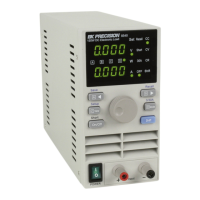
Setup List Parameters
Below is an example with step by step instructions on setting up a sequence
using list modes.
Step 1 – Select step number to
program
If not already, boot the instrument
into LIST mode by holding the
key while switching on the power
button. Press , then
to enter the LIST menu for
programming LIST parameters.
The display will look like the one
on the right.
If you want to program from the
first step, leave it shown on the
bottom display as 0. In this
example, we will start from 0. After
entering all parameters assigned
for the step, the menu system will
automatically go back to this setup
screen with step number
automatically incremented by 1.
You only need to adjust this if you
want to edit a programmed step
later on or if you want to program a
different step.
Press to go and configure
the next parameter.
View
C
Recall
CC
Short CV
OFF
Shift
30A
CR
A
B
C
D
Set
V
W
A
150W DC Electronic Load
8540
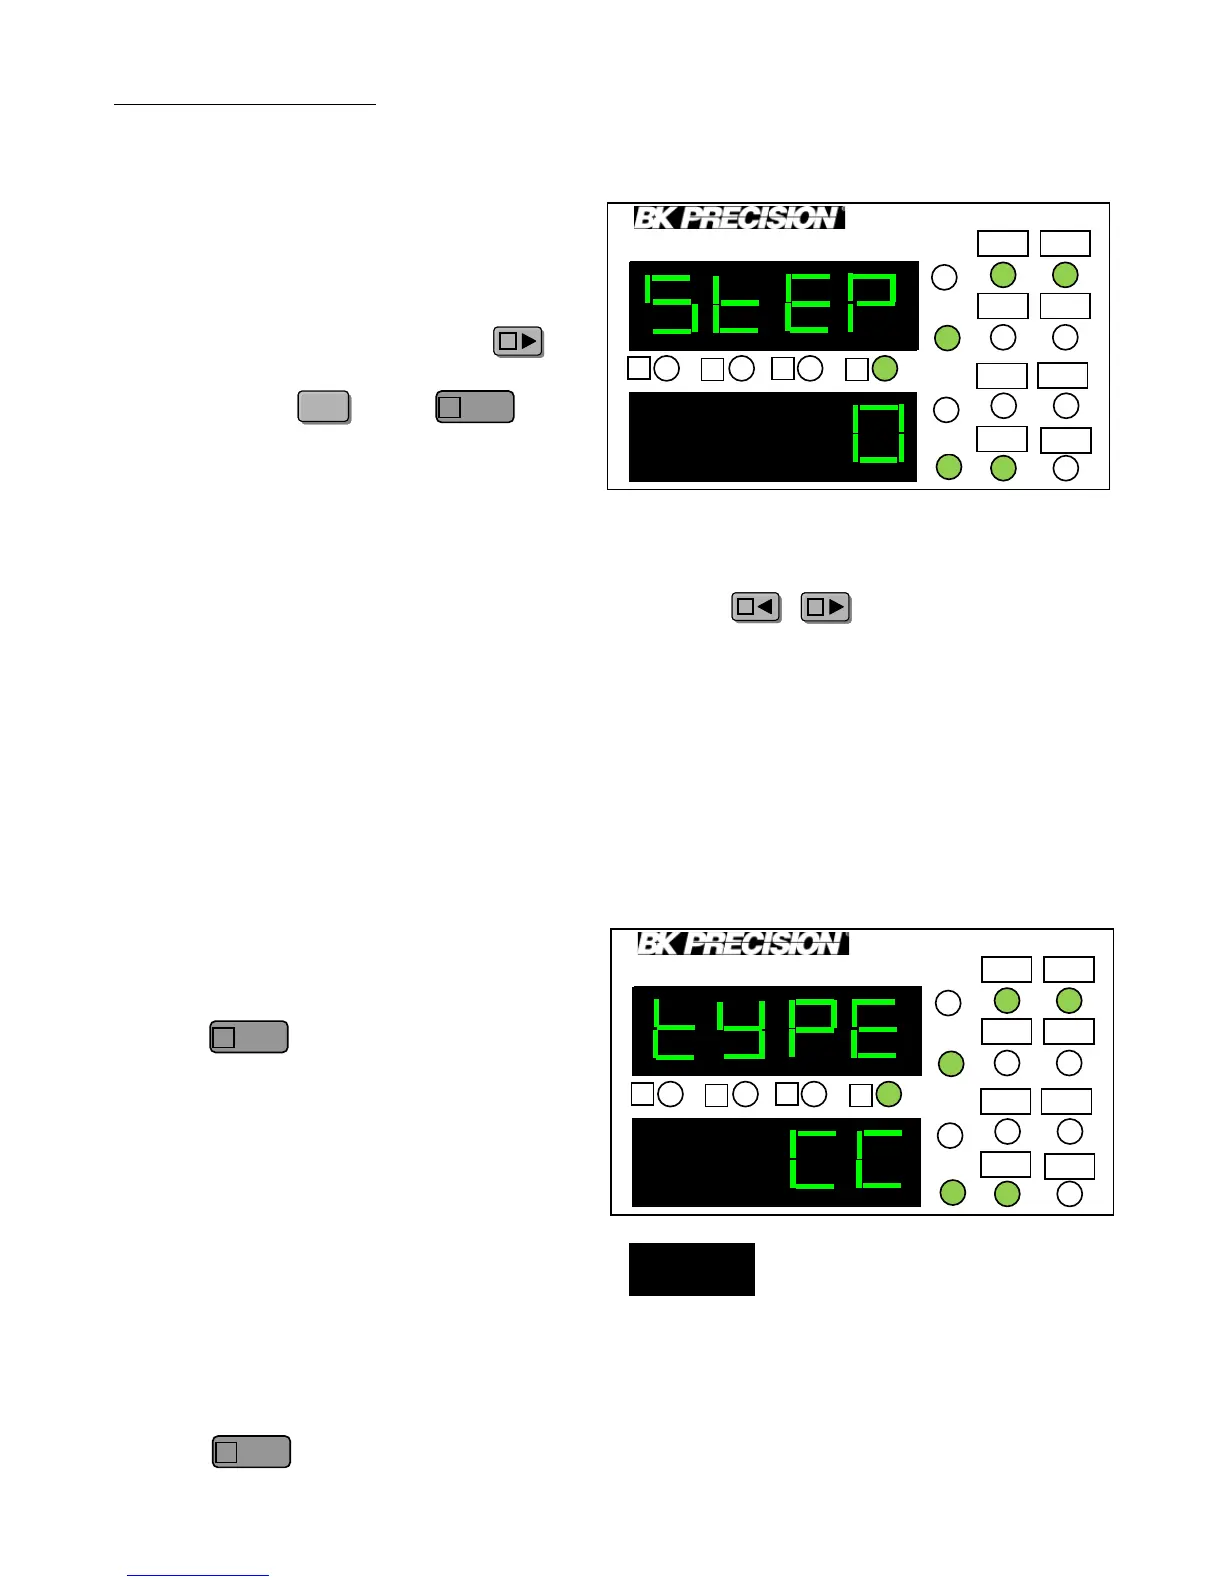
Step 2 – Select type
Bottom display will show the type
for step 0. Use the knob to select
between CC, CV, or CR type.
When running the list, this step will
set the load to the selected type of
operation. In this example, we will
select CC.
Press to go and configure
the next parameter.
Recall
CC
Short CV
OFF
Shift
30A
CR
A
B
C
D
Set
V
W
A
150W DC Electronic Load
8540
View
C
View
C
Programmable Range: 0 – 99
Use the keys to change
cursor position shown by the LED light
next to either A, B, C, or D (These four
denotes cursor position, with A selecting
the most significant figure and D the
least significant figure.
NOTE
Users can create a sequence with a
mixed combination of different types
in each step (i.e. One step can run in
CC while another step in CV)