12
ENGLISH
(Original instructions)
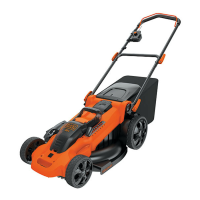
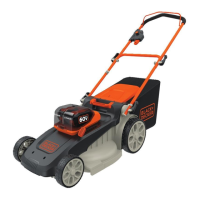
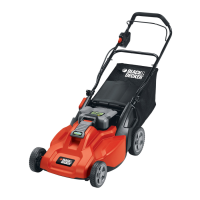
Assembling the grass collection box
(Fig. A - C)
The grass box requires assembly before use and comes in 3
pieces.
u Clip the 2 sides of the grass collection box (9) together
(g.A). Make sure that all clips and guides are aligned.
u Align the lid (17) onto the assembled grass collection box.
Ensure that the guides and clips are aligned.
Note: Take extra care when aligning the clips at the rear of the
grass collection box.
u Push down on the lid to secure all clips. Begin at the
front and work towards the back. Ensure that all clips are
securely located.
Fitting the lower handle (Fig. D & E)
u Remove the lower handle quick release clamps (11) from
the base of the mower.
u Place the lower handle (10) around the base, making
sure the three notches (18) on the lower handle (10) face
toward the top.
u Screw the lower handle quick release clamps (11) through
the lower handle into the mower base, With the lower
handle quick release clamps screwed in half way, close
the quick release clamps (g.E) and ensure the teeth of
the handle and base interlock. If the connection between
the handle and quick release clamps is too tight or loose,
adjust the depth of the quick release clamps and close
them again until the teeth are fully closed.
Fitting the upper handle (Fig. F & G)
u Fit the upper handle (6) to the lower handle (10) using the
upper handle quick release clamps (7) and clamp nuts
(19) as shown.
u Screw the upper handle quick release clamps (7) through
the lower handle into the clamp nuts (20), With the
upper handle quick release clamps screwed in half way,
close the quick release clamps (Fig. G).
If the connection between the handle and quick release
clamps is too tight or loose, adjust the depth of the quick
release clamps and close them again until the teeth are
fully closed.
Adjusting the height of the handle (Fig. H)
u Release the lower handle quick release clamp as shown.
u Lift or lower the handle into one of the 3 marked positions
next to the lower handle quick release clamps.
u Close the lower handle quick release clamps (11) and
ensure the teeth of the handle and base interlock.
If the connection between the handle and quick release
clamps is too tight or loose, adjust the depth of the quick
release clamps and close them again until the teeth are
fully closed.
Securing the motor cable
The motor cable has to be xed using the cable restraint.
u Secure the cable to the upper and lower handle by cliping
it into the cable restraint clips (5).
Fitting the grass collection box (Fig. I & J)
u Lift the clear grass ap (12) and place the grass collection
box (9) over the lugs (20).
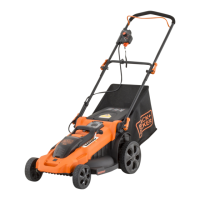
Wheel height adjustment (Fig. K & L)
Your mower features the BLACK+DECKER Easy ‑ height
adjustment system. This system will adjust all four wheels at
the
same time.
The mower has six blade height adjustment positions (30 mm
to 80 mm). Refer to the scale on the side of the mower. The
pointer will indicate the height setting for cutting your lawn.
This setting can be a reference for the next time you want to
cut your lawn to the same height.
u Release the bail bar (2) to turn the lawnmower off, wait
until the blade stops and remove the safety key (1).
u To raise or lower the cutting height, place the palm of your
hand on the palm rest (21) and pull the height adjustment
lever (13) away from the mower body.
u Move the height adjust lever (13) into the required position
then push it back in towards the mower body.
Note: Make sure that the mower is securely locked in one of
the six positions.
Removing and tting the battery (Fig. O)
Before removing the battery:
u Place the mower on level ground.
u Release the bail bar (2) to turn the mower off, wait for the
blade to stop and remove the safety key (1).
To remove the battery:
u Pull the battery cover release (15) towards the front of the
mower body and lift the battery cover (14).
u Lift the battery (22) out of the mower.
To t the battery
u Pull the battery cover release (15) towards the front of the
mower body and lift the battery cover (14).
u Slide the battery (22) into the mower. (the battery will only
t one way.)
Use
Warning! Let the appliance work at its own pace.
Do not overload.
Charging the battery (Fig. M)
The battery needs to be charged before rst use and

 Loading...